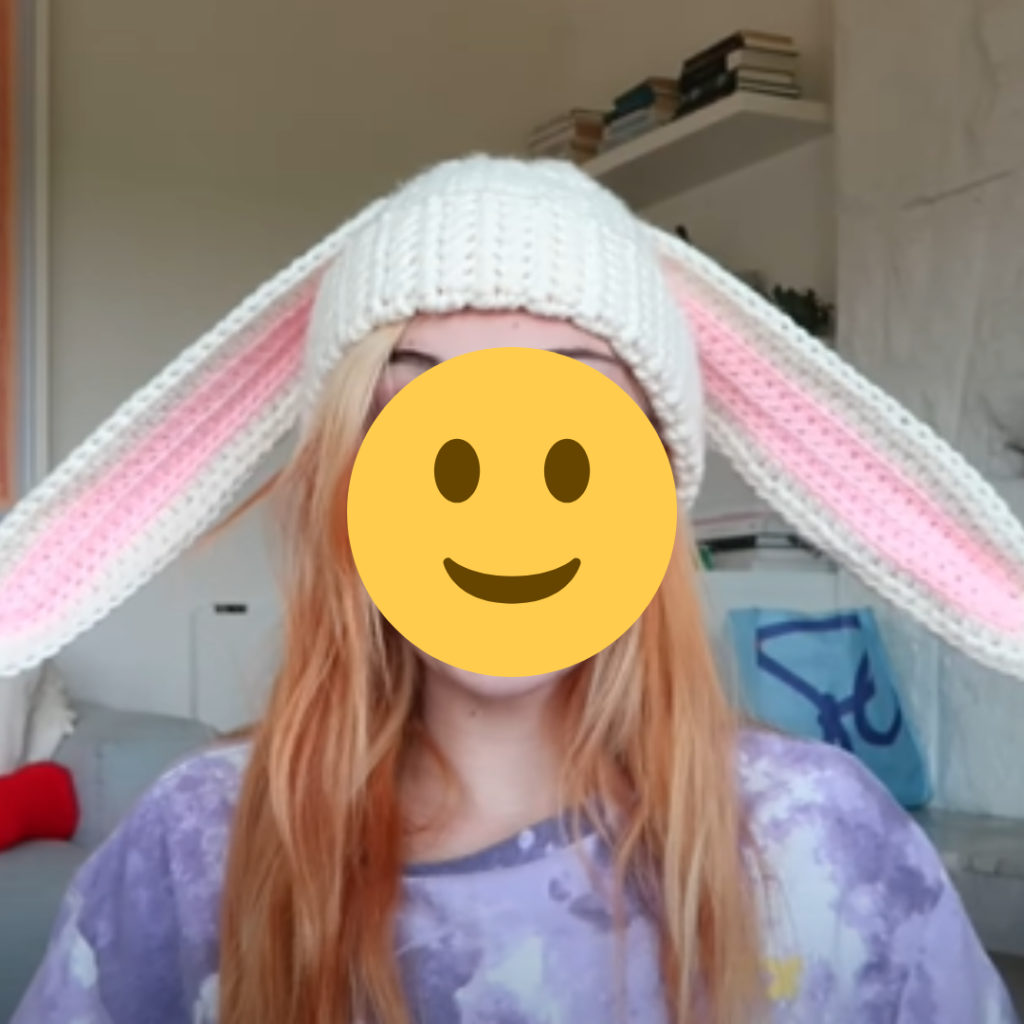
If you want to add a playful touch to your projects, learning how to crochet bunny ears is the perfect way to customize hats, headbands, or amigurumi.
Creating How to Crochet Bunny Ears is one of those small but surprisingly impactful projects that every crocheter ends up returning to time and time again. As an experienced crocheter, I’ve learned that even the simplest elements—like a pair of ears—can completely transform a piece. Whether they’re attached to a beanie, a bonnet, or an amigurumi, bunny ears instantly add charm, softness, and a playful personality. And the beauty of making them yourself is that you can shape, size, and style them exactly the way you envision.
When I start crocheting bunny ears, the first thing I think about is yarn. The choice here really affects the final look. For structured ears that stand upright, I usually reach for a medium-weight cotton yarn. It holds its shape beautifully and gives crisp stitch definition. If I’m aiming for softer, floppier ears—something more delicate and relaxed—I might choose an acrylic or blended yarn that drapes more naturally. Color is another important detail. Classic white, cream, or pastel shades give that traditional bunny look, while adding a contrasting inner ear in pink or beige brings depth and visual interest.
How to Crochet Bunny Ears – Step-by-Step Guide
Hook size plays a subtle but important role. I often go slightly smaller than the yarn label suggests when I want firmer ears that hold their shape. A tighter fabric provides structure, especially for upright designs. If I want the ears to bend or flop gently, I’ll stick to the recommended hook size or even go slightly larger. These small adjustments are something you learn to play with over time, and they make a noticeable difference in the final result.
The construction of bunny ears is usually straightforward, but it’s in the details where the magic happens. Most designs start with a chain or a small foundation and are worked in rows, building the length of the ear. As I crochet, I pay close attention to the edges, making sure they stay smooth and even. Clean edges are especially important here because the ears are such a visible feature. Even tension is key, and I find a steady rhythm helps keep everything consistent.
Mastering how to crochet bunny ears is easier than you think! With just a few stitches, you can create adorable ears for Easter decorations or cute accessories.
Now that you’ve learned how to crochet bunny ears, you can customize them in different sizes and colors. Have fun making these charming additions to your projects!
How to Crochet Bunny Ears – Free Pattern
Shaping is what really defines the look of the ears. Gentle increases and decreases create that soft taper, giving the ear a natural, elongated form. I always take my time with this part, making sure the transitions are smooth. A well-shaped ear should feel balanced—not too wide at the base, not too narrow at the tip. Sometimes I’ll hold the piece up and look at it from different angles as I work, adjusting slightly if needed. It’s a small step, but it helps ensure the final shape feels just right.
The inner ear detail is one of my favorite elements to add. This can be done by crocheting a separate piece in a contrasting color and attaching it, or by incorporating color changes directly into the work. I personally enjoy making a separate inner ear, as it gives more control over placement and texture. It also adds a subtle layering effect that makes the ears look more dimensional and refined.
Once both ears are complete, symmetry becomes the focus. Even though they’re handmade, I always aim to make them as similar as possible in size and shape. I often lay them side by side, checking for any differences and making small adjustments if needed. This step might seem minor, but it makes a big difference in the overall appearance, especially when the ears are attached to a finished piece.
Attaching the ears is where everything comes together. Whether I’m sewing them onto a hat or an amigurumi, I take my time with placement. Positioning affects not only how the piece looks but also the personality it conveys. Ears placed closer together can create a more playful, whimsical feel, while slightly wider placement gives a softer, more relaxed look. I usually pin them in place first, step back, and take a look before securing them permanently.
For upright ears, sometimes a bit of extra structure is needed. This can be achieved by crocheting the ears with tighter stitches, adding a second layer, or even lightly shaping them with your hands after finishing. For floppier ears, I let the yarn do the work, allowing it to fall naturally into a gentle curve. Both styles have their own charm, and choosing between them depends on the overall design you’re aiming for.
Materials:
- Worsted weight yarn (white, pink, or any color)
- 4 mm crochet hook
- Tapestry needle
- Scissors
Abbreviations (US Terms):
- CH – Chain
- SC – Single Crochet
- HDC – Half Double Crochet
- DC – Double Crochet
- SL ST – Slip Stitch
- INC – Increase (2 SC in the same stitch)
- DEC – Decrease (SC2TOG)
- FO – Fasten Off
Pattern:
Outer Ear (Make 2)
- CH 6. SC in 2nd CH from hook and across. (5 SC)
- CH 1, turn. SC across for 10 rows.
- Start shaping: HDC in the first stitch, DC in the next 3, HDC in the last stitch. CH 1, turn.
- Repeat the shaping row for 4 more rows.
- Begin decreasing: HDC2TOG, DC in the next 3, HDC2TOG. CH 1, turn.
- Continue decreasing until 1 stitch remains. FO.
Inner Ear (Make 2, Optional)
- Follow the same steps as the outer ear but use a smaller hook for a snug fit.
- Sew or crochet the inner ear onto the outer ear.
Assembly:
- Attach the ears to a beanie, headband, or stuffed animal using a tapestry needle.
- Shape them to stand up or bend slightly for a cute effect.
In the end, creating How to Crochet Bunny Ears is a reminder that even the smallest details can have a big impact. It’s about taking a simple idea and bringing it to life with care and attention. And when you see those finished ears—soft, balanced, and full of charm—you’re reminded once again of the quiet joy that comes from creating something with your own hands.
Note: Here is a pattern suggestion for you to create your own pattern. The end result may vary.