If you’re a fan of adorable characters and crochet, learning how to crochet Monster BOO Amigurumi is a delightful project to take on. Inspired by the sweet character Boo from Monsters, Inc., this amigurumi version captures her charm in a cuddly and handmade form. Perfect for beginners or experienced crafters looking for something whimsical, this project is a great way to bring your favorite character to life through yarn.
Creating a Crochet Monster BOO amigurumi is one of those projects that instantly brings out the playful side of crochet, even after years of experience. It has that perfect balance of spooky and cute, the kind of piece that feels right at home in Halloween decor but still carries a softness that makes it approachable and fun. What I love most about this design is how expressive it can be. From the very first stitches, you can already imagine the personality taking shape, and that sense of anticipation makes the whole process even more enjoyable.
I usually begin with the body, working in continuous rounds to create a smooth and seamless base. For a BOO-style monster, I tend to keep the shape slightly rounded but not perfectly symmetrical, as that little bit of irregularity adds character. Even though the design is whimsical, I still focus on maintaining consistent tension, using a smaller hook to keep the stitches tight and even. This ensures the structure is sturdy and gives the finished piece a clean, polished look. As I work through the increases and decreases, I let the shape develop naturally, adjusting slightly if I feel the proportions need a bit more balance.
Choosing yarn for this project is always one of my favorite parts. This is where you can really play with color and mood. Classic Halloween shades like bright orange, deep purple, or ghostly white work beautifully, but I also enjoy experimenting with unexpected combinations, like pastel tones or even a soft gray for a more subtle look. The key is to use yarn with good stitch definition so the details stand out clearly. I usually reach for cotton or a smooth acrylic blend, as both provide the structure needed for amigurumi while still feeling soft to the touch.
How to Crochet Monster BOO Amigurumi with Step-by-Step Instructions
This guide on how to crochet Monster BOO Amigurumi walks you through each step to recreate Boo in her monster costume. With simple shapes and fun details, you’ll enjoy every stitch of this charming figure.
Now that you’ve learned how to crochet Monster BOO Amigurumi, you have a one-of-a-kind plushie that’s both nostalgic and irresistibly cute. Add her to your collection or gift it to a Monsters, Inc. fan!
Stuffing is something I never rush, even in a playful project like this. The way you fill the body has a big impact on the final result. I add the stuffing gradually, shaping the piece gently with my hands to achieve that slightly plump, soft form. It should feel firm enough to hold its shape but still have that squishy quality that makes amigurumi so appealing. Taking the time to do this properly ensures the monster looks balanced and feels well made.
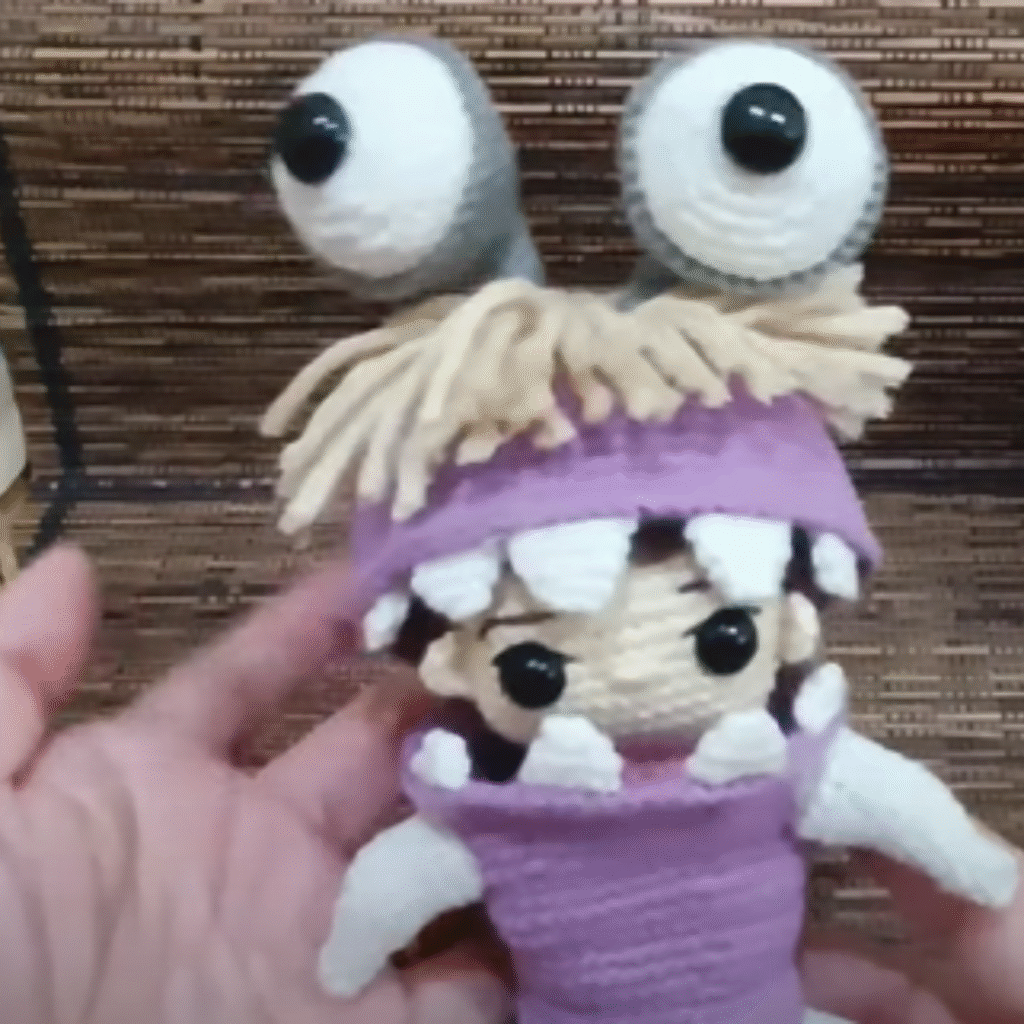
The real personality of the BOO monster starts to come through when I add the facial features. This is where creativity really takes over. The eyes can be large and round for a surprised look, or slightly uneven for something more mischievous. I often use safety eyes for convenience, but I also enjoy embroidering them when I want more control over the expression. Placement is everything here, and I always test different positions before attaching them permanently. Even a small shift can completely change the character.
The mouth is another key feature, especially for a BOO-themed design. I like to keep it simple but expressive, sometimes stitching a wide “boo” expression or adding small details like teeth or a tongue. These elements don’t need to be overly complex; in fact, simplicity often works best. It allows the overall shape and color of the monster to remain the focus while still giving it a clear personality.
Crochet Monster BOO Amigurumi Pattern
Assembling the piece is a process I approach with patience. Even though the design is playful, I still want the construction to be solid and durable. I make sure all parts are securely attached and that the seams are neat. I also take the time to weave in all ends carefully, ensuring nothing comes loose over time. This attention to detail is what gives the finished piece a professional feel, even when the design itself is whimsical.
Once everything is assembled, I like to step back and look at the monster as a whole. This is where I make any final adjustments, whether it’s reshaping the stuffing slightly or repositioning a detail. Sometimes I’ll add a small finishing touch, like a bit of embroidery or a subtle accent, to bring everything together. If I’ve used cotton yarn, I might lightly steam the piece from a distance to help the fibers settle and give it a smoother appearance.
Materials:
- Worsted weight yarn (light pink, purple, skin tone, white, black)
- 2.5 mm crochet hook
- 6 mm safety eyes
- Embroidery thread (black, pink)
- Stuffing
- Yarn needle and stitch marker
Abbreviations (US Terms):
- MR: Magic Ring
- SC: Single Crochet
- INC: Increase
- DEC: Decrease
- SL ST: Slip Stitch
- CH: Chain
- FO: Fasten Off
Head (Skin Color):
- MR, 6 SC
- INC around (12)
- (SC, INC) x6 (18)
- (2 SC, INC) x6 (24)
- (3 SC, INC) x6 (30)
6–10. SC around (30) - (3 SC, DEC) x6 (24)
- (2 SC, DEC) x6 (18)
- (SC, DEC) x6 (12)
- DEC around, FO and stuff (6)
Body (Pink or Purple):
- MR, 6 SC
- INC around (12)
- (SC, INC) x6 (18)
- (2 SC, INC) x6 (24)
5–9. SC around (24) - (2 SC, DEC) x6 (18)
- SC around
Stuff and FO.
Arms (Make 2 – Pink or Purple):
- MR, 6 SC
2–5. SC around
Stuff lightly, FO, sew to sides
Legs (Make 2 – Pink or Purple):
- MR, 6 SC
- INC x6 (12)
3–5. SC around
Stuff and sew to bottom of body
Eyes and Face:
- Attach safety eyes between rounds 6 and 7 on the head
- Embroider eyelashes and mouth with black thread
- Use pink for blush and lip embroidery
Monster Hood (Pink or Purple):
- MR, 6 SC
- INC around (12)
- (SC, INC) x6 (18)
- Continue increasing to fit head (approx. 30–36 SC)
5–9. SC around
FO and attach around head
Ears (Make 2 – Pink with white center):
- CH 4, SC across, turn
- INC at ends, SC in middle
- Shape and attach to hood
What I love most about creating a Crochet Monster BOO amigurumi is the freedom it offers. It’s a project that encourages creativity and allows you to step away from strict patterns and perfect symmetry. Each piece ends up with its own personality, shaped by your choices and your instincts. After years of crocheting, that sense of creative freedom is something I truly value.
In the end, this little monster becomes more than just a decorative item. It carries a sense of fun and imagination, something that can bring a smile to anyone who sees it. Whether displayed as part of a Halloween setup, given as a gift, or simply kept as a personal project, it holds that unmistakable handmade charm. And for me, that’s what makes crochet so special, the ability to take something as simple as yarn and turn it into a character full of life and personality, one stitch at a time.
Note: Here is a pattern suggestion for you to create your own pattern. The end result may vary.