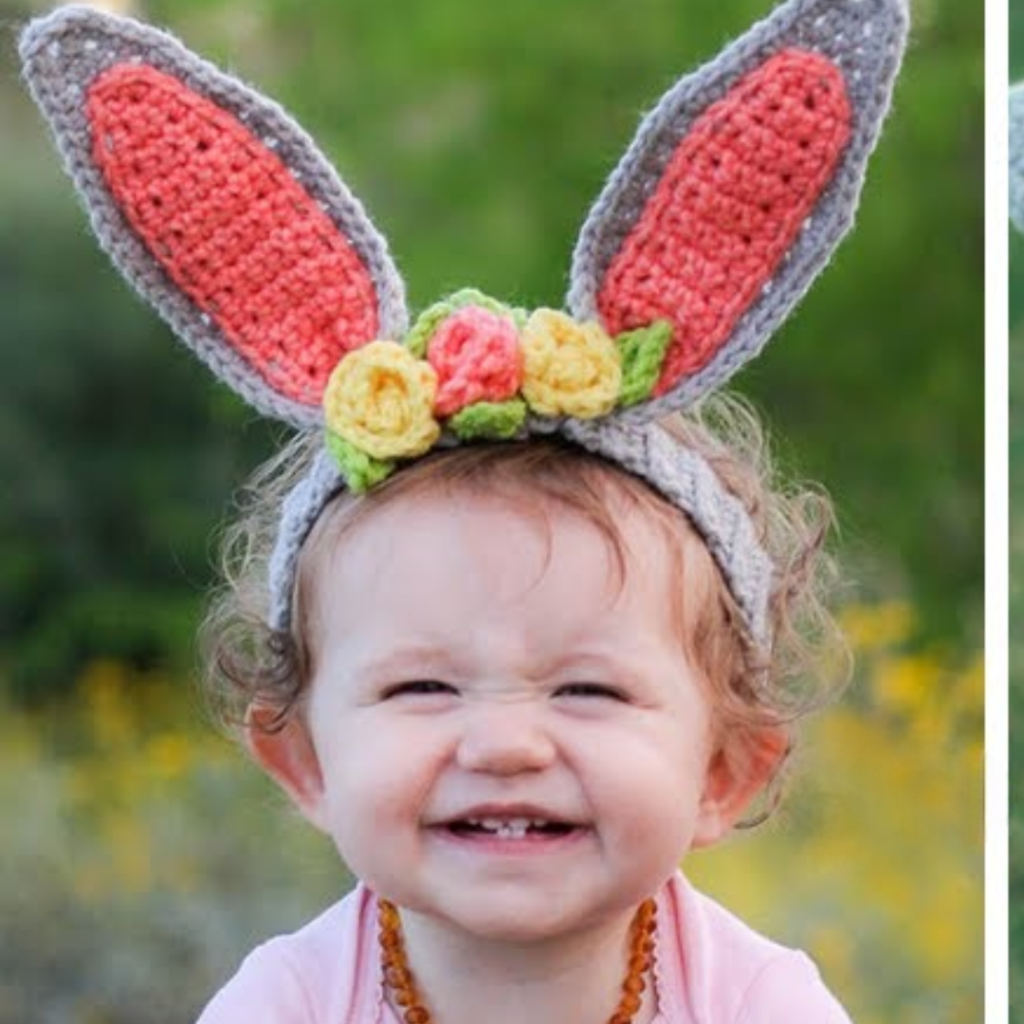
Adding a fun touch to your hat? This Bunny Headband with Flowers pattern is simple to follow and perfect for costumes, Easter, or everyday cuteness!
Creating a bunny headband with flowers is one of those projects that feels soft, whimsical, and full of gentle charm from the very first stitch. Even after years of crocheting, I still find myself drawn to pieces like this because they combine wearability with delicate detail in such a satisfying way. It’s not just an accessory, it’s something that carries a light, playful feeling, perfect for spring days, special occasions, or simply adding a touch of sweetness to an everyday look.
I usually begin with the headband itself, since it forms the foundation for everything else. Getting the fit right is essential, so I like to measure carefully or work with a flexible pattern that allows for adjustment. I often use a slightly stretchy stitch pattern or choose a yarn that has a bit of give, so the headband sits comfortably without feeling too tight. At the same time, I keep my tension even and controlled, because a clean, structured base makes all the decorative elements stand out beautifully.
How to Make Bunny Headband with Flowers
These Bunny Headband with Flowers are a quick and adorable way to customize your hat. With just a few stitches, you can create soft, floppy ears for a charming look.
This Bunny Headband with Flowers tutorial is perfect for all skill levels. Customize the size and color to match your beanie and enjoy a playful accessory!
When it comes to yarn choice, I tend to lean toward soft, lightweight fibers, especially if the headband is meant to be worn for longer periods. Cotton is always a reliable option because it holds its shape well and feels gentle against the skin, but soft acrylic blends can also work nicely if you want a bit more flexibility. Color selection is where the personality really begins to show. Neutral tones like cream, soft beige, or pale pink create a delicate base, while the flowers can bring in subtle pops of color that feel fresh and natural.
Bunny Headband with Flowers – Free Pattern
Once the headband is complete, I move on to the bunny ears, which are truly the heart of the design. I usually crochet them separately, working them in rows or rounds depending on the style I want to achieve. The shape needs to be soft yet defined, with a gentle curve that mimics the natural look of bunny ears. Sometimes I add a contrasting inner ear detail using a lighter or slightly brighter shade, which adds depth without making the piece feel too busy.
Shaping the ears is something I take my time with. I often use a combination of stitch techniques to create that slight taper toward the top, and I may lightly reinforce the base so they stand up nicely when attached. Placement is key here, so I always pin them onto the headband first, adjusting until they feel balanced and symmetrical. Even a small shift can change the overall look, so I like to step back and view the piece from different angles before securing them permanently.
The flowers are where this project becomes truly special. Each one is usually small and delicate, but together they create a beautiful, layered effect. I like to crochet them individually, experimenting with different stitch combinations to achieve a soft, petal-like texture. Sometimes I keep them simple with just a few rounds, while other times I add extra layers for a fuller look. The key is to maintain consistency in size so they sit nicely together without overwhelming the headband.
Color choice for the flowers is always a joy. I often draw inspiration from nature, choosing soft pastels like blush pink, lavender, and pale yellow, or even slightly more vibrant tones if I want a brighter look. Mixing a few shades can add depth and dimension, making the arrangement feel more organic. I also like to include small details like tiny centers in contrasting colors, which give each flower a finished, polished appearance.
Materials:
- Worsted weight yarn (any color)
- 4 mm crochet hook
- Tapestry needle
- Scissors
Abbreviations (US Terms):
- CH – Chain
- SC – Single Crochet
- HDC – Half Double Crochet
- DC – Double Crochet
- SL ST – Slip Stitch
- FO – Fasten Off
Pattern:
Ear (Make 2)
- CH 6. SC in 2nd CH from hook and across. (5 SC)
- CH 1, turn. SC across. Repeat for 12 rows.
- Continue increasing: HDC in first stitch, DC in next 3, HDC in last stitch. CH 1, turn.
- Repeat row 3 for 5 more rows.
- Begin decreasing: HDC2TOG, DC in next 3, HDC2TOG. CH 1, turn.
- Continue decreasing until 1 stitch remains. FO.
Inner Ear (Optional, Make 2 in Contrasting Color)
- Follow the same steps as the outer ear, but use a smaller hook for a snug fit.
- Sew or crochet the inner ear onto the outer ear.
Attaching to Beanie:
- Position the ears on the beanie and sew them securely in place using a tapestry needle.
- Adjust the ear shape to make them stand up or flop down as desired.
What I love most about a bunny headband with flowers is how it combines softness and detail in such a natural way. It’s a project that feels both relaxing and rewarding, allowing you to focus on small, thoughtful elements that come together into something truly charming. It’s also incredibly versatile, suitable for children, special occasions, or anyone who enjoys a touch of handmade whimsy.
In the end, this piece becomes more than just an accessory. It carries a sense of care and creativity, something that reflects the time and attention put into every stitch. Whether it’s worn for a celebration or simply to brighten a day, it has that unmistakable handmade warmth that makes it feel special. And honestly, there’s something truly lovely about seeing a finished piece like this, soft, delicate, and full of life, knowing it was created slowly and thoughtfully, one stitch at a time.
Note: Here is a pattern suggestion for you to create your own pattern. The end result may vary.