Crochet mini fruit keychains are the perfect combination of cute and functional! Whether it’s a watermelon slice or any tiny fruit-inspired design, these keychains are great for adding a pop of color to your keys, bag, or as a small gift. With just a few materials, you can create these adorable accessories that are quick, easy, and satisfying to make.
Creating crochet mini fruit keychains is one of those delightful projects that never gets old, no matter how many you make. Even after years of crocheting, I still feel a spark of excitement when I start a new one, because each tiny fruit has its own personality, its own color story, and its own little charm. It’s the kind of project that feels light and playful, yet still allows you to practice precision and attention to detail in a very satisfying way.
I start with a magic ring and build outward with small, controlled increases, always keeping my stitches tight and even. For pieces this small, I always use a smaller hook than recommended. This helps create a dense fabric that holds its shape and keeps the stuffing neatly inside, which is especially important for keychains that will be handled often.
How to Make Crochet Mini Fruit Keychains
These crochet mini fruit keychains are an excellent project for beginners or anyone who loves quick and fun crafts. With vibrant colors and simple shapes, they are ideal for experimenting with different fruits like watermelon, strawberries, or citrus slices. Let’s dive into the step-by-step tutorial! Crochet mini fruit keychains are a delightful way to express your creativity. Customize them with your favorite colors and fruit designs for a unique look. They make thoughtful gifts or cute additions to your everyday essentials. Enjoy crocheting these little treasures!
The shaping is simple but requires care. A strawberry, for example, needs that gentle taper toward the top, while an apple has a more rounded, slightly indented form. These differences come from small adjustments in increases and decreases, and over time, you develop an instinct for how to achieve each shape. It’s one of those subtle skills that grows with experience, and it’s incredibly satisfying to see how a few stitches can completely change the character of a piece.
Detailed Recipe: Crochet Mini Fruit Keychains
Choosing the yarn is one of my favorite parts of making mini fruit keychains. This is where creativity really shines. Bright, vibrant colors bring these little fruits to life, rich reds for strawberries, sunny yellows for lemons, fresh greens for apples or limes. I usually reach for cotton yarn because it provides excellent stitch definition and durability, but a soft acrylic can also work if you prefer a slightly softer feel. Since these are small projects, they’re perfect for using leftover yarn, and I often find myself mixing and matching colors from my stash.
As the fruit takes shape, I begin adding the stuffing. This step may seem simple, but it makes a big difference in the final look. I always add small amounts at a time, gently shaping the piece with my fingers to keep it smooth and evenly filled. The goal is to create a firm but slightly soft texture, something that holds its form without feeling rigid. With such small items, it’s important not to overstuff, as it can distort the shape.
Details are what truly bring these mini fruits to life, and this is where I slow down and enjoy the process even more. For strawberries, I often embroider tiny seeds using a contrasting color, placing them carefully so they look balanced and natural. For apples, I might add a small embroidered indentation at the top, along with a tiny crocheted or stitched stem. These small touches may take a bit of time, but they add so much character and make each piece feel complete.
Leaves are another detail I love to include. A simple crocheted leaf, made with a few chains and stitches, can transform the entire look of the fruit. I usually attach it near the top, along with the stem, making sure everything is secure. Even though these pieces are small, durability is important, especially for something that will be used as a keychain.
Materials:
- Yarn: Worsted-weight yarn in pink, white, green, and black.
- Hook: 3.5mm crochet hook.
- Keychain rings with a loop.
- Fiberfill stuffing.
- Yarn needle and scissors.
Abbreviations (US terms):
- MR: Magic ring
- SC: Single crochet
- INC: Increase (2 SC in one stitch)
- DEC: Decrease (SC 2 stitches together)
- CH: Chain
- SL ST: Slip stitch
- FO: Fasten off
Instructions:
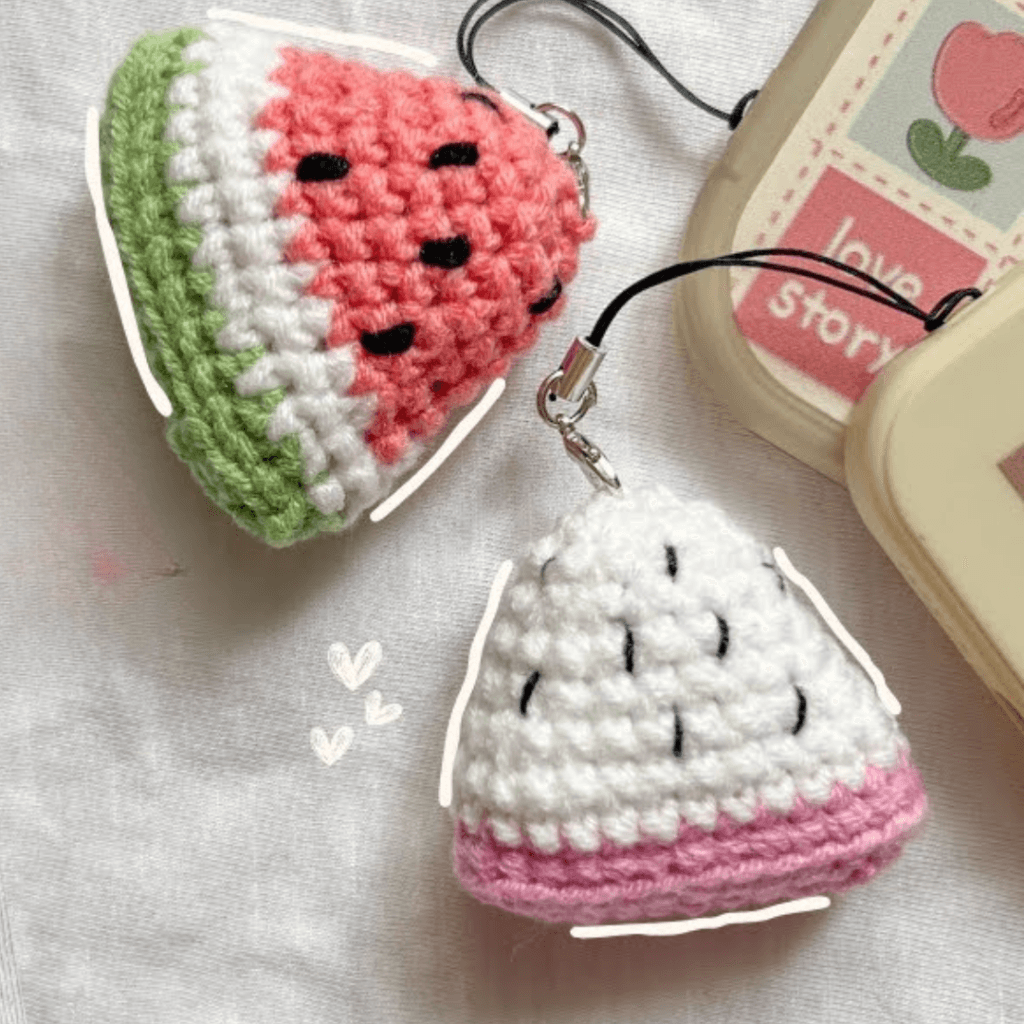
Watermelon Slice Base:
- With pink yarn, MR, 6 SC into the ring. (6)
- INC in each stitch around. (12)
- (SC, INC) repeat around. (18)
- (2 SC, INC) repeat around. (24)
- Switch to white yarn and SC in each stitch around. (24)
- Switch to green yarn and SC in each stitch for 1 round. FO and leave a long tail.
Assembly:
- Fold the circular piece in half to form a semi-circle.
- Use the yarn tail to sew along the straight edge, leaving a small opening for stuffing.
- Add fiberfill stuffing and close the opening.
Seeds:
- Use black yarn to embroider small seeds randomly on the pink portion of the watermelon slice.
Attach the Keychain Ring:
- Insert the keychain loop at the top of the watermelon.
- Secure tightly with the yarn tail or a metal loop.
What I love most about these mini fruit keychains is how versatile they are. You can make them individually or as a set, mix different fruits together, or even create themed collections. They’re perfect as small gifts, additions to bags, or even decorative accents. Each one feels unique, shaped not only by the pattern but by your color choices and small design decisions.
After years of crocheting, I’ve come to appreciate projects like this for their simplicity and creativity. They don’t require a large time commitment, but they still offer that same sense of satisfaction as bigger projects. They’re also a wonderful way to practice consistency and precision, because with such small pieces, every stitch matters.
Finishing is something I always take seriously, even with a quick project. I carefully weave in all ends, making sure nothing is visible or loose. I gently shape the fruit one last time, smoothing out the surface and adjusting the stuffing if needed. These final touches give the piece a polished, professional look that makes all the difference.
Note: Here is a pattern suggestion for you to create your own pattern. The end result may vary.