Create your own adorable mini cute bear amigurumi keychain with this beginner-friendly crochet tutorial. It’s perfect for gifts and accessories! There’s something about a crocheted bear that carries a sense of comfort and familiarity, and even as an experienced crocheter, I still find a quiet kind of joy in shaping one from scratch. It’s a project that allows you to focus on the fundamentals, clean stitches, balanced proportions, and thoughtful details, while still leaving plenty of room for personality.
Working in continuous rounds, I start with a magic ring and build outward with steady increases, keeping my stitches tight and even. I always use a smaller hook than the yarn recommends, especially for amigurumi, because it creates a firm fabric that holds its shape beautifully. As the rounds grow, I focus on maintaining a smooth curve, avoiding any uneven tension that might disrupt the shape.
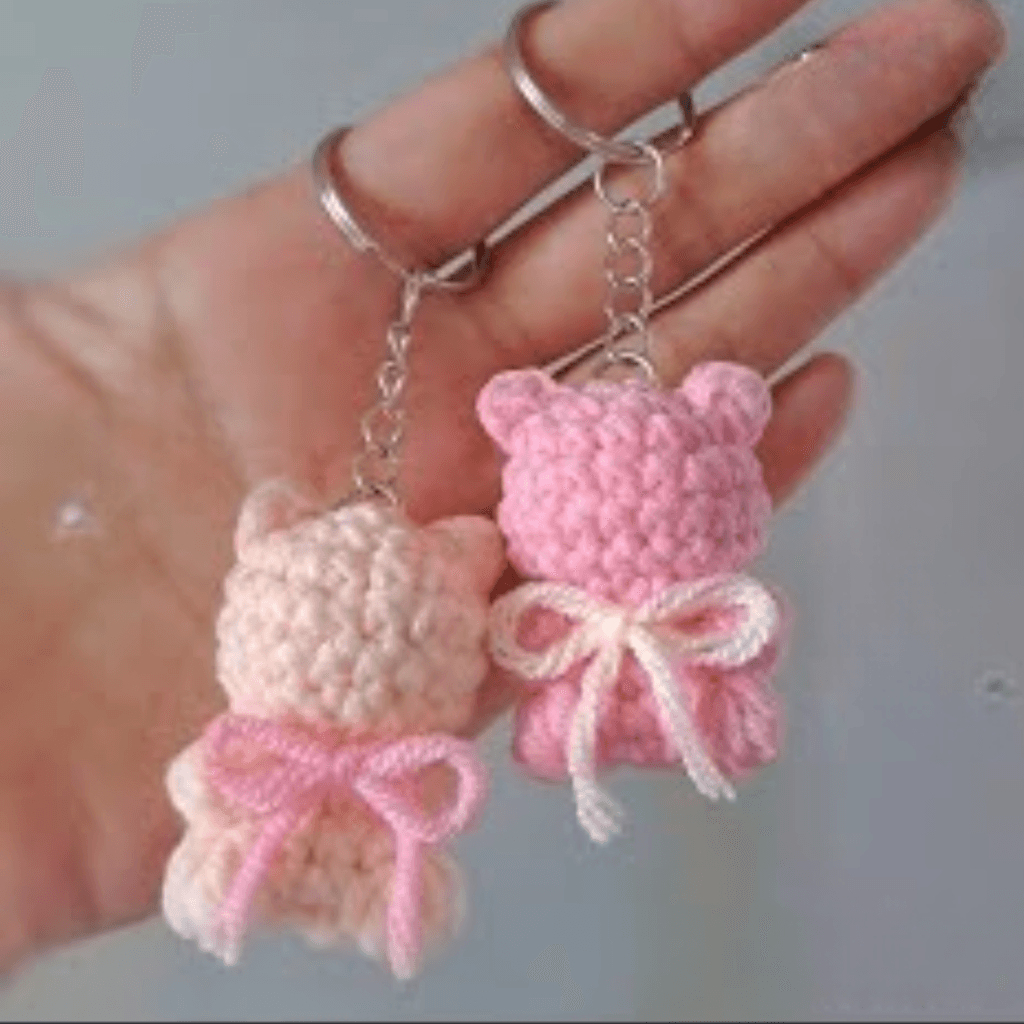
How to Crochet a Mini Cute Bear Amigurumi
Crocheting a mini cute bear is a fun and simple project that suits both beginners and advanced crafters. This mini bear, adorned with a cute bow, doubles as a charming keychain that makes the perfect handmade gift.
Now that you’ve crafted your mini cute bear amigurumi, you have a versatile and adorable keychain. Customize it with different colors and bows to make it unique. Happy crocheting!
The yarn choice plays a big role in the overall feel of the bear. Warm browns are the most traditional, but I also love working with creamy neutrals, soft grays, or even pastel shades for a more playful look. Cotton yarn gives a crisp, structured finish with clear stitch definition, while a softer acrylic can create a more plush and cuddly texture. Sometimes I even choose a slightly fuzzy yarn to mimic the look of fur, though that requires a bit more patience when working the stitches.
Detailed Recipe: Mini Cute Bear Amigurumi Keychain
As the head takes shape, I begin stuffing it gradually. This is a step I never rush, because it defines the final look. I add small amounts of fiberfill at a time, shaping it gently with my hands to keep everything smooth and evenly rounded. The head should feel firm but still soft, with no lumps or uneven areas. Once I’m satisfied with the shape, I close the opening neatly and set it aside for a moment.
The body is worked in a similar way, often starting from the bottom and building upward. I like to give the bear a slightly rounded belly, which adds to that soft, cuddly appearance. The shaping here is subtle, just enough increases and decreases to create a gentle curve. Again, I pay close attention to my tension, because consistency is what gives the piece its polished look. As I stuff the body, I aim for a balance between structure and softness, making sure it can hold its form while still feeling pleasant to the touch.
The ears are one of my favorite details. They’re small, simple, and full of character. I usually crochet them as tiny circles or half-spheres, keeping the stitches tight so they hold their shape. Placement is key, so I always pin them onto the head first, adjusting their position until they look just right. A slightly higher placement can make the bear look more playful, while a lower placement gives it a softer, more classic expression.
The arms and legs are worked separately, and while they’re simple in structure, they require careful attention to proportion. I like to keep them slightly rounded and softly shaped, so they complement the body without looking too rigid. Depending on the design, I might lightly stuff them or leave them a bit more flexible.
Attaching them securely is important, and I take my time to ensure they’re evenly positioned so the bear sits or stands comfortably.
The face is where the bear truly comes to life, and it’s a step I approach with patience and care. I often use safety eyes for a clean, classic look, placing them carefully to achieve that gentle, friendly expression. The snout is usually a small separate piece, slightly raised to give dimension to the face. I attach it neatly, then embroider the nose and mouth with a darker yarn, shaping them slowly until the expression feels just right.
Materials:
- Yarn: Pink and/or pastel-colored cotton yarn (lightweight).
- Hook: 2.5mm crochet hook.
- Stuffing: Polyester fiberfill.
- Safety eyes: 6mm.
- Keychain ring with chain.
- Yarn needle.
- Ribbon for the bow (optional).
Abbreviations (US terms):
- MR: Magic ring
- SC: Single crochet
- INC: Increase (2 SC in the same stitch)
- DEC: Decrease (single crochet two stitches together)
- FO: Fasten off
Instructions:
Head and Body
- Start with the head:
- Round 1: MR, 6 SC. (6)
- Round 2: INC in each stitch. (12)
- Round 3: (SC, INC) around. (18)
- Round 4-6: SC around. (18)
- Round 7: (SC, DEC) around. (12)
- Round 8: DEC around. (6) Stuff the head. FO.
- Create the body:
- Round 1: MR, 6 SC. (6)
- Round 2: INC in each stitch. (12)
- Round 3-5: SC around. (12)
- Round 6: DEC around. (6) Stuff the body. FO.
Arms (Make 2)
- Round 1: MR, 5 SC. (5)
- Round 2-4: SC around. FO.
Legs (Make 2)
- Round 1: MR, 6 SC. (6)
- Round 2-3: SC around. FO.
Ears (Make 2)
- Round 1: MR, 6 SC. (6)
- FO, leaving a tail for sewing.
Assembly
- Attach the head to the body.
- Sew on the arms and legs.
- Position and sew the ears onto the head.
- Add safety eyes and embroider the nose and mouth.
- Tie a small ribbon around the neck.
- Attach the keychain ring to the top of the head.
After years of crocheting, I’ve come to appreciate projects like this for their simplicity and depth at the same time. A bear amigurumi doesn’t require complex techniques, but it does ask for attention, patience, and a sense of balance. It’s a reminder that even the most familiar designs can still feel special when made with care.
In the end, holding a finished bear amigurumi in your hands is always a comforting moment. It’s soft, warm, and full of personality, a small creation that carries time and intention in every stitch. And honestly, there’s something truly special about seeing that gentle little face looking back at you, knowing it came together slowly, one stitch at a time, into something that feels both simple and full of life.