Crochet Bear and Hello Kitty Glasses Holder. Looking to keep your glasses safe while adding a dose of cuteness to your space? The Crochet Bear and Hello Kitty Glasses Holder is a fun and functional project that combines practicality with charm. Whether you’re a fan of classic teddy bears or the beloved Hello Kitty character, this crochet tutorial will help you craft adorable holders that keep your glasses organized and within reach.
Creating a crochet glasses holder inspired by a sweet bear and that unmistakable Hello Kitty style is one of those projects that feels both playful and surprisingly practical. Even after years of crocheting, I still get excited about pieces like this because they combine function with personality in such a charming way. It’s not just about making something useful to keep your glasses safe, it’s about turning an everyday object into something that makes you smile every time you reach for it.
When I begin a project like this, I usually start by thinking about structure first. A glasses holder needs to have enough stability to keep its shape, but it also has to be soft and flexible enough to comfortably hold the frames without scratching them. I like to use a tight stitch, usually single crochet, worked with a smaller hook than the yarn calls for. This creates a dense, even fabric that gives the holder durability while still feeling smooth to the touch. With something that will be used daily, this balance is essential.
Crochet Bear and Hello Kitty Glasses Holder
In this guide, we’ll cover Crochet Bear and Hello Kitty Glasses Holder , with simple, beginner-friendly steps. Each design is crafted using basic amigurumi techniques and can be customized in color and size. These holders are great as gifts for glasses wearers of all ages and make perfect desk or bedside companions.
With your crochet bear and Hello Kitty glasses holder finished, your eyewear will always have a cozy and cute resting place. These fun creations are not only functional but also bring smiles to any space. Keep exploring variations and characters to build your own glasses holder collection!
Crochet Pattern – Crochet Bear and Hello Kitty Glasses Holder
The base shape is typically worked flat or slightly rounded, depending on the style I want to achieve. In this case, the design leans toward a soft, rounded rectangle that frames the face details beautifully. I work in rows or rounds, keeping my tension consistent and my edges neat, because clean lines make a big difference in a project like this. Since the surface will feature facial elements, it’s important that the stitches look even and well-aligned.
Choosing the yarn is one of my favorite parts. For this kind of design, I usually go with a soft white or cream as the main color, something that highlights the simplicity and allows the facial features to stand out. Cotton yarn is often my first choice because it offers excellent stitch definition and holds its shape well, but a soft acrylic blend can also work nicely if you want a slightly cozier feel. The key is to use a yarn that doesn’t pill easily, since this piece will be handled often.
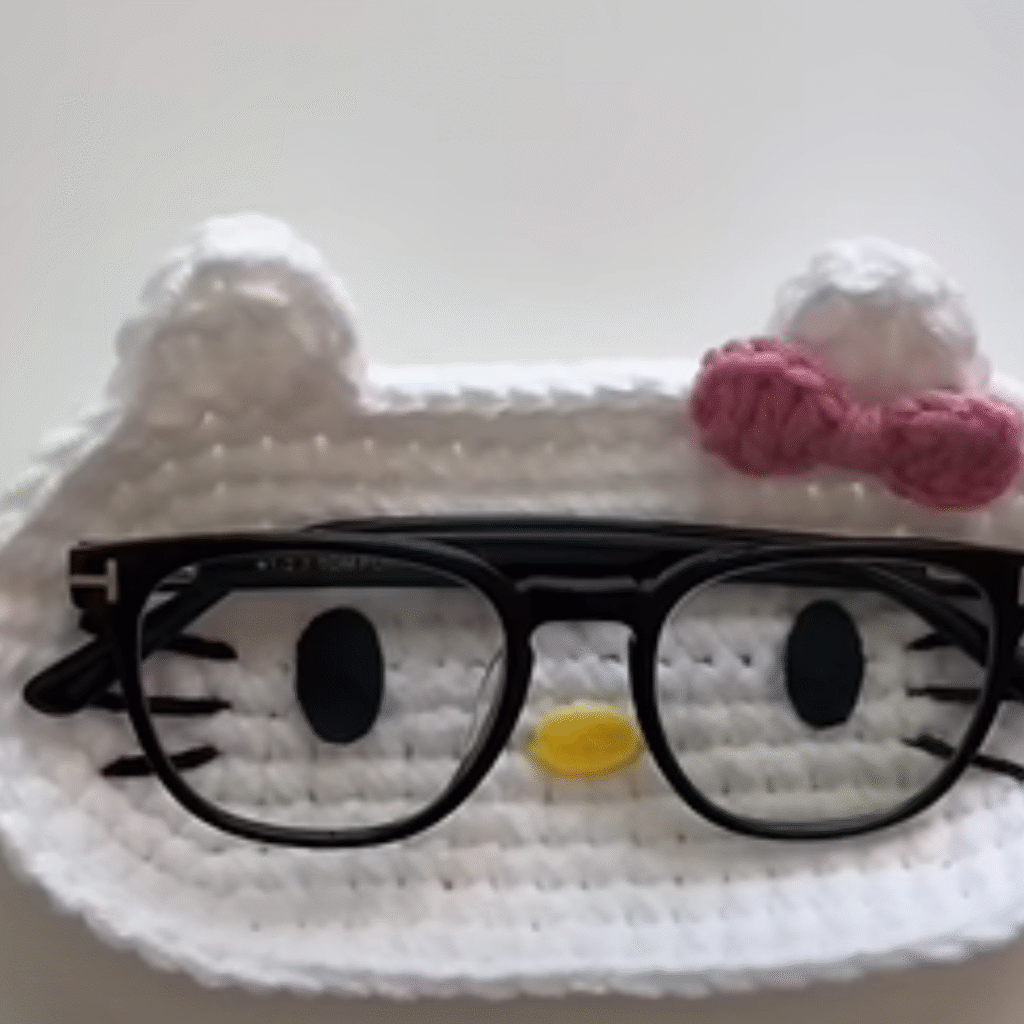
Once the base is complete, I move on to the details that bring the design to life. The facial features are what truly define the character, and I always take my time with this step. The eyes are typically simple oval shapes, either embroidered or crocheted separately and sewn on. I prefer embroidery for a smoother finish, especially on a flat surface like this. The nose, in a soft yellow, adds just the right amount of contrast and instantly gives that recognizable look.
Materials:
- Worsted weight yarn (white, pink, brown, black, red)
- Crochet hook (3.5 mm)
- Safety eyes (10 mm)
- Yarn needle
- Stitch marker
- Fiberfill stuffing
- Felt (optional, for Hello Kitty’s bow)
- Hot glue (optional)
Abbreviations (US):
- MR = Magic Ring
- SC = Single Crochet
- INC = Increase
- DEC = Decrease
- SL ST = Slip Stitch
- FO = Fasten Off
HEAD (Make 2: One for Bear, One for Hello Kitty):
- MR, 6 SC
- INC around (12)
- (SC, INC) x6 (18)
- (2 SC, INC) x6 (24)
5–9. SC around (24) - (2 SC, DEC) x6 (18)
- (SC, DEC) x6 (12)
- Stuff firmly, then DEC to close, FO
BASE (Make 2):
- MR, 6 SC
- INC around (12)
- (SC, INC) x6 (18)
- (2 SC, INC) x6 (24)
- (3 SC, INC) x6 (30)
- FO and sew to bottom of head (flat and centered)
EARS:
Bear (Make 2):
- MR, 6 SC
- (SC, INC) x3 (9)
- FO and sew to head sides
Hello Kitty (Make 2):
- MR, 5 SC
- INC in each stitch (10)
- FO and attach on top sides of head
BOW (Hello Kitty):
- CH 5, work 4 SC rows
- Wrap center with yarn to shape bow
- Sew or glue onto one ear
EYES & FEATURES:
- Sew or glue safety eyes
- Embroider nose and mouth (use black or pink yarn)
- Position and secure facial details with felt or thread
GLASSES PLACEMENT:
- Place glasses so bridge rests on the “nose” area
- Adjust eye placement to support the lens arms
What I love most about a project like this is how it transforms something ordinary into something personal and expressive. It’s not just a glasses holder anymore, it’s a little character that sits on your desk or bedside table, adding a touch of warmth to your space. It’s the kind of piece that makes people pause and smile, and often ask, “Did you make that?”
After so many years of crocheting, I’ve come to appreciate projects that combine creativity with everyday usefulness. They remind me that crochet isn’t just about making decorative items, but about adding beauty and personality to the things we use every day. This glasses holder is a perfect example of that, simple in construction, but full of charm and character.
In the end, pieces like this carry a special kind of satisfaction. They’re quick enough to be enjoyable, detailed enough to be engaging, and practical enough to be used daily. And honestly, there’s nothing better than seeing something you’ve made become part of your everyday routine, a small but meaningful reminder of the care and creativity that went into every stitch.
Note: Here is a pattern suggestion for you to create your own pattern. The end result may vary.