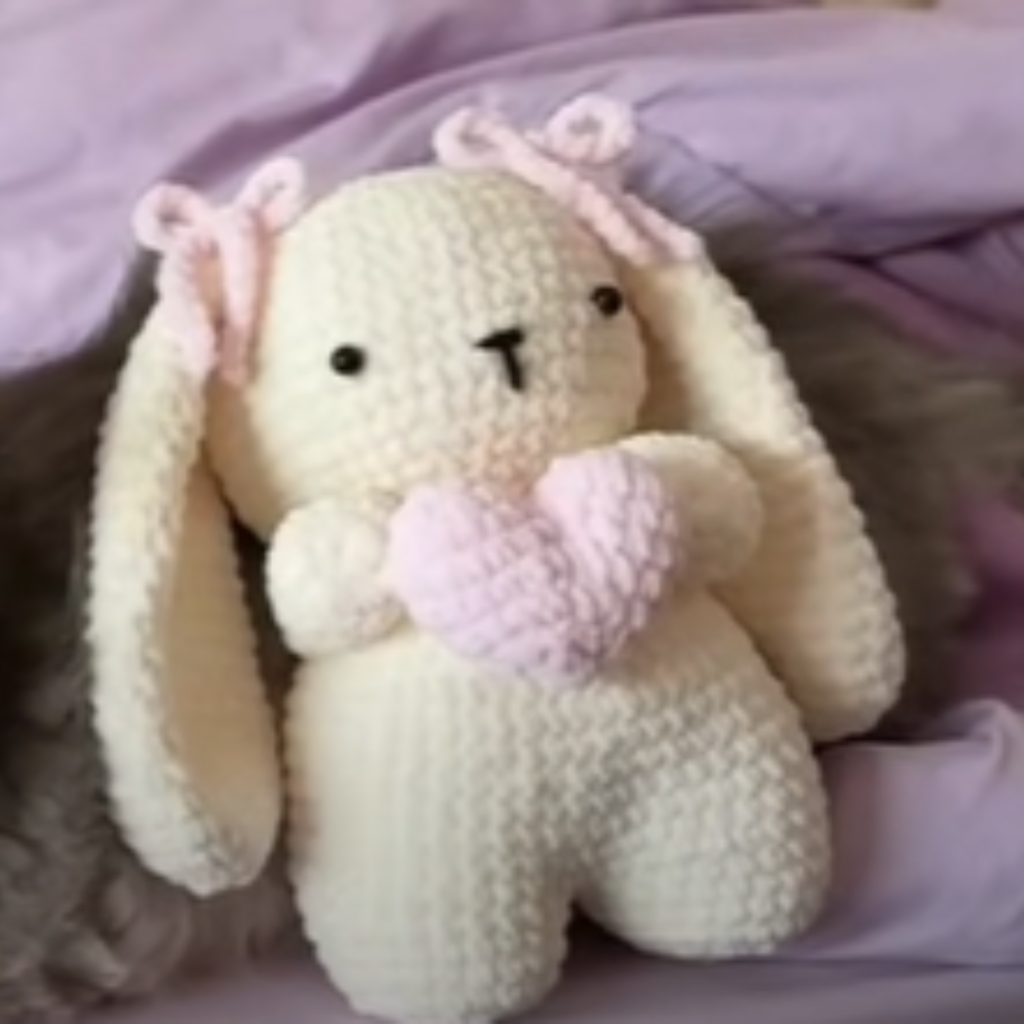
Crochet a cute bunny holding a heart as a perfect handmade gift for someone special! This adorable amigurumi bunny is great for Valentine’s Day or any occasion. There’s something deeply comforting about this kind of project, something simple yet full of personality, where every stitch contributes to that gentle, endearing expression we all associate with a bunny.
I usually begin with the body, working in continuous rounds to create a smooth, seamless shape. This is the foundation of the entire piece, so I take my time to keep my stitches even and my tension consistent. For amigurumi, I almost always use a smaller hook than recommended for the yarn, because tighter stitches help the piece hold its shape and prevent the stuffing from showing through. As I work through the increases, the base begins to round out, forming that soft, plump body that gives the bunny its cuddly appearance.
Choosing the yarn is always a lovely part of the process. For a cute bunny, I tend to gravitate toward soft, gentle colors like cream, light gray, pale pink, or even a warm beige. These tones give the bunny a delicate and timeless feel. Cotton yarn is a favorite because it offers excellent stitch definition and structure, but a soft acrylic can also create a slightly fluffier, more plush effect. The texture you choose really influences the personality of the finished piece, and that’s something I always enjoy experimenting with.
How to Crochet a Cute Bunny Holding a Heart
Follow this step-by-step pattern to crochet a cute bunny holding a heart. It’s an easy and fun project for beginners and experienced crocheters alike!
Now that you’ve completed your bunny holding a heart, try using different colors and sizes for a personalized touch. Happy crocheting!
As the body takes shape, I begin to think about the proportions. A cute bunny often has a slightly larger head compared to its body, which adds to that sweet, almost childlike look. Whether I work the head as part of the same piece or crochet it separately, I pay close attention to the shaping. Smooth transitions between rounds and careful placement of increases and decreases help create a balanced and natural form.
Stuffing is one of those steps that may seem simple, but it makes a significant difference in the final result. I always add the filling gradually, shaping the piece gently with my hands as I go. The goal is to achieve a firm yet soft feel, something that holds its structure without becoming stiff. I smooth out any uneven areas and make sure the curves remain clean and rounded, because this is what gives the bunny its soft, polished look.
Crochet a Cute Bunny Holding a Heart – Free Pattern
The ears are where the bunny truly starts to show its personality, and I always enjoy this part. I usually crochet them separately, creating long, soft shapes that can either stand upright or gently flop to the side. The choice depends on the style I want to achieve. Upright ears give the bunny a more alert and playful look, while floppy ears create a softer, more relaxed feel. Sometimes I add a contrasting inner ear in a lighter shade, which brings a subtle depth and makes the design feel more complete.
Placement of the ears is something I never rush. I pin them in place first, adjusting their position until everything feels balanced. Even a slight change in angle can alter the entire expression of the bunny, so I take a moment to step back and look at the piece from different perspectives before sewing them on securely.
The face is perhaps the most important part of creating a cute bunny, and it’s where all the character comes together. I prefer to keep the features simple and delicate. Small eyes, either safety eyes or embroidered, placed carefully to achieve that gentle expression, are key. A tiny nose, often stitched in a soft pink, adds warmth and charm. Sometimes I include a subtle mouth or a hint of whiskers, but I always keep it minimal. With amigurumi, especially something meant to be cute, less truly is more.
Materials:
- Worsted weight yarn (white for the bunny, red or pink for the heart)
- 3.0 mm crochet hook
- Fiberfill stuffing
- Safety eyes (6 mm)
- Embroidery thread (black and pink)
- Tapestry needle
- Scissors
Abbreviations (US Terms):
- MR – Magic Ring
- SC – Single Crochet
- INC – Increase (2 SC in one stitch)
- DEC – Decrease (single crochet two stitches together)
- CH – Chain
- SL ST – Slip Stitch
- FO – Fasten Off
Bunny Pattern:
Head:
- MR, 6 SC (6)
- INC around (12)
- (SC, INC) * 6 (18)
- (2 SC, INC) * 6 (24)
- (3 SC, INC) * 6 (30)
6-12. SC around (30) - (3 SC, DEC) * 6 (24)
- (2 SC, DEC) * 6 (18)
- (SC, DEC) * 6 (12)
- DEC around (6), FO, weave the ends.
Ears (Make 2):
- MR, 6 SC (6)
- (SC, INC) * 3 (9)
3-6. SC around (9)
FO, leaving a long tail to sew onto the head.
Body:
- MR, 6 SC (6)
- INC around (12)
- (SC, INC) * 6 (18)
4-8. SC around (18) - (SC, DEC) * 6 (12)
- DEC around (6), FO, leaving a long tail to sew to the head.
Arms (Make 2):
- MR, 6 SC (6)
2-4. SC around (6)
FO, leaving a tail for sewing.
Legs (Make 2):
- MR, 6 SC (6)
2-5. SC around (6)
FO, leaving a tail for sewing.
Heart:
- MR, 6 SC (6)
- INC around (12)
- (SC, INC) * 6 (18)
4-5. SC around (18)
Make two halves, join them together, and continue: - SC around both pieces (30)
- (3 SC, DEC) * 6 (24)
- (2 SC, DEC) * 6 (18)
- (SC, DEC) * 6 (12)
- DEC around (6), FO, and sew shut.
Assembly:
- Sew the ears onto the head.
- Attach the head to the body.
- Sew the arms and legs in place.
- Embroider the facial details.
- Attach the heart to the bunny’s arms.
After years of crocheting, I’ve come to appreciate projects like this for their quiet simplicity. They don’t need to be complex to be meaningful. In fact, it’s often the simplest designs that carry the most charm. A cute bunny is more than just a small crochet piece, it’s a little companion, a handmade expression of care and creativity.
In the end, holding that finished bunny in your hands is always a special moment. It’s a reminder of the time, attention, and love that went into each stitch. Whether it’s kept as a personal piece, given as a gift, or added to a collection, it carries that unmistakable handmade warmth. And honestly, there’s nothing quite like seeing that tiny bunny sitting there, soft and full of character, knowing it came to life one stitch at a time.
Enjoy your crochet bunny holding a heart!
Note: Here is a pattern suggestion for you to create your own pattern. The end result may vary.