Celebrate Easter with this Super Easy Easter Bunny Egg crochet pattern! This adorable and colorful bunny egg is the perfect handmade decoration or gift. Creating an Easy Easter Bunny Egg in crochet is one of those delightful projects that feels light, playful, and full of seasonal charm.
As an experienced crocheter, I’ve always had a soft spot for Easter-themed pieces, and this particular design captures that joyful spirit in such a simple yet satisfying way. It’s the kind of project that works up quickly, but still gives you plenty of room to enjoy the process, experiment with colors, and add your own personal touch.
When I begin a crochet Easter bunny egg, the first thing I think about is yarn choice. Because this is a decorative piece, I like to use cotton yarn for its clean stitch definition and structure. Cotton helps the egg hold its shape nicely, especially when it’s stuffed, and it gives that smooth, polished look that really highlights the details. For colors, I tend to lean toward soft pastels—light pinks, baby blues, creamy whites, and gentle yellows. These shades instantly evoke that Easter feeling and make the finished piece look sweet and inviting.
The construction usually starts with the egg shape itself, and this is where I settle into a calm, steady rhythm. Working in continuous rounds, I begin at the top or bottom, depending on the pattern, and gradually build the form with increases and then decreases. The key here is symmetry. A well-shaped egg should feel balanced, with a smooth curve that transitions naturally from one end to the other. I pay close attention to my tension, keeping it even so the surface remains neat and consistent.
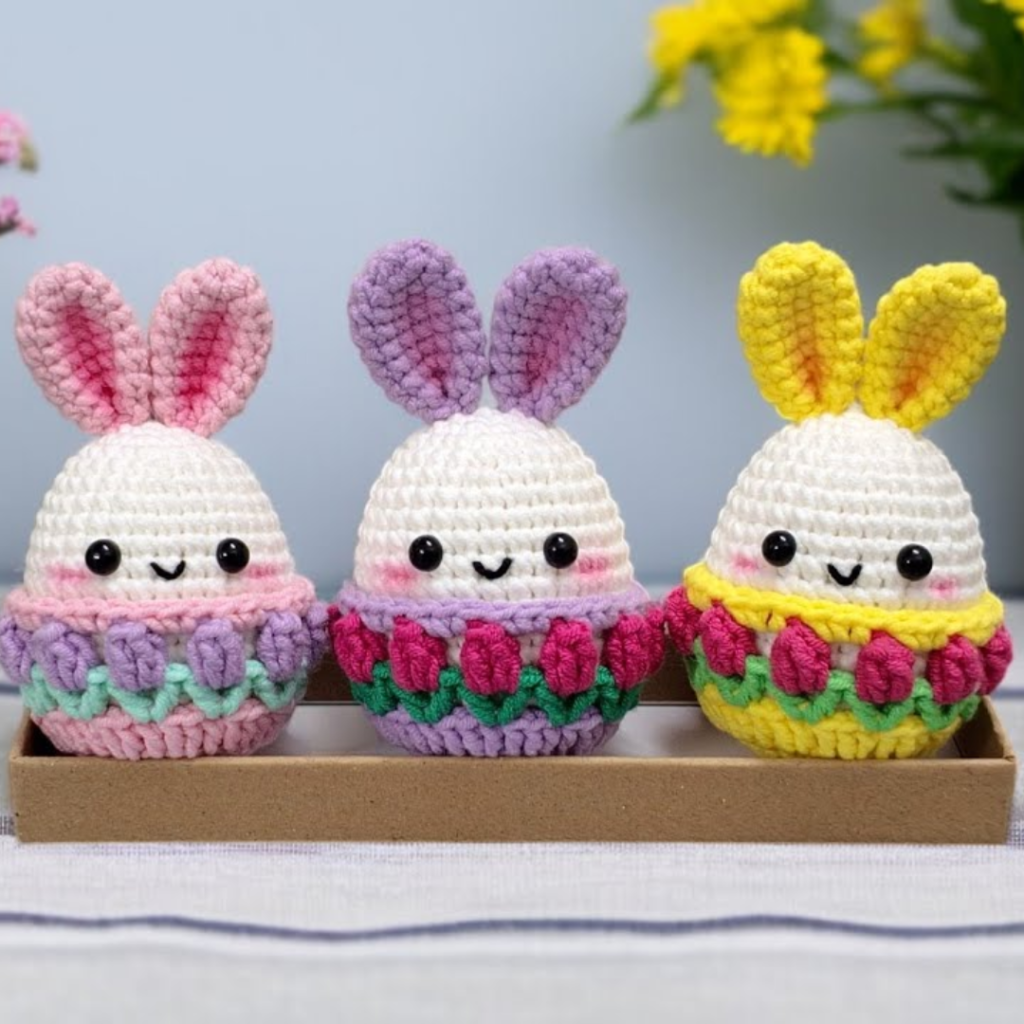
How to Make a Super Easy Easter Bunny Egg
This fun and beginner-friendly crochet project will brighten up your Easter celebrations. With simple stitches and vibrant colors, you can create a charming bunny egg in no time!
Now that you know how to make a Super Easy Easter Bunny Egg, try making a few in different colors for a festive Easter display. Happy crocheting!
Stuffing is an important step, even in a small project like this. I like to add it gradually, shaping the egg gently with my fingers as I go. You want it to be firm enough to hold its structure, but still soft to the touch. Overstuffing can distort the shape, while too little stuffing can make it look flat, so finding that balance is part of the craft. With experience, it becomes almost instinctive—you can feel when it’s just right.
What transforms a simple crocheted egg into an Easter bunny is, of course, the details. The ears are the first feature I usually work on after completing the base. They’re typically small, elongated shapes, crocheted separately and then attached. I enjoy shaping them carefully, making sure they’re symmetrical and proportionate to the egg. Sometimes I’ll add a contrasting inner ear using a softer color, which gives a lovely layered effect and adds a bit of depth to the design.
Super Easy Easter Bunny Egg – Free Crochet Pattern
Attaching the ears is a step I never rush. Placement is everything. Too close together, and the look can feel cramped; too far apart, and it loses that classic bunny appearance. I like to pin them in place first, take a step back, and adjust until it feels balanced. Once they’re secured, the transformation really begins to take shape.
The face is where the personality comes in, and this is always one of my favorite parts. Even with just a few simple stitches, you can create something incredibly expressive. I usually add small eyes—either safety eyes or embroidered ones—along with a tiny nose and perhaps a delicate mouth. Sometimes I’ll include a hint of blush using yarn or thread, just to give the bunny a softer, more endearing expression. It’s amazing how these small details can bring the entire piece to life.
Another element I sometimes like to add is a bit of embellishment. A tiny bow, a miniature flower, or even a simple ribbon around the base can elevate the design and make it feel more festive. These additions don’t take much time, but they add a layer of charm that makes each piece feel unique. It’s also a wonderful opportunity to use up small scraps of yarn in creative ways.
As I move into the final stages, I slow down and focus on finishing. I weave in all the ends carefully, making sure nothing is visible or loose. I gently shape the egg one last time, adjusting the stuffing if needed and smoothing out the surface. These finishing touches are what give the piece that polished, professional look.
What I love most about making an Easy Easter Bunny Egg is how approachable it is. It’s perfect for beginners, but still enjoyable for more experienced crocheters. It’s a project that doesn’t require a large time commitment, yet it offers that same sense of satisfaction you get from completing something with care. And because it’s small, it’s ideal for making in batches—perfect for gifts, decorations, or even a themed display.
Materials:
- Cotton yarn in white, pink, yellow, purple, green, and other pastel colors
- 3.0mm crochet hook
- Black safety eyes (6mm)
- Embroidery thread for the smile
- Yarn needle
- Scissors
- Fiberfill stuffing
Abbreviations (US Terms):
- MR = Magic Ring
- CH = Chain
- SC = Single Crochet
- INC = Increase (2 SC in the same stitch)
- DEC = Decrease (SC2TOG)
- SL ST = Slip Stitch
- FO = Fasten Off
Instructions:
Bunny Egg Body:
- Start with white yarn. MR, 6 SC in the ring. (6)
- INC in each stitch around. (12)
- SC, INC repeat around. (18)
- SC 2, INC repeat around. (24)
- SC 3, INC repeat around. (30)
6-12. SC around. - Begin decreasing: SC 3, DEC repeat around. (24)
- SC 2, DEC repeat around. (18)
- SC, DEC repeat around. (12)
- Stuff with fiberfill, DEC around. (6) FO and close.
Ears (Make 2):
- MR, 6 SC.
- SC, INC repeat around. (9)
- SC 2, INC repeat around. (12)
4-7. SC around. FO, leaving a tail for sewing.
Decorative Egg Shell (Bottom Half):
- Start with pastel-colored yarn. MR, 6 SC.
- INC in each stitch around. (12)
- SC, INC repeat around. (18)
- SC 2, INC repeat around. (24)
- SC 3, INC repeat around. (30)
6-7. SC around. FO.
Flower Border (Optional):
- Using green yarn, crochet a chain that fits around the egg.
- Switch to pink yarn and crochet small petals along the chain.
- Attach the flower border around the egg shell.
Assembly:
- Sew ears to the top of the bunny egg.
- Attach safety eyes and embroider a small smile.
- Place the bunny inside the egg shell bottom.
There’s also something very nostalgic about it. Easter projects often carry a sense of warmth and tradition, and creating something by hand adds to that feeling. Whether it’s placed in a basket, used as a decoration, or given to someone special, it carries a bit of that handmade love with it.
In the end, creating an Easy Easter Bunny Egg is about enjoying the simplicity of the craft. It’s about taking a small idea and turning it into something charming and full of character. And even after years of crocheting, it’s projects like this that remind me why I love it so much—the quiet rhythm, the attention to detail, and the joy of seeing something come to life, one stitch at a time.
Note: Here is a pattern suggestion for you to create your own pattern. The end result may vary.