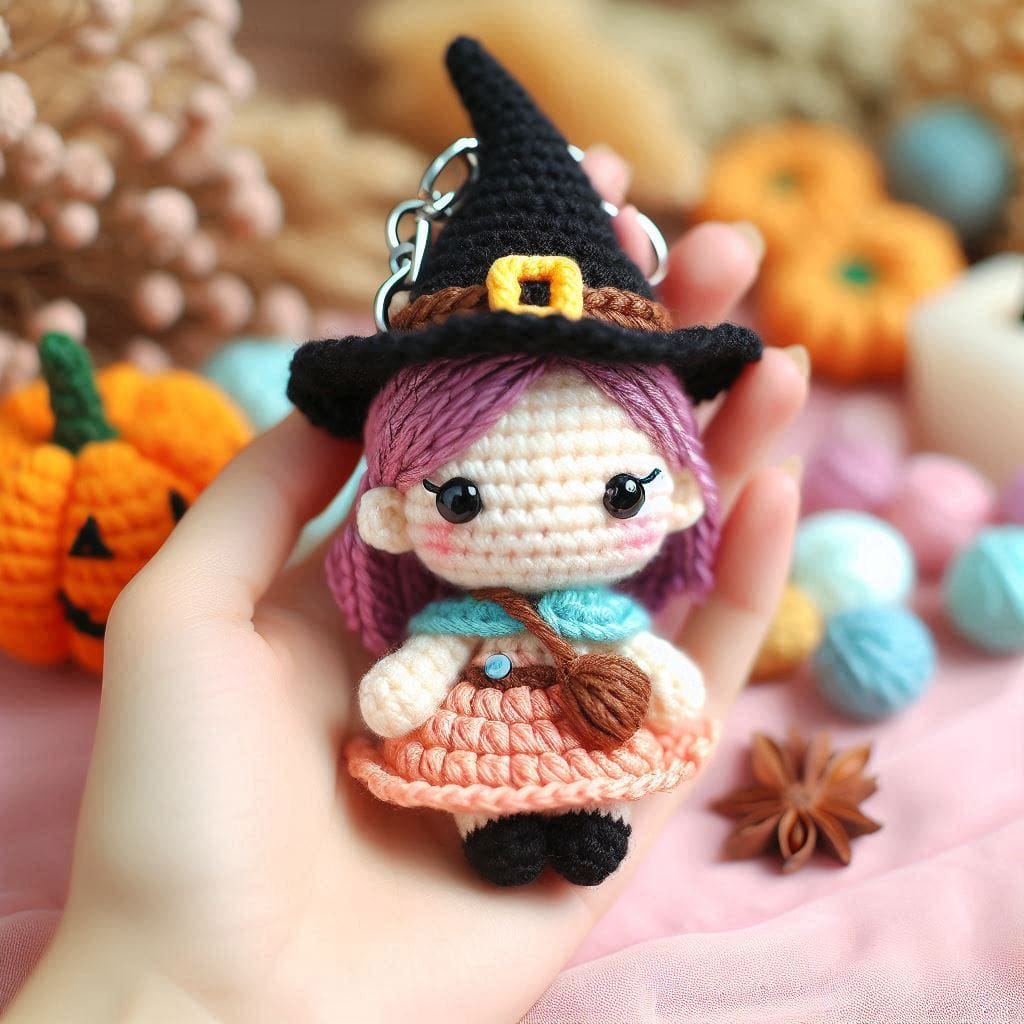
This adorable witch doll keychain is an enchanting crochet creation that combines Halloween spirit with cute amigurumi design. With her purple hair, charming hat, and tiny accessories, she makes a delightful companion for your keys or bags.
Okay, fellow yarn lovers — I have to gush about this Adorable Witch Doll Keychain I just finished crocheting! She turned out so sweet and tiny, I honestly didn’t want to stop at just one.
You know those projects that just spark joy as soon as you start stitching them? This was definitely one of them. She’s the perfect mix of cute and magical — more Kawaii witch than spooky witch — and I loved giving her all the little details that make her feel alive.
How to Crochet an Adorable Witch Doll Keychain
This witch doll keychain is made using basic amigurumi techniques, and the detailed features bring this tiny witch to life. Follow the steps below to craft your own charming crochet witch.
I used a soft cotton yarn in vibrant purples and blacks, with a splash of orange for her accessories. Her dress flares out just a bit, and that teeny tiny hat? Oh my goodness. Crocheting that little witch hat was probably my favorite part — it instantly gave her all the charm and sass she needed. I added a little ribbon bow to mine because, why not? A witch can be stylish too!
She’s small enough to fit in the palm of your hand, which makes her perfect for keychains, bag charms, or even Halloween party favors. I attached a sturdy silver lobster clasp to the top, so she’s easy to clip onto whatever needs a little handmade magic.
If you’re gifting these or selling at markets, be warned — people love them. I made one for my niece, and now all her friends want one. I’ve even had grown-ups ask if they can get her in different outfits, like a Christmas witch or even a rainbow witch!
Crochet Pattern: Witch Doll Keychain
Materials:
- DK weight yarn in skin color, black, purple, turquoise, brown, orange, and yellow
- Crochet hook size D/3 (3.25 mm)
- 6 mm safety eyes
- Tapestry needle
- Polyester stuffing
- Keychain ring and chain
- Stitch markers
- Blush for cheeks (optional)
Abbreviations:
- ch: chain
- sc: single crochet
- inc: increase (2 sc in the next st)
- dec: decrease (sc two stitches together)
- sl st: slip stitch
- rnd: round
- st(s): stitch(es)
- FO: fasten off
Head and Body (Skin Color Yarn):
- Head:
- Rnd 1: Magic ring, 6 sc in the ring (6 sts).
- Rnd 2: Inc in each st around (12 sts).
- Rnd 3: Sc in next st, inc in next st, repeat around (18 sts).
- Rnd 4-7: Sc in each st around (18 sts).
- Insert safety eyes between Rnd 4 and 5, about 5 sts apart.
- Rnd 8: Sc in next st, dec in next st, repeat around (12 sts).
- Rnd 9: Dec in each st around (6 sts).
- Stuff firmly.
- FO and weave in the end.
- Body (Orange Yarn):
- Rnd 1: Attach orange yarn to any st of the head, ch 1, sc in each st around (6 sts).
- Rnd 2: Inc in each st around (12 sts).
- Rnd 3: Sc in next st, inc in next st, repeat around (18 sts).
- Rnd 4-6: Sc in each st around (18 sts).
- Rnd 7: Sc in next st, dec in next st, repeat around (12 sts).
- Rnd 8: Dec in each st around (6 sts).
- Stuff the body lightly.
- FO, leaving a long tail to close and sew to the legs.
Legs (Black Yarn):
- Make 2.
- Rnd 1: Magic ring, 6 sc in the ring (6 sts).
- Rnd 2-4: Sc in each st around (6 sts).
- FO, leaving a long tail for sewing.
- Sew the legs to the bottom of the body.
Arms (Skin Color Yarn):
- Make 2.
- Rnd 1: Magic ring, 5 sc in the ring (5 sts).
- Rnd 2-3: Sc in each st around (5 sts).
- FO, leaving a long tail for sewing.
- Sew the arms to the sides of the body.
Hat (Black Yarn):
- Rnd 1: Magic ring, 6 sc in the ring (6 sts).
- Rnd 2: Sc in next st, inc in next st, repeat around (9 sts).
- Rnd 3: Sc in next 2 sts, inc in next st, repeat around (12 sts).
- Rnd 4: Sc in next 3 sts, inc in next st, repeat around (15 sts).
- Continue increasing 3 sts every round until the hat fits snugly on the head.
- Switch to brown yarn for the band.
- Add a yellow buckle to the front of the band.
- To create the brim, sc in next st, ch 1 around.
- FO and weave in the end.
Hair (Purple Yarn):
- Cut strands of yarn and attach them to the head for hair.
- Style the hair as desired.
Skirt Ruffle (Orange Yarn):
- Attach orange yarn to the bottom of the body, ch 1.
- Rnd 1: Sc in each st around (12 sts).
- Rnd 2: Sc in next st, inc in next st, repeat around (18 sts).
- Rnd 3: Sc in next 2 sts, inc in next st, repeat around (24 sts).
- FO and weave in the ends.
Cloak (Turquoise Yarn):
- Ch 15, turn, sc in each ch across (14 sts).
- Ch 1, turn, sc in each st across (14 sts).
- FO, leaving a long tail for sewing.
- Attach the cloak around the doll’s neck, securing it with a small button or knot.
Bag (Brown Yarn):
- Rnd 1: Magic ring, 6 sc in the ring (6 sts).
- Rnd 2: Sc in each st around (6 sts).
- Rnd 3: Sc in each st around (6 sts).
- FO, leaving a long tail for sewing.
- Attach the bag to the body and add a small brown yarn detail for the strap.
Assembly:
- Place the hat on the head and sew it securely.
- Attach the keychain ring and chain to the top of the hat.
- Use blush to add rosy cheeks.
Now your adorable little witch doll keychain is complete! This delightful amigurumi project is perfect for Halloween or as a fun gift for friends who love all things magical.
I used a 2.25 mm hook to keep everything nice and tight since she’s stuffed. Safety eyes give her that sweet little expression, but I’ve also embroidered eyes on a few for younger kiddos. Trust me, once you make one of these Adorable Witch Doll Keychains, you’ll want to make a whole coven.