Creating a witch amigurumi keychain is a charming way to add a touch of magic to your accessories. This keychain is perfect for those who love the crochet universe and want to make a unique and personalized piece. With delicate details and an adorable look, this crochet witch will be a hit among craft lovers.
If you’re anything like me, you probably love tiny crochet projects that are packed with personality—and the Witch Amigurumi Keychain is exactly that kind of delightful creation! Whether you’re a Halloween fanatic, a witchy soul all year round, or just someone who can’t resist an adorable mini amigurumi, this little crochet witch is sure to capture your heart. It’s the perfect mix of cute, spooky, and portable!
Let me start by saying how much fun I had bringing this magical little witch to life. As a crocheter, there’s something incredibly satisfying about working on miniature amigurumi projects. They come together fairly quickly, they’re super easy to customize, and they always make people smile. This keychain is no exception! I worked mine up using a DK-weight yarn and a 2.5 mm hook, but you can always adjust the size and materials to suit your preferences. Want her even tinier? Try a finer yarn and hook! Prefer a chunkier, plushier version? Go up a size and make her into a bag charm or ornament.
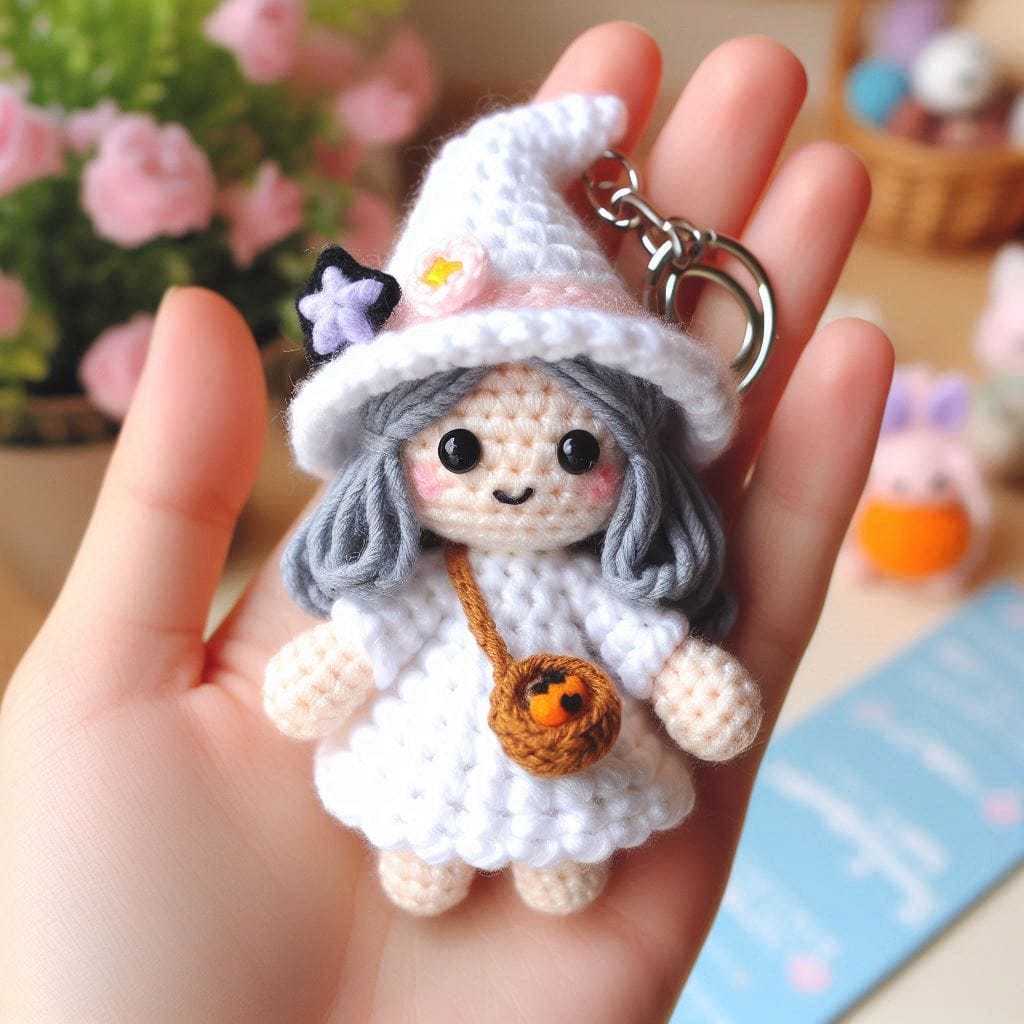
The best part? You don’t need to be an expert to make this witch. If you’ve got your single crochets, increases, and decreases down, you’re good to go. The basic structure of the amigurumi is simple: you start with the head and body as one continuous piece (so no attaching headaches there!), then move on to the tiny hat, arms, and accessories. The pattern often includes a small broomstick, maybe a cape or wand depending on how whimsical you’re feeling, and of course, the iconic pointy hat! I even added a little star charm to mine for extra sparkle.
Step-by-Step Guide to Making the Witch Amigurumi Keychain
This witch keychain is crocheted using yarn in various colors for different elements, such as the hat, dress, and hair. Before you begin, make sure you have all the materials on hand and follow the instructions carefully to ensure all details are perfect.
Now, let’s talk color. The classic black-and-purple combo is always a hit, but I’ve seen—and made!—versions in all sorts of shades. Forest green and burnt orange for an earthy vibe, midnight blue with silver sparkles for a celestial theme, even pastel pink and lavender for a soft witchcore look. Honestly, the possibilities are endless. You can give your witch a sassy twist with a bold lipstick-colored mouth, tiny embroidered lashes, or even little felt glasses for that scholarly sorceress vibe.
One of the things I adore most about this project is how personal it can become. Each witch I make seems to have her own personality by the time I finish. Some end up looking mischievous, others sweet and serene. I think that’s one of the most magical things about amigurumi in general—each piece is one-of-a-kind, even if you follow the same pattern every time.
I’ve gifted these Witch Amigurumi Keychains to friends, sold them at local markets, and even used them as party favors at Halloween gatherings. People love them. They’re small enough to clip onto backpacks, purses, keyrings, or even rearview mirrors (yes, I have one hanging in my car!). They also make fantastic stocking stuffers, birthday gifts, or little tokens of appreciation for fellow crochet lovers and witchy friends.
And let me tell you: if you’re into crafting for the seasons or love selling your creations, this pattern is a winner. I can whip up a few of these in a weekend, and they’re always bestsellers during the spooky season. They don’t take much yarn, so they’re a great stash-busting project too. You can use leftover scraps for the accessories—think tiny brooms made with embroidery floss and twigs, mini felt spellbooks, or beaded potions.
Another fun thing about this project is how versatile it is in terms of storytelling. I like to imagine that each witch I crochet has her own name and powers. One might be the guardian of the moon phases, another the protector of herbs and healing. It’s like writing little magical stories with yarn and a hook. And if you’re making these with kids, they absolutely love that aspect—naming their witch, deciding her powers, and carrying her around like a secret magical friend.
If you’re new to making keychains, don’t worry—it’s super easy. You just need a keyring or lobster clasp, and you can sew or glue a small loop of yarn or ribbon to the top of the witch’s hat or head. I prefer sewing for durability, especially if it’s going on keys or bags that get a lot of use.
Materials needed:
- Crochet yarn in white, beige, gray, and brown
- Crochet hook matching the yarn thickness
- Synthetic fiber for stuffing
- Tapestry needle
- Scissors
- Safety eyes for amigurumi
- Metal keychain
- Small embellishments (optional)
Detailed Instructions:
- Head and Body:
- Start by making a magic ring with the beige yarn.
- Inside the magic ring, crochet 6 single crochets.
- Increase to 12 single crochets in the second round and continue increasing until you reach 30 stitches.
- Continue crocheting in a spiral until you reach the desired height for the head.
- Switch to white yarn to start the witch’s body.
- Gradually decrease the stitches to form the body, remembering to add stuffing as you work.
- Hat:
- With white yarn, make a magic ring.
- Increase the stitches in each round to form the base of the hat until it fits the witch’s head.
- Continue crocheting in a spiral to add height to the hat.
- Finish the brim of the hat by increasing in each stitch.
- Hair and Details:
- Use gray yarn to make the witch’s hair. Create small chains for each strand and attach them to the head with the tapestry needle.
- Make small details, such as a small bag or other embellishments, using brown or colored yarn.
- Assembly:
- Sew the hat onto the witch’s head.
- Insert the safety eyes in the desired position and embroider a small mouth with black thread.
- Attach the metal keychain to the top of the head.
Witch Amigurumi Keychain. Conclusion
Finish by sewing all the details, adjusting as necessary, and adding final touches like embellishments or a small charm. Your witch amigurumi keychain is ready to be used or gifted!
To sum it up, the Witch Amigurumi Keychain is one of those projects that brings pure crochet joy. It’s quick, cute, and customizable—everything I love in a pattern. Whether you’re keeping her for yourself, gifting her to someone special, or making a cauldron-full to sell, you’re bound to have fun with this spellbinding little project.
So grab your hook, conjure up your favorite yarn colors, and let your creativity fly on a broomstick! Happy hooking, and may your stitches be magical
[/read]