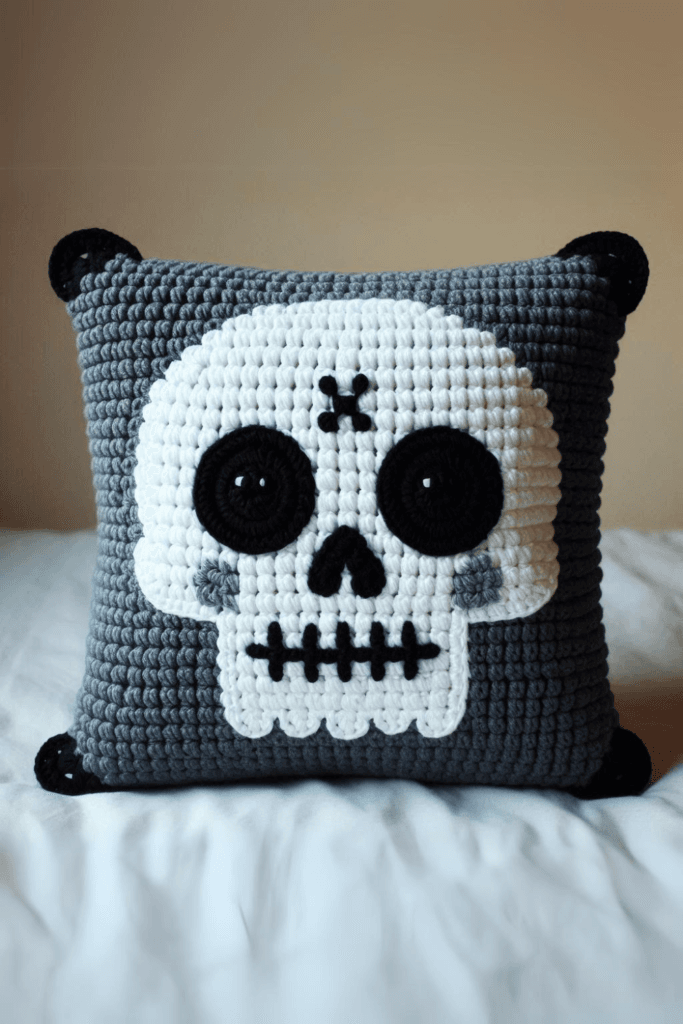
The Skull Crochet Pillow is a distinctive and eye-catching addition to any room, perfect for those who enjoy a touch of whimsy with a bit of edge. This pillow combines a simple yet striking skull design with a gray background, creating a modern and playful aesthetic that stands out in any setting. Whether you’re adding it to a themed room or using it as a statement piece, this pillow is sure to draw attention and spark conversation.
If you’re anything like me, you love a good statement piece—especially one that’s handmade with love, yarn, and a little bit of attitude. That’s exactly what this Skull Crochet Pillow is: a bold, fun, and totally unique piece of décor that brings cozy vibes and personality to any space!
Now, I know what you’re thinking: a skull… but in crochet? And I say, absolutely yes! This isn’t your average scary skull — it’s charming, creative, and surprisingly cuddly. Whether you’re into gothic décor, love celebrating Halloween all year round, or just want something unexpected for your home, this pillow adds that just-right mix of edgy and adorable.
How to Make a Skull Crochet Pillow
Creating a Skull Crochet Pillow involves working with basic crochet stitches to form the square base, followed by the intricate skull design using appliqué techniques. You can choose your favorite colors, though the classic gray, white, and black combination works exceptionally well. This project is ideal for intermediate crocheters looking to challenge their skills and create something truly unique.
The best part? It’s so satisfying to make! The pattern is simple and rhythmic, which means you can pop on your favorite show or podcast and get lost in the stitches. Most of it is worked in single crochet, and once you get the basic skull shape down, you can totally make it your own. I’ve made several now, and not one looks the same — that’s the beauty of it!
Some of mine have bold black eyes and stitched teeth for a more traditional look, while others are dressed up with floral accents, colorful embroidery, and even sparkle yarn! I once made a sugar-skull inspired version with bright pinks, purples, and blues — and let me tell you, it turned out stunning. It’s amazing how a few tweaks in color and detail can give each pillow a whole new vibe.
Crochet Pattern: Skull Crochet Pillow
You can use pretty much any worsted weight yarn you like — cotton for a firmer structure, or acrylic if you want something soft and snuggly. And it’s a fantastic stash-busting project! Those little bits of yarn you’ve been saving? They’re perfect for adding fun details to the face, or for stitching little flowers and hearts if you want to make your skull a little sweeter.
When you’re done, you’ll have a pillow that’s not just eye-catching, but also handmade and heartfelt. I love tossing mine onto the couch, bed, or even my craft chair — it’s the kind of piece that makes people go, “Wait, did you make that?!” (And yes, I did, thank you very much!)
Whether you’re making it for your own home or as a gift for someone with a unique sense of style, this Skull Crochet Pillow is a total winner. It’s cozy. It’s cool. It’s creative. And most importantly, it’s a reflection of your handmade magic.
So grab your hook, pick your favorite colors, and let your imagination run wild — because this skull is ready to come to life in your hands.
Skull Crochet Pillow. Materials:
- Worsted weight yarn in gray, white, and black
- Crochet hook size H/8 (5.0 mm)
- Tapestry needle
- Polyester stuffing
- Stitch markers
Abbreviations:
- ch: chain
- sc: single crochet
- st(s): stitch(es)
- sl st: slip stitch
- rnd: round
- dec: decrease (single crochet two stitches together)
Pillow Base:
- Front Panel (Gray Background):
- Ch 41.
- Row 1: Sc in the second ch from hook and in each ch across (40 sts).
- Row 2-40: Ch 1, turn. Sc in each st across (40 sts).
- Fasten off and weave in ends.
- Back Panel:
- Repeat the same steps as the front panel.
Skull Appliqué:
- Skull Base (White Yarn):
- Magic ring, ch 1, 8 sc in ring, join with sl st to first sc.
- Rnd 1: Ch 1, 2 sc in each st around (16 sts).
- Rnd 2: Ch 1, sc in next st, 2 sc in next st, repeat from * to * around (24 sts).
- Rnd 3: Ch 1, sc in next 2 sts, 2 sc in next st, repeat from * to * around (32 sts).
- Rnd 4-6: Ch 1, sc in each st around (32 sts).
- Shape the bottom of the skull by crocheting the following: Ch 1, sc in next 10 sts, turn.
- Row 2: Ch 1, sc dec in first 2 sts, sc in next 6 sts, sc dec in last 2 sts (8 sts).
- Row 3: Ch 1, sc in each st across (8 sts).
- Fasten off and weave in ends.
- Eyes (Black Yarn):
- Make 2.
- Magic ring, ch 1, 6 sc in ring, join with sl st to first sc.
- Rnd 1: Ch 1, 2 sc in each st around (12 sts).
- Fasten off, leaving a long tail for sewing.
- Nose (Black Yarn):
- Ch 5.
- Row 1: Sc in second ch from hook and next 3 sts (4 sts).
- Row 2: Ch 1, sc dec in first 2 sts, sc dec in last 2 sts (2 sts).
- Row 3: Ch 1, sc dec (1 st).
- Fasten off, leaving a long tail for sewing.
- Mouth (Black Yarn):
- Use black yarn to embroider the mouth onto the skull base with a tapestry needle.
Assembly:
- Sew the skull appliqué onto the center of the front panel.
- Sew the eyes and nose in place on the skull.
- Place the front and back panels together, right sides facing out.
- Join the panels by sc around the edges, leaving one side open.
- Stuff the pillow with polyester filling.
- Close the remaining side with sc.
- Fasten off and weave in all ends.
Your Skull Crochet Pillow is complete!
Note: Here is a pattern suggestion for you to create your own pattern. The end result may vary.