Leprechaun amigurumi tutorial. A crochet leprechaun amigurumi tutorial is the perfect craft for St. Patrick’s Day or anyone who loves Irish culture. With its charming hat and beard, it’s an adorable addition to your collection of handmade decorations. This fun project combines creativity and tradition, resulting in a whimsical keepsake.
Creating a leprechaun amigurumi is one of those projects that feels full of character from the very first stitch, especially when you’ve spent years bringing little figures to life with yarn. There’s something about this design that invites playfulness and detail at the same time. It’s not just about shaping a small doll, it’s about capturing personality, that mischievous, cheerful spirit that a leprechaun is known for, all through careful stitches, color choices, and thoughtful finishing.
This approach creates a seamless look, which I always prefer for amigurumi because it feels cleaner and more refined. Starting with a magic ring, I build the shape gradually with increases, forming a smooth, rounded head. I keep my stitches tight by using a smaller hook than recommended, which helps maintain structure and prevents the stuffing from showing through. As the piece grows, I transition into the body with subtle shaping, making sure the proportions feel balanced and natural.
How to Crochet a Leprechaun Amigurumi Tutorial
Making a crochet leprechaun amigurumi tutorial involves combining bright colors and details to create a festive and cheerful character. You can personalize your leprechaun with different shades of green or add accessories like a pot of gold. Let’s bring this lucky little character to life!
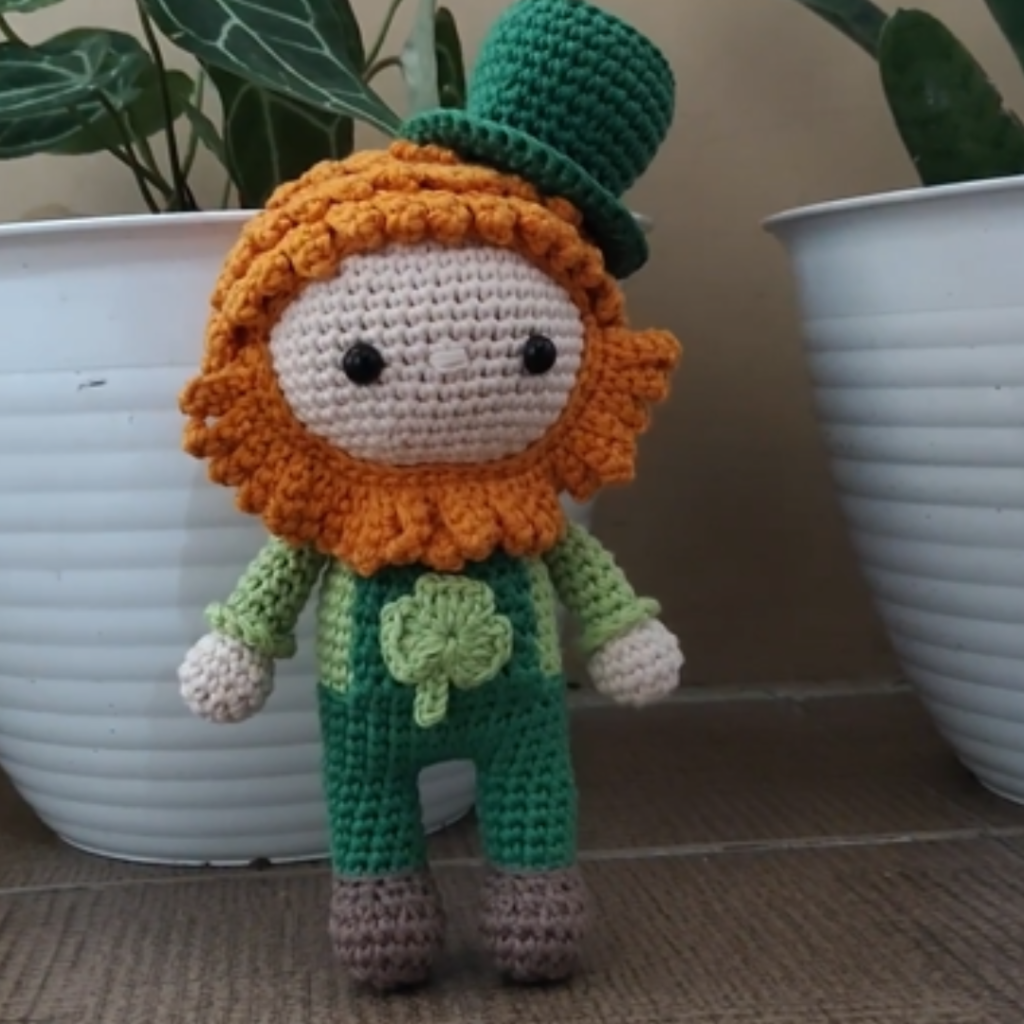
Your crochet leprechaun amigurumi tutorial is now complete! Whether as a gift or a festive decoration, this cute and detailed project is sure to bring smiles. Celebrate Irish charm with this creative craft.
The yarn choice is where the personality really begins to emerge. For a leprechaun, the color palette is essential. Rich greens are the foundation, often paired with black, gold, and soft neutrals for the skin tone. I like to use cotton yarn for its structure and stitch definition, especially when the piece includes small details like clothing and accessories. The contrast between the colors is what gives the character its charm, so I always take a moment to choose shades that complement each other well.
Stuffing is done gradually as I work, particularly once the head is formed. I add small amounts at a time, shaping the piece gently with my hands to keep it smooth and evenly filled. The head should feel firm enough to hold its shape, but still soft to the touch. This balance is something that becomes intuitive over time, and it makes a noticeable difference in the final result.
Detailed Recipe: Crochet Leprechaun Amigurumi Tutorial
Once the main body is complete, I move on to the limbs. Arms and legs are usually crocheted separately, worked in small rounds with simple shaping. These pieces may be small, but they require the same attention to tension and consistency as the rest of the project. I often leave them lightly stuffed or even unstuffed, depending on the look I want. Attaching them securely is important, and I always take care to position them evenly so the figure sits or stands nicely.
The clothing is where the leprechaun truly comes to life. Sometimes I crochet the outfit directly as part of the body, changing colors as I go, while other times I create separate pieces like a tiny jacket or vest. The belt is one of my favorite details, usually made with a strip of black yarn and a small embroidered or crocheted buckle in gold. It’s a simple addition, but it adds so much character and helps define the look.
The hat is, of course, an essential part of any leprechaun amigurumi. I typically crochet it separately, starting from the top and working downward, shaping it with increases to create that classic rounded form. A small brim at the base gives it structure, and sometimes I add a contrasting band to tie it into the rest of the outfit. Getting the proportions right is important here, the hat should sit comfortably on the head without looking too large or too small.
Facial features are where everything truly comes together. I prefer to embroider the eyes and mouth for a softer, more expressive look, especially for a character like this. Placement is key, so I take my time marking where each feature should go before stitching. A small smile can give the leprechaun a friendly expression, while slightly angled features can add a hint of that playful mischief.
Materials:
- Yarn: Worsted-weight yarn in green, orange, beige, brown, and black.
- Hook: 3.5mm crochet hook.
- Safety eyes (10mm).
- Fiberfill stuffing.
- Yarn needle and scissors.
Abbreviations (US terms):
- MR: Magic ring
- SC: Single crochet
- INC: Increase (2 SC in one stitch)
- DEC: Decrease (SC 2 stitches together)
- CH: Chain
- SL ST: Slip stitch
- FO: Fasten off
Instructions:
Head:
- With beige yarn, MR, 6 SC into ring. (6)
- INC in each stitch around. (12)
- (SC, INC) repeat around. (18)
- (2 SC, INC) repeat around. (24)
- SC in each stitch for 6 rounds.
- (2 SC, DEC) repeat around. (18)
- (SC, DEC) repeat around. (12)
- Stuff the head and FO.
Body:
- With green yarn, MR, 6 SC into ring. (6)
- INC in each stitch around. (12)
- (SC, INC) repeat around. (18)
- (2 SC, INC) repeat around. (24)
- SC in each stitch for 8 rounds.
- (2 SC, DEC) repeat around. (18)
- (SC, DEC) repeat around. (12)
- Stuff the body and FO.
Arms (Make 2):
- With beige yarn, MR, 6 SC into ring. (6)
- SC in each stitch for 3 rounds. Switch to green yarn.
- SC in each stitch for 4 rounds. FO and leave a tail to sew.
Legs (Make 2):
- With brown yarn, MR, 6 SC into ring. (6)
- INC in each stitch around. (12)
- SC in each stitch for 2 rounds. Switch to green yarn.
- SC in each stitch for 6 rounds. FO and leave a tail to sew.
Hat:
- With black yarn, MR, 6 SC into ring. (6)
- INC in each stitch around. (12)
- Switch to green yarn. (SC, INC) repeat around. (18)
- (2 SC, INC) repeat around. (24)
- SC in each stitch for 5 rounds. FO and leave a tail to sew.
Beard:
- With orange yarn, attach to the front loops of the head.
- Crochet SC along the jawline, creating a fluffy beard. FO.
Assembly:
- Sew the head to the body.
- Attach the arms and legs securely.
- Sew the hat onto the head.
- Add the beard and secure the safety eyes.
In the end, holding a finished leprechaun amigurumi in your hands is always a satisfying moment. It’s more than just yarn shaped into a figure, it’s a small creation full of detail, personality, and care. And honestly, there’s something truly special about seeing that little character come together, knowing it was built stitch by stitch, with attention in every detail and a bit of joy woven into every part.
Note: Here is a pattern suggestion for you to create your own pattern. The end result may vary.