If you’re looking for a fun and adorable crochet project, learning how to crochet a mini bag with a bow is the perfect way to add charm and style to your accessories collection. This mini bag is ideal for holding small items like lip balm, coins, or keys, and the sweet bow detail gives it a unique, handmade touch.
Creating a how to crochet a mini bag with a bow is one of those projects that perfectly balances charm and practicality, and as an experienced crocheter, I can say it’s the kind of piece that never goes out of style. There’s something so satisfying about working on a small accessory that comes together relatively quickly but still allows you to explore texture, structure, and detail. From the very first stitches, you can already picture the finished bag—compact, elegant, and finished with that delicate bow that adds just the right touch of sweetness.
For a structured bag, I tend to reach for cotton yarn. It holds its shape beautifully, gives crisp stitch definition, and makes the bag feel sturdy despite its small size. If I’m aiming for a softer, more relaxed style, I might choose an acrylic blend, but I always keep in mind that the bag needs enough structure to maintain its form. Using a slightly smaller hook than recommended is one of my favorite tricks for this kind of project. It tightens the stitches, making the fabric dense and durable, which is exactly what you want for something that will hold small items.
Step-by-Step Guide on How to Crochet a Mini Bag with a Bow
In this tutorial on how to crochet a mini bag with a bow, we’ll guide you through every step to create this lovely piece. It’s a great project for beginners and also makes a wonderful handmade gift. You can easily customize the size, color, or even add a strap to turn it into a mini crossbody bag. Crocheting a mini bag with a bow is not only simple and fun but also allows you to create something stylish and useful. Whether you’re keeping it for yourself or giving it as a gift, this charming mini bag is sure to bring smiles!
The base of the mini bag is where everything begins, and I like to take my time here. Whether working in rounds or rows, the foundation needs to be even and well-shaped. This part sets the tone for the entire piece. As I build up the sides, I pay close attention to my tension, making sure each stitch is consistent. Over time, you develop a feel for this, and your hands almost instinctively adjust to keep the fabric smooth and balanced. Watching the bag take shape is always one of my favorite moments—it’s simple, but incredibly satisfying.
How to crochet a mini bag with a bow Pattern
As the body grows, I often think about the final proportions. A mini bag should be compact, but still functional. It needs to be large enough to hold essentials like keys, a small wallet, or lip balm, while still maintaining that delicate, miniature look. This balance is something you learn to judge with experience. Sometimes I’ll pause and gently shape the bag with my hands, checking that the sides are even and the structure feels right before continuing.
Handles or straps are another important element, and there are so many ways to approach them. For a more classic look, I might crochet short handles directly onto the bag, reinforcing them with tighter stitches for strength. If I want something more versatile, I’ll create a longer strap that can be worn crossbody. Either way, I always make sure the attachment points are secure, because even a small bag needs to be reliable. There’s nothing more disappointing than a beautiful piece that doesn’t hold up with use.
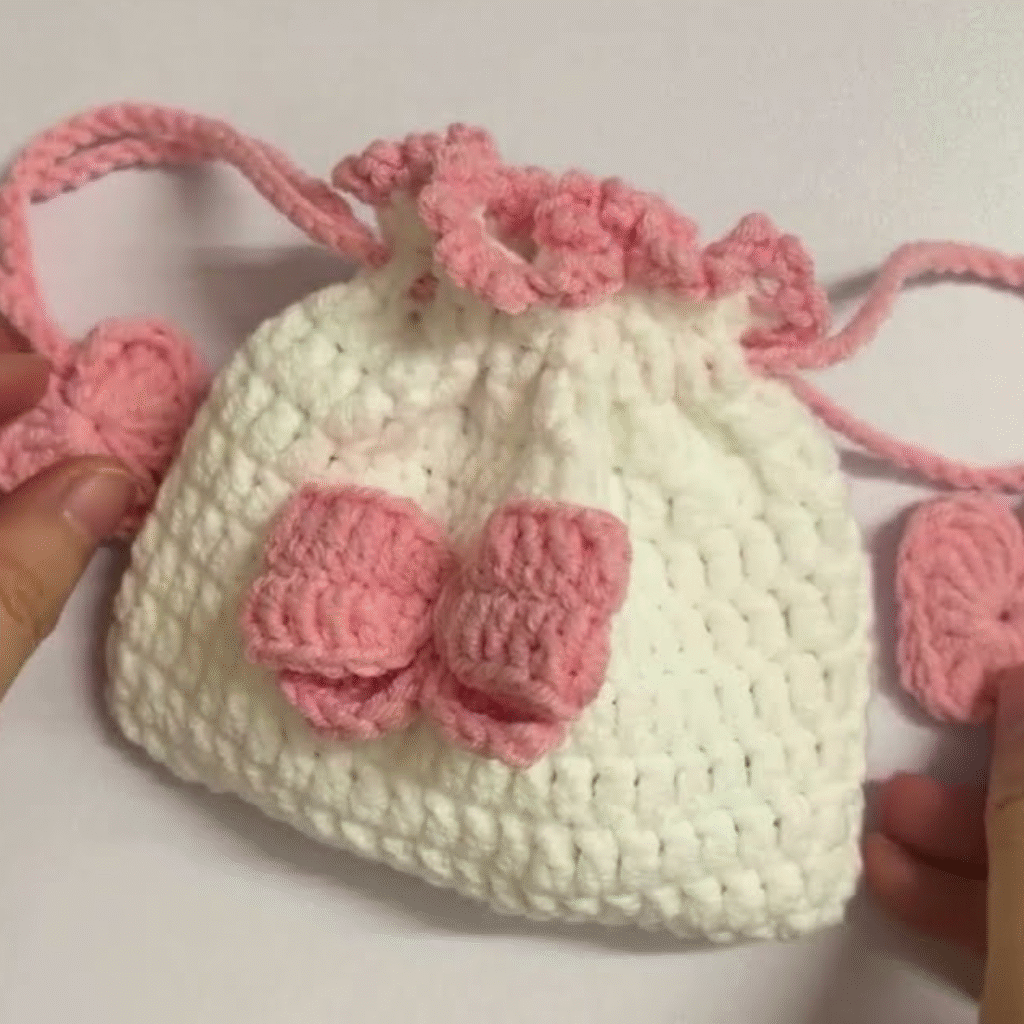
And then comes the bow, which is truly the highlight of this project. I always enjoy this part because it’s where the bag’s personality really shines. The bow can be as simple or as detailed as you like, but I tend to keep it elegant—clean lines, balanced loops, and a neat center wrap. Crocheting the bow separately allows for more control, and once it’s finished, I take a moment to position it on the bag before attaching it. Placement is everything. Centered for a classic look, slightly off to the side for something more playful—these small decisions make each piece unique.
Materials:
- Cotton yarn (2 colors: one for the bag, one for the bow)
- 3.5 mm crochet hook
- Yarn needle
- Scissors
- Button or snap (optional)
Abbreviations (US Terms):
- CH = Chain
- SC = Single Crochet
- HDC = Half Double Crochet
- SL ST = Slip Stitch
- FO = Fasten Off
Mini Bag Instructions:
- Base:
- CH 16
- Row 1: SC in 2nd CH from hook and in each across (15 SC). CH 1, turn.
- Rows 2–14: SC in each stitch across. CH 1, turn.
- FO and weave in ends.
- Forming the Bag:
- Fold your rectangle in half.
- SC around the sides and bottom to close, leaving the top open.
- FO and weave in ends.
- Bow:
- CH 10
- Row 1: HDC in 2nd CH from hook and across (9 HDC). CH 1, turn.
- Rows 2–4: HDC across.
- FO, leaving a long tail.
- Pinch the center and wrap yarn tightly around the middle to form the bow.
- Sew the bow to the front of the bag.
- Closure (Optional):
- Attach a small button or sew in a snap at the top.
Even after years of crocheting, projects like this continue to bring me joy. They remind me that crochet doesn’t always have to be complex to be meaningful. Sometimes, it’s the simple pieces—the ones made with care and attention—that end up being the most loved. A mini bag with a bow is exactly that kind of project. It’s elegant, practical, and full of personality, all created with just a hook, some yarn, and a bit of patience.
In the end, creating a how to crochet a mini bag with a bow is about enjoying the process as much as the result. It’s about taking the time to shape each stitch, to refine each detail, and to create something that feels both handmade and timeless. And when you finally hold the finished piece in your hands, there’s that familiar sense of satisfaction—knowing that something so charming came from your own skill and creativity.
Note: Here is a pattern suggestion for you to create your own pattern. The end result may vary.