How to crochet a cute shrek. Bring your favorite ogre to life with this crochet Shrek amigurumi pattern! Perfect for fans of the beloved green character, this pattern is beginner-friendly and a fun way to practice color changes, shaping, and details like ears and a vest. Whether you keep it for yourself or gift it, this mini Shrek will surely bring smiles!
Creating a How to crochet a cute shrek is one of those projects that instantly sparks a sense of fun and creativity, especially for those of us who love bringing recognizable characters to life through yarn. As an experienced crocheter, I can say that character-based amigurumi always come with their own unique challenges, but that’s exactly what makes them so rewarding. With Shrek, it’s all about capturing that balance between his iconic features and a softer, cuter interpretation that works beautifully in crochet form.
The first thing I always think about when starting a project like this is color. That distinctive green is essential, and choosing the right shade makes all the difference. I usually go for a soft, slightly muted green rather than something too bright, as it translates better into a handmade piece and gives it a more charming, approachable feel. For the clothing, earthy tones like brown, cream, and a touch of darker accents help ground the design and stay true to the character. I prefer using cotton yarn for amigurumi because it offers clean stitch definition, which is especially important when working on detailed features.
The head is undoubtedly the focal point, and with Shrek, it requires a bit more attention than a typical amigurumi shape. It starts as a rounded form, worked in continuous rounds, and this is where maintaining even tension becomes crucial. Over the years, I’ve learned to trust the rhythm of my stitches, but I still take care to count and check my work as I go. The head needs to be firm enough to hold its shape but still soft enough to allow for subtle shaping. I like to add stuffing gradually, adjusting as I go to keep everything smooth and evenly filled.
How to Crochet a Cute Shrek Step-by-Step
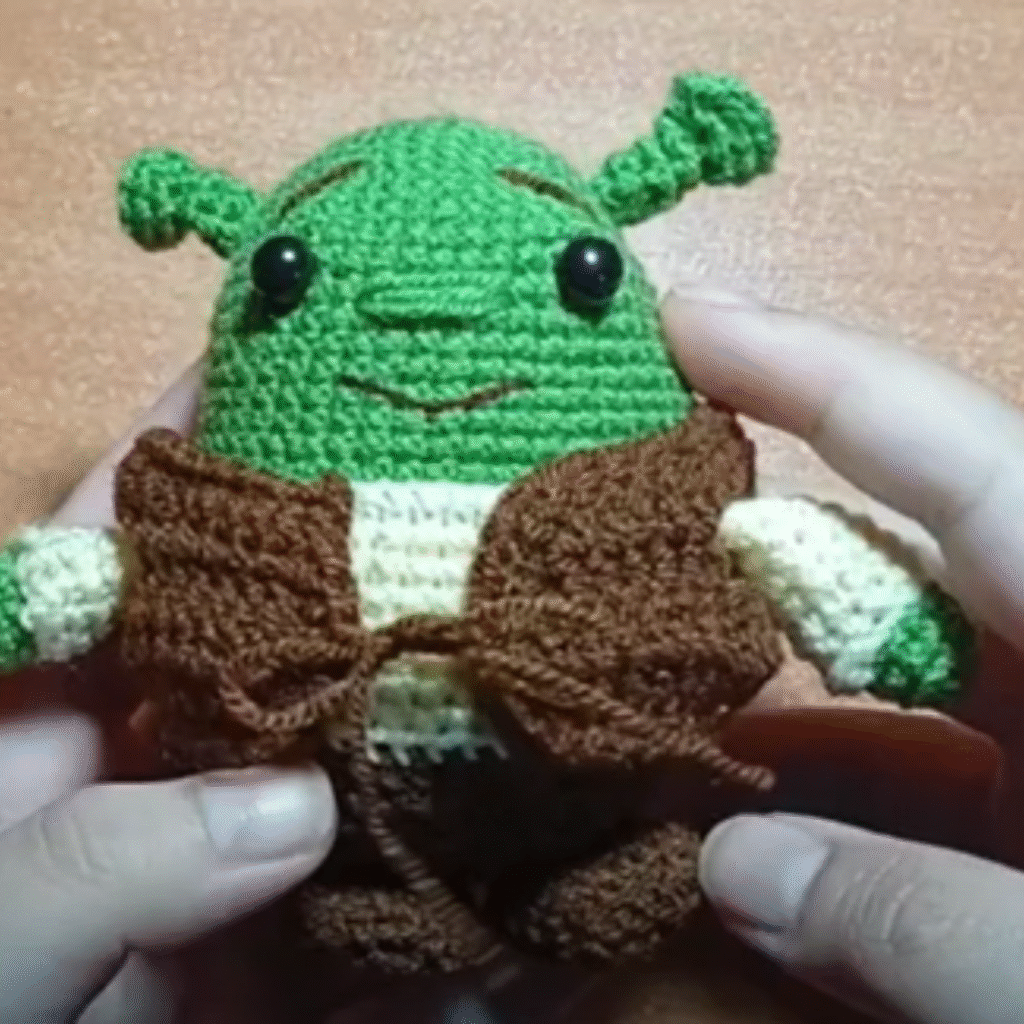
This How to crochet a cute Shrek guide takes you through each part of Shrek’s body, from his signature green head to his brown vest and friendly smile. The pattern is worked in separate pieces and sewn together for a clean and cuddly finish. Even with simple stitches, you can create an adorable version of everyone’s favorite ogre!
This crochet Shrek amigurumi project is a delightful way to blend creativity and fandom. Customize it with tiny accessories or pair it with other characters for a fun display. Get your yarn and hook ready for this swamp-tastic adventure!
How to crochet a cute shrek Pattern
One of the most distinctive features of Shrek is, of course, his ears. These are what really define the character, and they’re such a fun element to create. Instead of traditional ears, you’re working with those small, tubular shapes that extend from the sides of the head. I usually crochet them separately, shaping them carefully so they’re even and symmetrical. Attaching them is a step I never rush. I like to pin them in place first, adjusting the angle until it feels just right. When positioned correctly, they instantly transform the piece into something recognizable.
The face is where the personality truly comes through. For a “cute” version of Shrek, I tend to soften the features slightly. The eyes are usually a bit larger and more rounded, giving that gentle, friendly expression. Placement is everything here. Even a small shift can change the entire look, so I take my time to get it right. The nose, slightly rounded and prominent, is another key detail. I like to give it just enough dimension to stand out without overpowering the face. A simple stitched mouth can add a hint of expression, keeping the overall look soft and approachable.
Moving on to the body, the construction becomes a bit more straightforward, but proportions are still important. The body is typically smaller in comparison to the head, which enhances that cute, stylized effect. I keep the shape simple and well-structured, making sure it can support the head comfortably. The clothing is where things get interesting. Shrek’s outfit is simple, but adding those layers—like the vest and tunic—brings depth to the piece. Sometimes I incorporate color changes directly into the body, while other times I create small separate elements to attach. Both methods have their advantages, and I choose based on the level of detail I want.
Materials:
- DK weight yarn (Green, Cream, Brown, Black)
- 2.5 mm crochet hook
- Safety eyes (8 mm)
- Stitch marker
- Yarn needle
- Polyester stuffing
- Scissors
Abbreviations (US terms):
- MR = Magic Ring
- SC = Single Crochet
- INC = Increase (2 SC in one stitch)
- DEC = Decrease (SC 2 stitches together)
- CH = Chain
- SL ST = Slip Stitch
- FO = Fasten Off
Head & Body (Green Yarn):
- MR, 6 SC (6)
- INC in each stitch (12)
- (SC, INC) x6 (18)
- (2 SC, INC) x6 (24)
- (3 SC, INC) x6 (30)
6–12. SC around (30) - (3 SC, DEC) x6 (24)
- (2 SC, DEC) x6 (18)
- (SC, DEC) x6 (12)
Stuff firmly - DEC around (6), FO
Arms (Make 2):
- With cream yarn: MR, 6 SC
- (SC, INC) x3 (9)
3–6. SC around (9)
Change to green yarn
7–9. SC around (9), FO, stuff lightly
Legs (Make 2 – Brown Yarn):
- MR, 6 SC
- INC around (12)
3–6. SC around (12), FO
Vest (Brown Yarn):
- CH 26
- Row 1: SC in each CH (25)
3–5. SC in rows, creating a rectangle - CH 10 for each armhole, SC around to shape vest
- FO and tie front with chains if desired
Ears (Make 2 – Green Yarn):
- MR, 4 SC
2–3. SC around (4), FO and sew on top sides of head
Assembly:
- Sew arms to the sides
- Sew legs at the bottom
- Attach vest and stitch in place
- Sew ears
- Add safety eyes
- Embroider eyebrows and smile with brown yarn
What I love most about creating a crochet Shrek is how it combines technical skill with a sense of playfulness. It’s not just about following a pattern—it’s about interpreting a character and deciding how to translate it into yarn. Every choice, from color to stitch tension to feature placement, contributes to the final result. And even after making several, each one feels a little different, carrying its own unique personality.
There’s also something incredibly satisfying about seeing such a recognizable character take shape in your hands. It’s a reminder of how versatile crochet can be, how it allows you to create not just objects, but expressions and emotions. A cute Shrek amigurumi might be small, but it carries a lot of charm and character, making it a wonderful piece to display or gift.
In the end, creating a How to crochet a cute shrek is about enjoying the process as much as the result. It’s about taking your time, paying attention to the details, and allowing your creativity to guide you. And when you finally finish, you’re left with a piece that feels both familiar and uniquely yours, shaped by your hands and your experience as a crocheter.