Craft your own adorable Hello Kitty Amigurumi with this easy and fun crochet pattern. Perfect as a gift or a collectible, this project will delight Hello Kitty fans and crochet lovers alike. Let’s bring this iconic character to life with yarn and creativity!
Creating a Hello Kitty Amigurumi is one of those projects that feels both nostalgic and deeply satisfying, especially when you’ve spent years refining your crochet skills. There’s something about bringing such a beloved and recognizable character to life with yarn that never loses its magic. Even though the design itself is relatively simple, the charm lies in the details, and as an experienced crocheter, I’ve learned that those small details are exactly what make the finished piece truly special.
Step-by-Step Hello Kitty Amigurumi Crochet Pattern
Dive into this detailed tutorial to create your very own Hello Kitty Amigurumi, featuring her signature bow and charming look.
When I begin a Hello Kitty amigurumi, the first thing I think about is yarn choice. Because this character relies on clean lines and soft shaping, I usually reach for a smooth cotton yarn. It provides excellent stitch definition and helps maintain that neat, polished look that’s so important for amigurumi. The classic white is, of course, essential for the main body, and I always make sure to pair it with a rich black for the facial features and a bright, cheerful color—often red or pink—for the bow. The contrast between these colors is what gives Hello Kitty her iconic appearance.
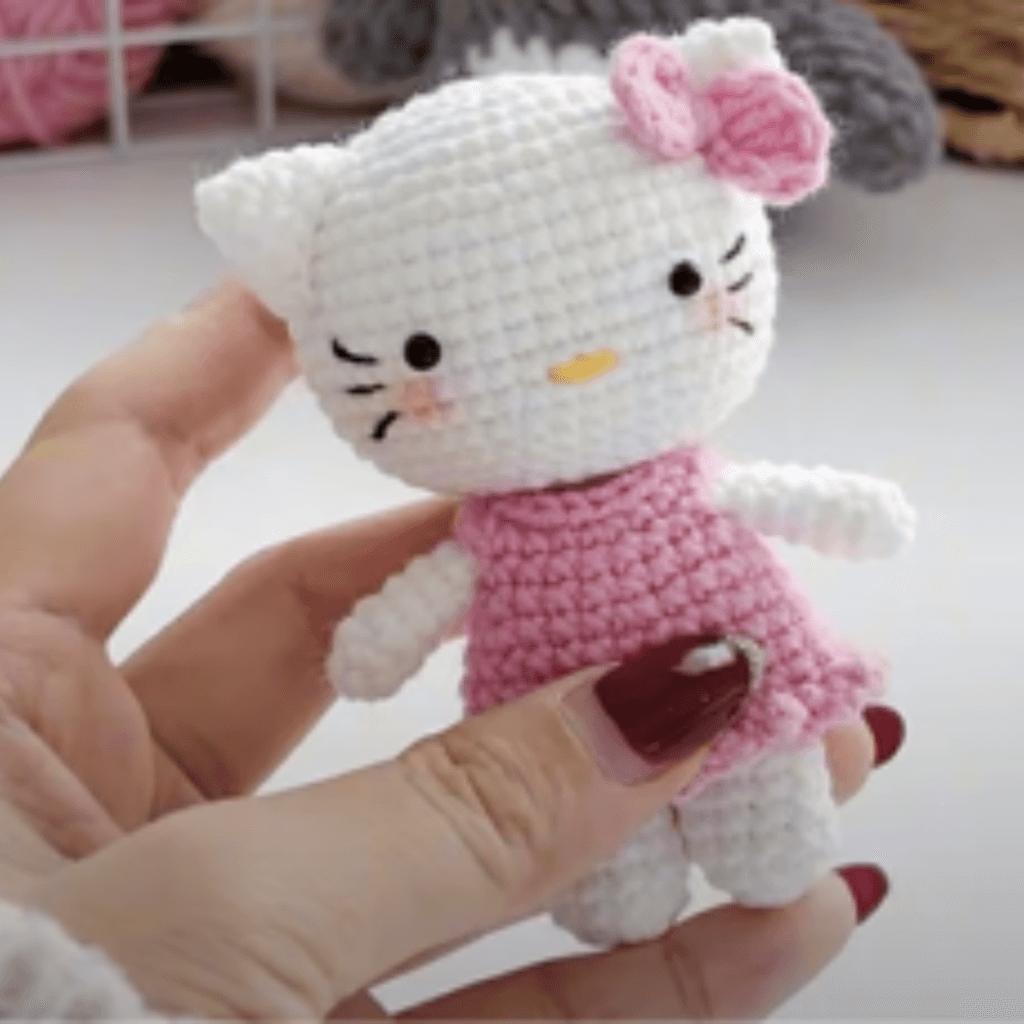
Hello Kitty Amigurumi Crochet Pattern
Hook size is another key factor. I tend to go smaller than the recommended size for the yarn, creating tight, compact stitches. This not only keeps the stuffing from showing through but also gives the piece a firm structure. Over time, you develop a sense for how tight your stitches should be, and for a project like this, that consistency really elevates the final result.
The head is usually the starting point, and it’s definitely the most important part of the project. Hello Kitty’s head has a distinct shape—rounded, but slightly wider than it is tall—and achieving that proportion is essential. As I work in continuous rounds, I pay close attention to my increases and stitch placement. I like to add stuffing gradually, shaping it with my hands as I go to ensure a smooth, even surface. This step is something I never rush, because the head sets the tone for the entire piece.
One of the defining features of Hello Kitty is her ears, and I always take care to shape them properly. They’re small and rounded, positioned symmetrically on the top of the head. Whether they’re crocheted as part of the head or attached separately, their placement needs to be precise. Even a slight shift can change the overall look, so I often pin them in place before securing them permanently.
The face is where the character truly comes to life, and it’s also where subtlety is key. Hello Kitty’s features are minimal—just two small eyes, a tiny oval nose, and her signature whiskers—but each element needs to be placed with care. I usually embroider these details using fine thread, taking my time to ensure everything is balanced and aligned. The simplicity of the face means there’s no room for error, but when done right, it creates that unmistakable expression.
The body is typically smaller and more understated, serving as a base for the head. I like to keep it slightly rounded and proportional, making sure it supports the overall shape without drawing too much attention. The arms and legs are simple as well, often small and softly shaped, adding to that classic amigurumi style. Attaching these parts is another step where I slow down, ensuring everything is aligned and secure.
Materials:
- Yarn:
- White for the body and head
- Red for the bow and dress
- Yellow for the nose
- Black for whiskers
- Hook: 2.5 mm crochet hook
- Safety eyes: 6 mm
- Polyfill stuffing
- Yarn needle
Abbreviations:
- MR: Magic ring
- sc: Single crochet
- inc: Increase (2 sc in the same stitch)
- dec: Decrease (single crochet two stitches together)
- sl st: Slip stitch
Pattern Instructions:
Head:
- Round 1: MR, 6 sc into the ring. (6)
- Round 2: Inc in each stitch around. (12)
- Round 3: [1 sc, inc] repeat around. (18)
- Round 4: [2 sc, inc] repeat around. (24)
- Rounds 5-9: Sc in each stitch around. (24)
- Round 10: [2 sc, dec] repeat around. (18)
- Round 11: [1 sc, dec] repeat around. (12)
- Stuff the head firmly, then fasten off.
Ears (Make 2):
- Round 1: MR, 4 sc into the ring. (4)
- Round 2: [1 sc, inc] repeat around. (6)
- Fasten off and sew onto the head.
Body:
- Round 1: MR, 6 sc into the ring. (6)
- Round 2: Inc in each stitch around. (12)
- Round 3: [1 sc, inc] repeat around. (18)
- Rounds 4-7: Sc in each stitch around. (18)
- Round 8: [1 sc, dec] repeat around. (12)
- Stuff the body and fasten off.
Arms (Make 2):
- Round 1: MR, 6 sc into the ring. (6)
- Rounds 2-4: Sc in each stitch around. (6)
- Fasten off and sew to the body.
Legs (Make 2):
- Round 1: MR, 6 sc into the ring. (6)
- Rounds 2-3: Sc in each stitch around. (6)
- Fasten off and attach to the body.
Bow:
- Row 1: Chain 7, sc in each stitch across. (6)
- Rows 2-3: Sc in each stitch. (6)
- Wrap the yarn around the middle to shape the bow, then sew it to the head.
Assembly:
- Sew the head onto the body.
- Attach the safety eyes and embroider the nose with yellow yarn.
- Embroider whiskers on each side of the face with black thread.
Final Thoughts
What I love most about creating a Hello Kitty amigurumi is how it combines simplicity with precision. It’s not a complicated design, but it requires attention to detail and a steady hand. Each time I make one, it feels slightly different, shaped by the choices I make along the way—whether it’s the yarn, the tension, or the placement of the features.
Even after years of crocheting, projects like this continue to bring me joy. They remind me that crochet is not just about technique, but about creativity and expression. Taking a familiar character and recreating it with your own hands is a unique kind of satisfaction, one that never really fades.
In the end, creating a Hello Kitty Amigurumi is about more than just making a toy. It’s about capturing a feeling, a sense of nostalgia, and translating it into something tangible. It’s about enjoying the process, paying attention to the details, and taking pride in the finished piece. And when you finally hold it in your hands, you can see all that care and effort reflected in every stitch, making it a truly special creation.
Your Hello Kitty Amigurumi is now complete! This charming project makes a perfect gift or collectible for fans of this iconic character. Enjoy showing off your crochet skills with this adorable creation!