Halloween Sorcerer Mickey Amigurumi. Halloween is a magical time to unleash your creativity, and there’s nothing better than creating your own Sorcerer Mickey Amigurumi to decorate or give as a gift. With some simple materials and a bit of patience, you can make an adorable crochet doll that will delight everyone.
As a crocheter with years of experience, I can say with absolute certainty that some projects carry a special kind of magic — and a Halloween Sorcerer Mickey amigurumi is one of them. From the moment I pick up my hook and begin shaping those first stitches, I already know I’m about to create something truly enchanting. It’s playful, nostalgic, and full of personality, all while offering just the right amount of technical challenge to keep things interesting.
This isn’t just another amigurumi piece. It’s a character — full of charm, expression, and storytelling. Every detail, from the iconic hat to the tiny embroidered features, brings it closer to life. And honestly, that transformation is one of the most rewarding parts of crochet.
When you’ve been crocheting for a long time, you start to appreciate projects that go beyond simple shapes. A character like Halloween Sorcerer Mickey Amigurumi requires intention — not just in construction, but in capturing personality.
What I love most about this kind of project, Halloween Sorcerer Mickey Amigurumi, is how it blends structure and emotion. You’re not just forming a body; you’re shaping something recognizable, something that sparks joy the moment someone sees it.
And when it comes to a Halloween-inspired version, there’s an extra layer of fun. The magical, slightly mysterious aesthetic fits perfectly with the season, making it both decorative and collectible.
Step-by-Step Guide to Making the Halloween Sorcerer Mickey Amigurumi
Color selection is absolutely essential here. Halloween Sorcerer Mickey Amigurumi This is one of those projects where precision matters.
I usually work with:
- Deep navy or royal blue for the sorcerer robe
- Bright red for the base garment
- Golden yellow accents for stars and details
- Black, white, and skin tones for the face and ears
As an experienced crocheter, I always choose yarns with good stitch definition, typically cotton or high-quality acrylic. You want those stitches to be clean and consistent, especially when working on small details.
A 2.0 mm to 2.5 mm hook is usually ideal for amigurumi like this — it keeps the stitches tight and prevents gaps in the fabric.
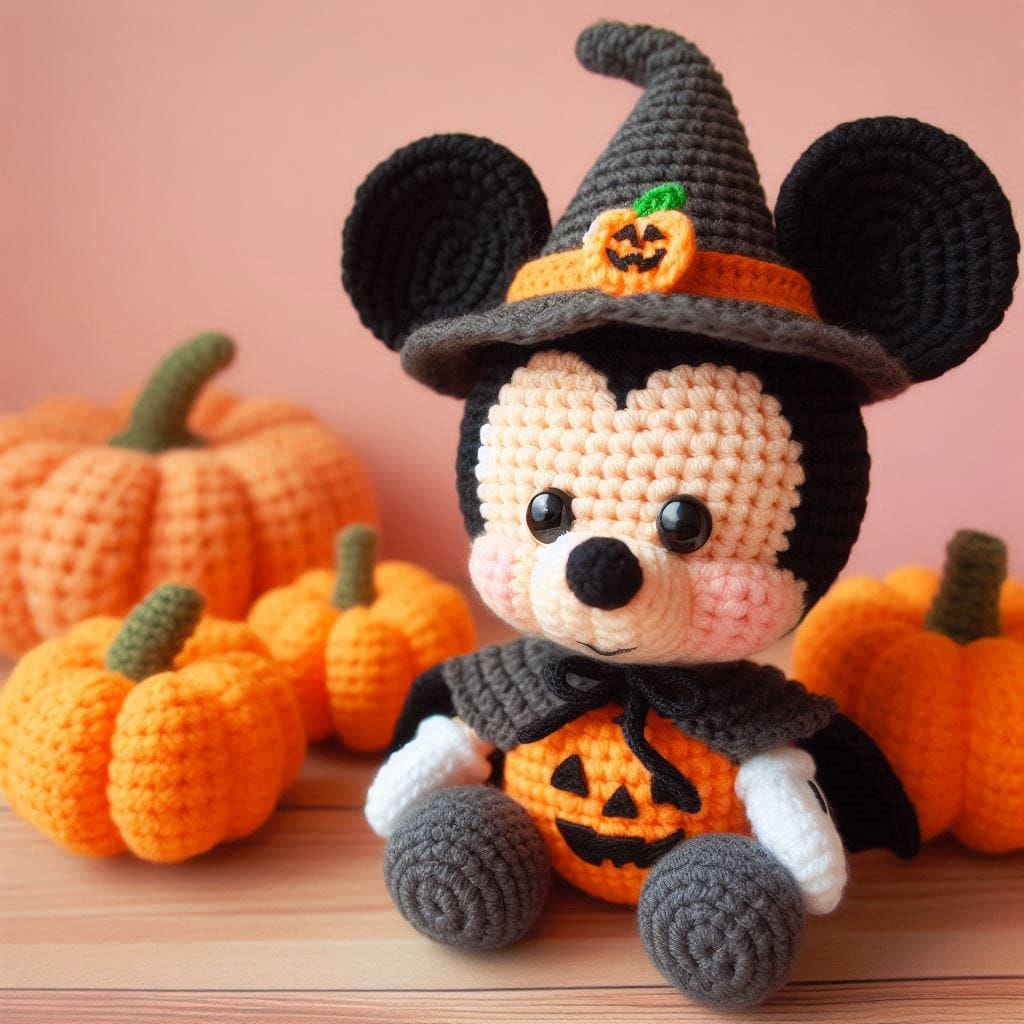
To start making your Sorcerer Mickey Amigurumi, you’ll need the following materials: black, orange, gray, and white crochet threads, a crochet hook, stuffing fiber, safety eyes, and a tapestry needle to sew the parts together.
Follow these steps, and you’ll have your Halloween Sorcerer Mickey Amigurumi ready in no time:
- Head and Body:
- Use the black thread to make a magic ring and start increasing until you form the head. Switch to the orange thread when starting the body.
- Continue increasing and then decreasing to create the rounded shape of the body.
- Ears:
- Make two ears with the black thread, following a circular pattern until the desired size is achieved.
- Arms and Legs:
- With the black thread, start with the feet, continuing to the legs and arms, alternating with the white thread for the hands.
- Sorcerer’s Hat:
- Using the gray thread, make a cone, starting with a few chains and gradually increasing. Add details like an orange ribbon and a small pumpkin.
- Final Details:
- Sew all the parts together and add the safety eyes. If desired, add blush to Mickey’s cheeks.
After years of crocheting, I’ve found that character amigurumi like this one keeps the craft exciting. It challenges your technique, your attention to detail, and your creativity — all at once.
It’s not the fastest project, and it’s not the simplest. But it’s deeply satisfying. Every step feels intentional, and the finished piece feels like something truly special.
Finalizing Your Halloween Sorcerer Mickey Amigurumi
After following all the steps, your Sorcerer Mickey Amigurumi will be ready to decorate your home for Halloween or become a special gift. Attention to detail makes all the difference, and with a bit of practice, you can create many other themed versions.
A Halloween Sorcerer Mickey amigurumi is more than just a crochet project — it’s a small work of art. It combines structure, color, and personality into something that feels alive in your hands.
And that’s what keeps me coming back to projects like this. The ability to take yarn and turn it into something expressive, recognizable, and full of charm.
Because at the end of the day, crochet isn’t just about making things — it’s about creating moments of magic, one stitch at a time.
And even after completing the main structure, there’s still something deeply satisfying about refining all those final details that truly make the piece stand out, especially in a project like a Halloween Sorcerer Mickey amigurumi where every small element contributes to the overall magic. As an experienced crocheter, I’ve learned that this finishing phase is just as important as the construction itself. This is when I step back, observe the proportions, adjust anything that feels slightly off, and bring harmony to the entire piece. Sometimes it’s as simple as repositioning the ears a few millimeters higher or angling the hat just slightly to give it more movement and personality.
Other times, I might reinforce certain stitches, especially around high-stress areas like the neck or where the limbs are attached, to ensure the amigurumi remains durable over time. I also like to lightly shape the stuffing inside, distributing it evenly so the figure feels balanced and firm without being stiff. If I want to elevate the piece even further, I might add subtle shading using soft yarn or embroidery techniques—just a hint around the edges of the robe or beneath the hat to create depth.
These are small, almost invisible touches, but they make a noticeable difference in the final result. Halloween Sorcerer Mickey Amigurumi Another detail I never overlook is weaving in the ends properly; I take the time to secure them deeply within the stitches so nothing comes loose with handling.
When everything is assembled, I often give the piece a gentle steam block from a safe distance, just enough to relax the fibers and smooth out any tension inconsistencies, especially if I’ve used cotton yarn. And then comes my favorite moment: placing the finished Sorcerer Mickey upright and really looking at it. There’s something incredibly rewarding about seeing how far it’s come—from a handful of yarn and loose stitches to a fully formed character with presence and charm. It’s in that moment that I’m reminded why I continue to crochet after so many years.
Halloween Sorcerer Mickey Amigurumi. Projects like this are not just about technique or outcome; they’re about the experience of creating something with intention, patience, and care. And when someone picks it up, smiles, or even feels a sense of nostalgia or wonder, that’s when the project truly comes to life. This kind of amigurumi becomes more than decoration—it becomes a keepsake, something that can be displayed year after year during the Halloween season, or even kept out as a beloved character all year long.
It’s the kind of piece that invites conversation, that people notice, that carries a bit of your time and energy within it. And honestly, that’s what I value most in crochet: the ability to turn simple materials into something meaningful, expressive, and lasting.