Creating a fashionable amigurumi witch keychain is the perfect project for crochet lovers who enjoy adding a stylish twist to their accessories. This trendy little witch is not only a fun Halloween charm but also a chic addition to your everyday keychain. With some creativity and a few simple crochet techniques, you can craft a witch that’s both spooky and stylish.
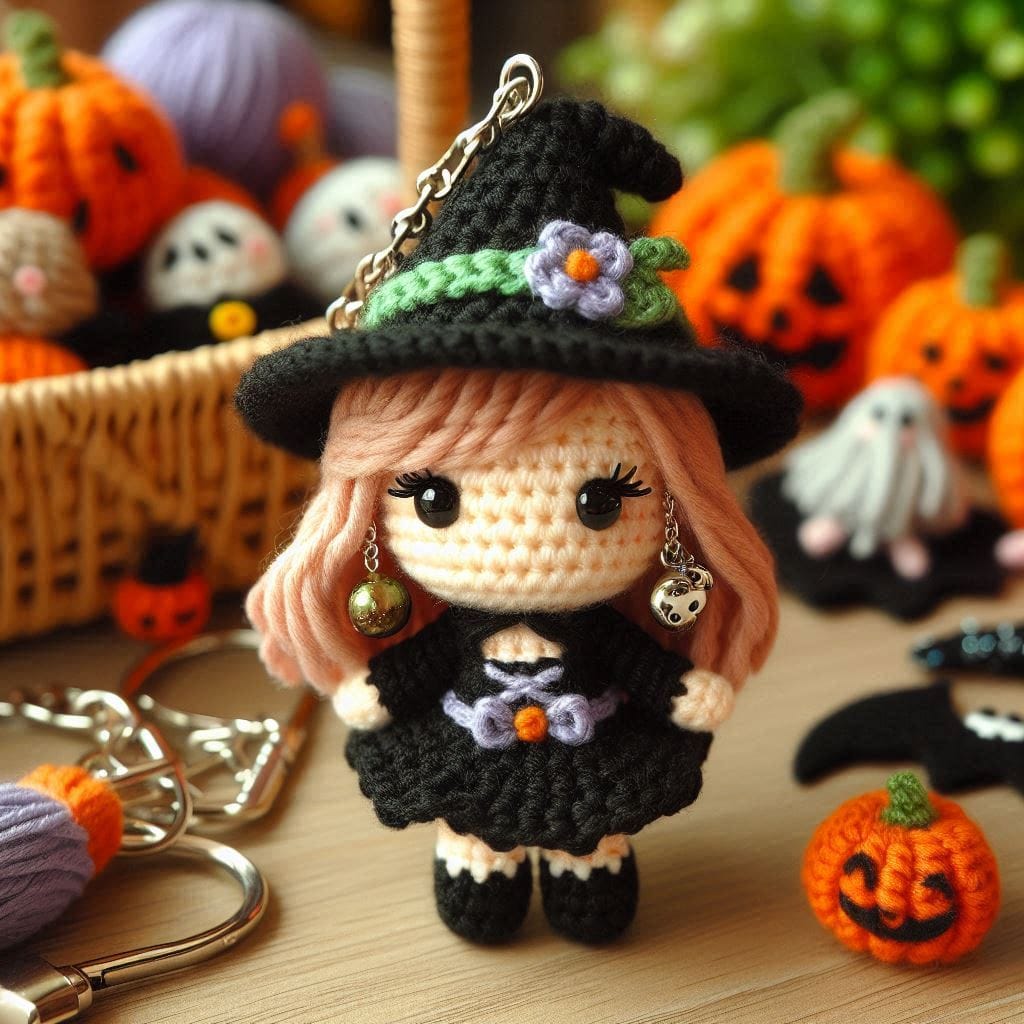
Okay friends, let me tell you — this little witch keychain has completely stolen my heart. As a crocheter who loves cute, slightly spooky, and totally charming projects, this fashionable amigurumi witch was just the thing I didn’t know I needed. She’s small, stylish, a little magical, and full of personality!
I originally started making her as a quick Halloween project — something cute and seasonal to hang on my bag or gift to a fellow yarn-loving friend. But by the time I finished stitching her tiny dress and shaping her little pointed hat, I knew she was going to be more than just a one-off. I’ve already made three and have plans for a whole coven!
How to Make a Fashionable Amigurumi Witch Keychain
Making a fashionable amigurumi witch keychain is an enjoyable project that allows you to express your unique sense of style. You can experiment with different colors, accessories, and details to make your witch truly stand out.
What I adore most about this project is how much charm and detail you can pack into such a tiny piece. She’s just the right size to fit in your palm — or to dangle from your backpack, purse, or car keys — but still detailed enough to have her own little style.
Her cute face, her tiny accessories, and her fashionable little outfit… it all just comes together so perfectly! You can get creative with the colors too. I went for a classic purple and black look for one, then made a forest green version with copper accents, and even one in pastel pinks and silver for a soft, dreamy vibe. The possibilities are endless, and each one takes on a unique personality depending on your yarn choices.
Instructions for a Fashionable Amigurumi Witch Keychain
What’s really fun about this witch keychain is how customizable it is. You can change the hat’s shape, switch out the boots for shoes, add a cape, or even give her a mini broomstick made from twine and a toothpick.
Want her to be a modern witch? Give her a tiny pair of sunglasses or embroider a crescent moon on her dress. Going for a woodland vibe? Try deep greens, browns, and even a few leaf-shaped buttons. I’ve even seen other crafters turn her into an elf or fairy by tweaking just a few elements!
Adding keychain hardware at the end is easy — just attach a jump ring to the top of the hat or stitch a small loop into her head. She instantly becomes portable magic.
- Materials Needed:
- Yarn in black, purple, green, and other accent colors of your choice
- Crochet hook (appropriate size for your yarn)
- Fiberfill stuffing
- Tapestry needle
- Small safety eyes or black embroidery thread for the eyes
- Keychain ring
- Embellishments (e.g., tiny beads, sequins, or a mini broomstick)
- Scissors
- Step-by-Step Instructions:
- Head:
- Start with a magic ring using skin-tone yarn.
- Round 1: 6 single crochets (sc) into the magic ring.
- Round 2: 2 sc in each stitch around (12 stitches).
- Round 3: 1 sc in next stitch, 2 sc in next stitch around (18 stitches).
- Rounds 4-7: Sc in each stitch around (18 stitches).
- Round 8: 1 sc in next stitch, decrease around (12 stitches).
- Insert safety eyes between Rounds 5 and 6, then stuff the head.
- Round 9: Decrease around, close the opening, and fasten off.
- Body:
- Attach the yarn color for the body (e.g., purple or green).
- Rounds 1-2: Sc in each stitch around (12 stitches).
- Round 3: 1 sc in next stitch, 2 sc in next stitch around (18 stitches).
- Rounds 4-6: Sc in each stitch around (18 stitches).
- Stuff the body lightly, then decrease around to close the opening. Fasten off.
- Hat:
- Start with a magic ring using black yarn.
- Round 1: 6 sc into the magic ring.
- Round 2: 2 sc in each stitch around (12 stitches).
- Round 3: 1 sc in next stitch, 2 sc in next stitch around (18 stitches).
- Round 4: Work in back loops only, sc in each stitch around.
- Rounds 5-6: Sc in each stitch around.
- Round 7: 1 sc in next stitch, decrease around.
- Add a stylish detail like a small bow or a belt made of contrasting yarn.
- Fasten off and sew the hat to the head.
- Accessories:
- Create a tiny cape or scarf using a contrasting yarn color.
- Add embellishments like tiny beads for earrings or a necklace.
- Attach the keychain ring to the top of the witch’s hat.
- Assembly:
- Weave in all loose ends and secure.
- Add any final touches, like a mini broomstick or a small handbag.
- Head:
- Final Touches:
- Personalize your fashionable witch with unique colors and accessories, making it a reflection of your style.
Conclusion
Crocheting this fashionable amigurumi witch keychain reminded me why I love this craft so much. In just a few hours and with a handful of materials, I created something full of charm, style, and character. It’s not just about making a doll — it’s about bringing a tiny bit of joy, magic, and whimsy into the everyday.
If you’re looking for a crochet project that’s fast, fun, and fabulous — this is it. And trust me, once you make one, you won’t want to stop. I’m already planning themed witches for every season: a Christmas witch with a red hat and snowflake dress, a springtime witch with flower details, and maybe even a seaside witch with shell buttons and a teal robe.
So go ahead, grab your hook, pick your yarn, and start stitching your own fashionable little spellcaster. Let her bring a bit of enchantment wherever she goes.
Crafting a fashionable amigurumi witch keychain is a delightful way to combine creativity and style. This trendy charm is perfect for adding a touch of magic to your keys or for gifting to someone special. Whether you make it as a Halloween accessory or a year-round charm, this stylish little witch is sure to turn heads!