Easter Basket Crochet Pattern. Decorate your Easter table with a charming Easter Basket Crochet Pattern! This project is perfect for holding Easter eggs and adding a festive touch. Even after years of working with yarn, I find myself coming back to this pattern every spring because it brings together structure, texture, and purpose in such a satisfying way. It’s not just a decorative piece, it’s something functional, something that holds little treasures, treats, and memories.
I usually begin with the base, because that’s where the strength of the basket really comes from. A sturdy foundation is essential, so I often work tightly in continuous rounds, starting with a magic ring and building outward with evenly spaced increases. This creates a flat, solid circle that will support the sides. I always use a smaller hook than recommended, especially for baskets, because tight stitches are what give the structure its firmness. If the stitches are too loose, the basket won’t hold its shape properly, and that’s something I’ve learned through experience.
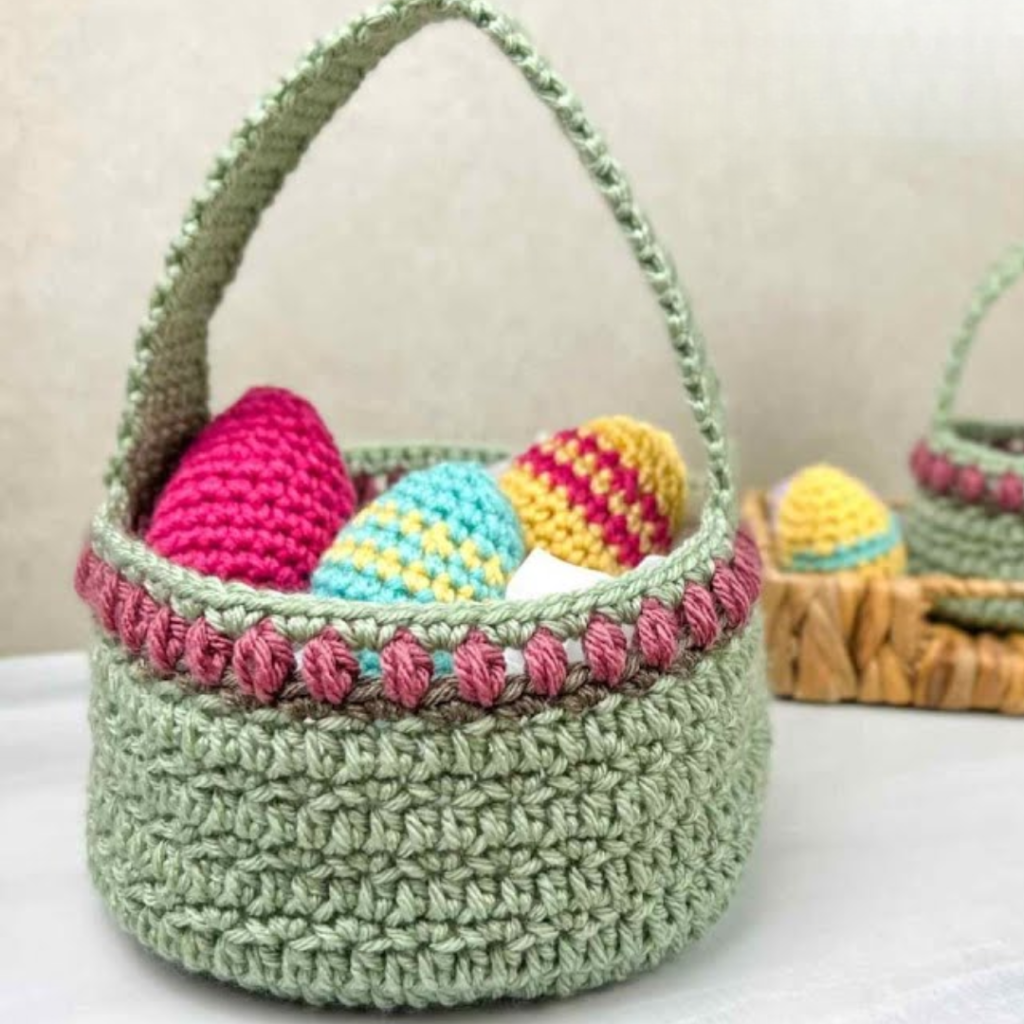
How to Make a Easter Basket Crochet Pattern
This easy and fun crochet pattern will guide you in creating a beautiful flower-shaped egg holder. It’s a great project for both beginners and experienced crocheters! Now that your Easter Basket Crochet Pattern is complete, enjoy displaying it as part of your Easter décor! Experiment with colors to create a personalized look.
The choice of yarn is just as important as the technique. For a basket, I almost always reach for cotton yarn or a cotton blend. It has the strength and durability needed to keep the basket upright, even when filled. The texture also adds a beautiful, defined look to each stitch, which enhances the overall appearance. When it comes to color, this is where the Easter theme really comes alive. Soft pastels like lavender, mint green, baby blue, and pale yellow create a gentle, seasonal feel, while brighter tones can make the basket feel more playful and vibrant.
Once the base is complete, I begin building the sides by working without increases. This is where the basket starts to take shape, rising steadily with each round. I pay close attention to keeping the stitches even and the tension consistent, because any variation can affect how straight the sides stand. Sometimes I like to work in the back loop only for the first round of the sides, which creates a subtle edge and helps define the base from the body of the basket. It’s a small detail, but it adds a nice structural element.
As the sides grow taller, I start thinking about the final height and proportion. A good Easter basket should feel balanced, not too shallow, but not overly deep either. I like it to be just tall enough to hold eggs or small gifts comfortably. Throughout this process, I occasionally pause to shape the basket gently with my hands, making sure the sides remain straight and even.
Easter Basket Crochet Pattern – Free Pattern
The handle is one of my favorite parts to create, because it brings both function and character to the basket. There are a few ways to approach it, but I often crochet it separately as a long strip, working tight, sturdy stitches so it can support the weight of whatever the basket will carry. Once it’s the right length, I attach it securely to opposite sides, reinforcing the stitches carefully. A strong handle makes all the difference, especially if the basket is meant to be used by children during Easter celebrations.
Sometimes I like to incorporate the handle directly into the basket by chaining across the top and reinforcing it with additional rows. This creates a seamless look and feels very satisfying to complete. Whichever method I choose, I always test the strength by gently pulling on the handle to make sure it feels secure and balanced.
What I love most about this project is the opportunity for decoration. A simple basket is beautiful on its own, but adding small details can make it truly special. I might crochet tiny flowers and attach them around the rim, or embroider subtle patterns along the sides. Sometimes I’ll add a small bunny appliqué or even a bow for a softer, more whimsical touch. These details don’t need to be complicated, but they bring personality and make each basket unique.
Materials:
- Worsted weight yarn in green (base), pink (flowers), and yellow (accents)
- 3.5 mm crochet hook
- Scissors
- Tapestry needle
Abbreviations (US Terms):
- MR – Magic Ring
- SC – Single Crochet
- HDC – Half Double Crochet
- DC – Double Crochet
- TR – Treble Crochet
- INC – Increase (2 SC in one stitch)
- SL ST – Slip Stitch
- CH – Chain
- FO – Fasten Off
Base:
- MR, 6 SC (6)
- INC around (12)
- (SC, INC) * 6 (18)
- (2 SC, INC) * 6 (24)
- (3 SC, INC) * 6 (30)
- (4 SC, INC) * 6 (36)
7-10. SC around (36)
FO, weave the ends.
Flower Petals (Make 6-8):
- Attach pink yarn to the top edge of the base, CH 3.
- Into the same stitch: (1 DC, 2 TR, 1 DC, CH 3, SL ST).
- Skip 2 stitches, SL ST in the next. Repeat around to create petals.
FO, weave the ends.
Assembly:
- Adjust the petals to sit evenly around the edge.
- Use different yarn colors to match your Easter theme.
What makes the Easter basket so special to me is not just the process of making it, but what it represents. It’s a piece that becomes part of a moment, something that holds treats, gifts, and small surprises. It carries a sense of tradition, but also the warmth of being handmade. Each stitch feels intentional, contributing to something that will be used and appreciated.
After years of crocheting, I’ve come to value projects like this for their balance of simplicity and purpose. They’re not overly complicated, but they require attention and care to achieve a beautiful result. They remind me that crochet is not just about creating objects, but about creating experiences.
In the end, a crochet Easter basket becomes more than just a container. It becomes part of a celebration, a piece filled with color, texture, and meaning. Whether it’s used year after year or given as a gift, it holds that unmistakable handmade charm. And honestly, there’s something deeply satisfying about finishing a basket like this and knowing that every stitch contributes to something that will bring joy, not just in how it looks, but in how it’s used and shared.
Enjoy your handmade Easter Basket Crochet Pattern and brighten up your holiday décor!