DIY Amigurumi Witch Keychain Crochet. Create your very own cute amigurumi witch keychain with this easy-to-follow crochet pattern. Perfect for Halloween or as a charming accessory for fans of mystical and esoteric themes, this amigurumi project is suitable for both beginners and experienced crocheters alike. With a few simple materials and basic crochet techniques, you can craft a delightful witch keychain that will add a magical touch to your keys or bag.
If you love cute and spooky projects, this DIY Amigurumi Witch Keychain is going to steal your heart (and maybe cast a little crochet spell on you too)! I had so much fun making this little witch — she’s tiny, magical, and the perfect mix of charm and mischief. I mean, who doesn’t want a mini witch riding along on their keychain, bag, or backpack?
Step-by-Step Guide to Crafting Your DIY Amigurumi Witch Keychain Crochet
Whether you’re an avid crocheter or just starting out, this amigurumi witch keychain pattern is a fun and rewarding project. Not only will it allow you to create a charming accessory, but it will also add a personal, handmade touch to your collection. Enjoy the process of bringing this magical little witch to life and take pride in your finished product!
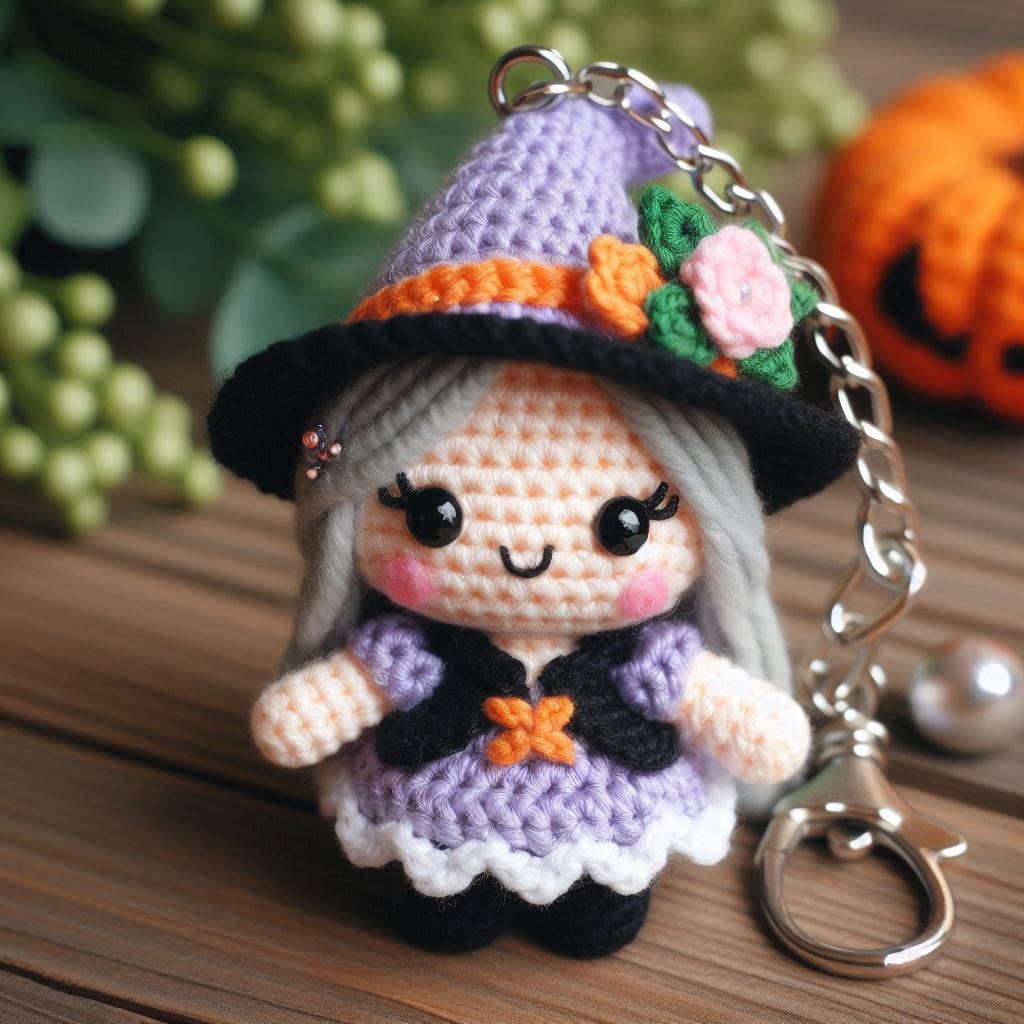
This is one of those quick, satisfying projects that uses just a bit of yarn, so it’s great for stash-busting. I used a mix of black, purple, and a touch of orange, but you can totally personalize your mini witch with whatever colors call to you — green skin? pink hair? go for it!
The pattern DIY Amigurumi Witch Keychain Crochet is beginner-friendly if you’re already comfortable with basic amigurumi techniques like single crochet, increasing, and decreasing. The body, head, and hat are worked separately and then sewn together, and you can add tiny details like a broomstick, cape, or even a glittery star on her hat if you’re feeling fancy.
DIY Amigurumi Witch Keychain Crochet Pattern: Detailed Recipe:
She’s only a few inches tall when finished, which makes her perfect for gifting during Halloween, adding to spooky decor, or even selling at craft fairs. I’ve made a few for friends and they loved them!
DIY Amigurumi Witch Keychain Crochet. There’s just something so cozy about crocheting tiny magical creatures. This little witch may be small, but she’s packed with personality — and making her is a total treat (no tricks here!).
So grab your hook, some scrap yarn, and get ready to conjure up a little handmade magic. This keychain is such a fun way to bring a bit of spooky sweetness to your crochet time!
- Materials Needed:
- Yarn in purple, black, orange, green, and pink
- Crochet hook (size appropriate for your yarn)
- Fiberfill stuffing
- Safety eyes (or embroidery thread for eyes)
- Stitch marker
- Yarn needle
- Keychain ring
- Scissors
- Step 1: Crochet the Head and Body
- Start with the head using a magic ring and the main color of your choice (light peach or skin tone).
- Round 1: 6 sc in magic ring.
- Round 2: 2 sc in each stitch around (12).
- Continue increasing in the subsequent rounds until you reach the desired head size.
- Crochet the body in a similar manner, using purple for the dress, and attach it to the head.
- Step 2: Create the Arms and Legs
- Crochet two small arms and legs in your chosen colors. Attach them securely to the body.
- Step 3: Craft the Hat
- Using black yarn, create a wide-brimmed witch hat, starting from the top and working your way down to create the brim. Add an orange band and a green flower detail.
- Step 4: Assemble the Keychain
- Attach safety eyes or embroider the eyes and facial features.
- Stuff the amigurumi with fiberfill and sew all parts together.
- Add the keychain ring to the top of the witch’s hat.
- Step 5: Final Touches
- Secure any loose ends and shape your amigurumi witch.
- Your amigurumi witch keychain is now ready to use or gift!
One of the things I love most about this DIY Amigurumi Witch Keychain Crochet is how portable and beginner-friendly it is. Whether you’re crocheting on the couch, in a waiting room, or riding the bus, this little project fits right into a small pouch and travels with you. I always carry one in my bag with a few scrap yarns and a 2.5mm hook — it’s like having a bit of magic on hand wherever I go!
And don’t get me started on the possibilities for customization! You can give her a tiny wand, add embroidery to her dress, or even stitch on a crescent moon or skull motif. One time, I made a pastel goth version with lavender hair and a mint green hat — and it turned out absolutely adorable! It’s the kind of project that really lets your creativity shine.
The best part? She works up quickly — I can usually make one in an evening while watching a cozy series or listening to a podcast. If you like making items to sell, she’s a great little item for Halloween markets or Etsy shops. People love unique, handmade keychains — especially when they’re this cute!
And if you’re thinking about gifting one, she makes a great “boo basket” surprise, party favor, or little treat for your witchy bestie. Just pop her into a small organza bag with a few candies or crystals, and you’ve got an enchanting little gift made with love.
So if you’re itching for a fun, seasonal make that’s equal parts cute and creepy, I can’t recommend this pattern enough. She’s simple, sweet, and packed with personality — everything I love in a good amigurumi. Happy hooking, and may your stitches always be spellbinding!
DIY Amigurumi Witch Keychain Crochet. Conclusion
I hope you fall in love with making this little witch just as much as I did. Whether she becomes a keychain, a bag charm, or a tiny magical friend sitting on your shelf, she’s sure to bring a smile to anyone who sees her. Don’t be afraid to play with colors, add your own little touches, and most importantly — have fun with it! Crochet is such a beautiful way to share joy and creativity, one stitch at a time. Happy crocheting, my yarn-loving friends!