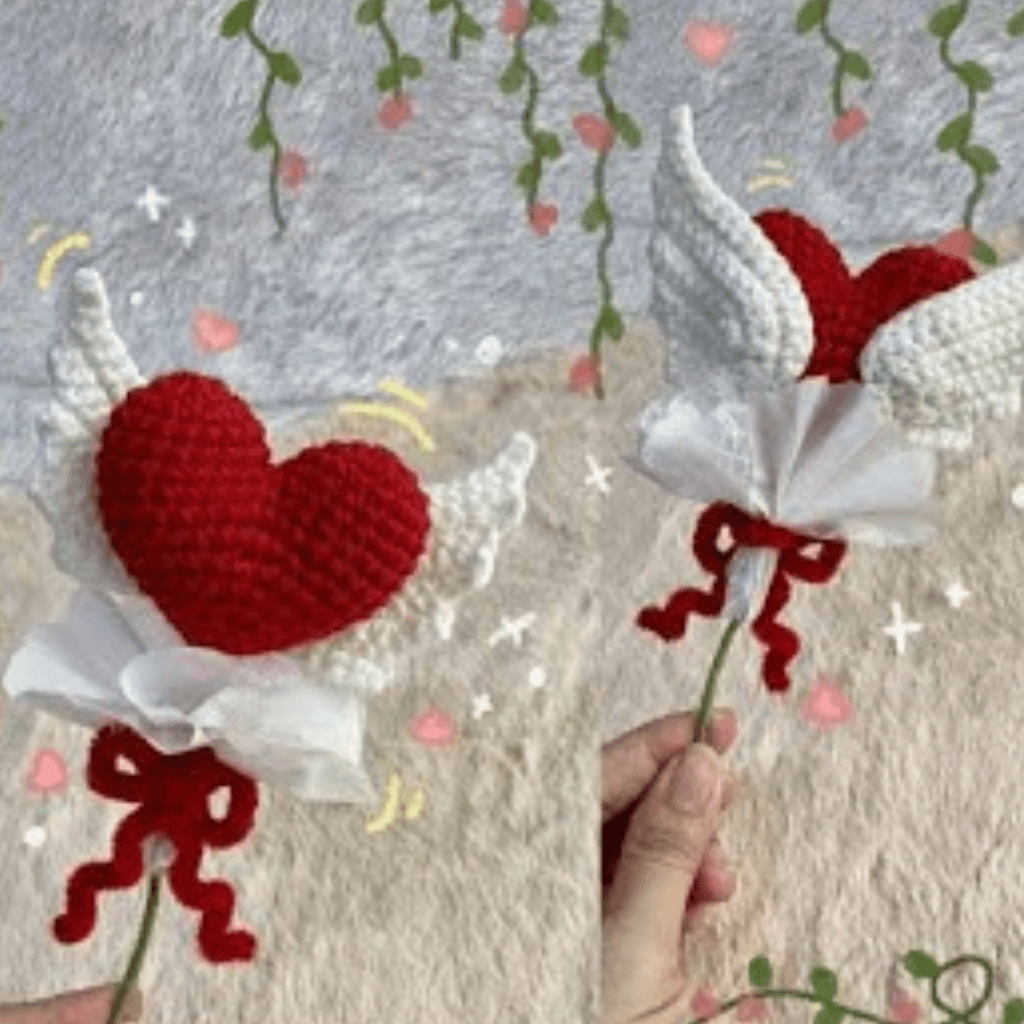
Add a touch of whimsy to your projects with this Crochet Heart with Wings design. Perfect as a gift or a sweet decorative item! As an experienced crocheter, I’ve always been drawn to designs that carry a bit of symbolism, and this one has a special kind of softness to it.
It’s not just about shaping yarn into a heart and adding wings—it’s about capturing a feeling, something light, gentle, and almost ethereal. Every time I make one, I find myself slowing down, paying closer attention to the details, and really enjoying the process.
The first thing I consider when starting a crochet heart with wings is the yarn. Because this piece often has a soft, decorative purpose, I like to choose yarns that enhance that lightness. Cotton yarn is a favorite because it gives clean stitch definition and helps the shape hold nicely, especially for the heart.
If I want a softer, more delicate finish, I might choose a lightweight acrylic or a cotton blend that has a bit of drape. The texture of the yarn plays a big role in how the wings will look, so I always think about that from the beginning.
How to Make a Crochet Heart with Wings
Color selection is where the personality of the piece really begins to show. Classic red or pink for the heart creates a timeless, romantic feel, while white or cream wings add that soft, angelic touch. Sometimes I like to experiment with pastels or even subtle gradients, especially if I want the piece to feel more whimsical. The contrast between the heart and the wings is important, as it helps each element stand out while still feeling cohesive.
Follow this easy pattern to create a charming Crochet Heart with Wings, ideal for Valentine’s Day, anniversaries, or any special occasion.
This Crochet Heart with Wings is not just fun to make but also a thoughtful gift. Create yours today and spread some handmade love!
Crochet Heart with Wings Pattern
Hook size is another detail I pay attention to. For the heart, I usually go slightly smaller than the recommended hook size to create a firm, well-defined shape. This helps the heart keep its structure, especially if it’s stuffed. For the wings, I might adjust slightly, depending on the effect I want. A slightly looser tension can give the wings a more delicate, airy appearance, which contrasts beautifully with the solid heart.
The construction of the heart is where I begin to settle into a steady rhythm. Most designs start with a magic ring or a small chain, building outward with increases to form those rounded curves at the top. I always take my time here, making sure the stitches are even and the shape is symmetrical. If the heart is stuffed, I add the filling gradually, shaping it gently with my fingers to achieve that soft, plump form. It’s a simple structure, but getting the proportions just right makes all the difference.
Once the heart is complete, I move on to the wings, and this is where the piece really comes to life. The wings are often worked in rows or small rounds, using a combination of stitches to create that feathered effect. I enjoy experimenting with different stitch patterns here—sometimes using chains and slip stitches to create a lacy look, or layering stitches to give the wings more dimension. The key is to keep them light and flowing, so they contrast with the solid shape of the heart.
Attaching the wings is a step I never rush. Placement is everything. I like to position them slightly behind the heart, angled just enough to give the impression of movement. Before securing them, I often pin them in place and take a moment to step back and look at the overall composition. This helps me ensure everything feels balanced and harmonious.
As I move into the finishing stages, I slow down and focus on the details. I carefully weave in all the ends, making sure they’re secure and hidden. If the piece needs a bit of shaping, I’ll gently adjust it with my hands or lightly block it to even out the stitches. These final touches are what give the piece that polished, refined look.
Materials:
- Yarn: Worsted weight yarn in red, white, or pink (for the heart) and white (for the wings)
- Hook: 3.5 mm crochet hook
- Fiberfill stuffing
- Yarn needle
- Scissors
Abbreviations:
- MR: Magic ring
- sc: Single crochet
- inc: Increase (2 sc in the same stitch)
- dec: Decrease (sc two stitches together)
- sl st: Slip stitch
- ch: Chain
Heart:
(Make 2 and join together)
- Round 1: MR, 6 sc into the ring. (6)
- Round 2: Inc in each stitch around. (12)
- Round 3: [1 sc, inc] repeat around. (18)
- Round 4: [2 sc, inc] repeat around. (24)
- Rounds 5-6: Sc around. (24)
- Round 7: [2 sc, dec] repeat around. (18)
- Round 8: [1 sc, dec] repeat around. (12)
- Stuff the heart firmly.
- Round 9: Dec around. (6)
- Fasten off and sew the opening closed.
Wings:
(Make 2)
- Row 1: Ch 8.
- Row 2: Starting in the 2nd ch from the hook, sc 7. (7)
- Row 3: Ch 1, turn, [1 sc, inc] repeat. (10)
- Row 4: Ch 1, turn, sc across. (10)
- Row 5: Ch 1, turn, [1 sc, dec] repeat. (7)
- Row 6: Ch 1, turn, sc across. (7)
- Fasten off and weave in ends.
Assembly:
- Sew the two wings to the back of the heart, positioning them evenly on either side.
- Add embellishments like glitter yarn or embroidered details to make it unique!
What I love most about creating a crochet heart with wings is its versatility. It can be a decorative ornament, a thoughtful handmade gift, or even part of a larger project. It’s a design that carries meaning, whether it’s used to symbolize love, remembrance, or simply something light and uplifting. Each time I make one, it feels a little different, shaped by the colors, the yarn, and the small choices I make along the way.
Even after years of crocheting, projects like this remind me why I fell in love with the craft in the first place. They’re not overly complex, but they invite you to be present, to focus on each stitch, and to create something with intention. There’s a quiet satisfaction in watching the piece come together, in seeing how simple elements can combine into something so expressive.
In the end, creating a Crochet Heart with Wings is about more than just technique. It’s about capturing a feeling and translating it into something tangible. It’s about enjoying the rhythm of the stitches, the softness of the yarn, and the process of bringing a gentle, symbolic design to life. And when you hold the finished piece in your hands, there’s that familiar sense of calm and accomplishment, knowing you’ve created something meaningful, one stitch at a time.