
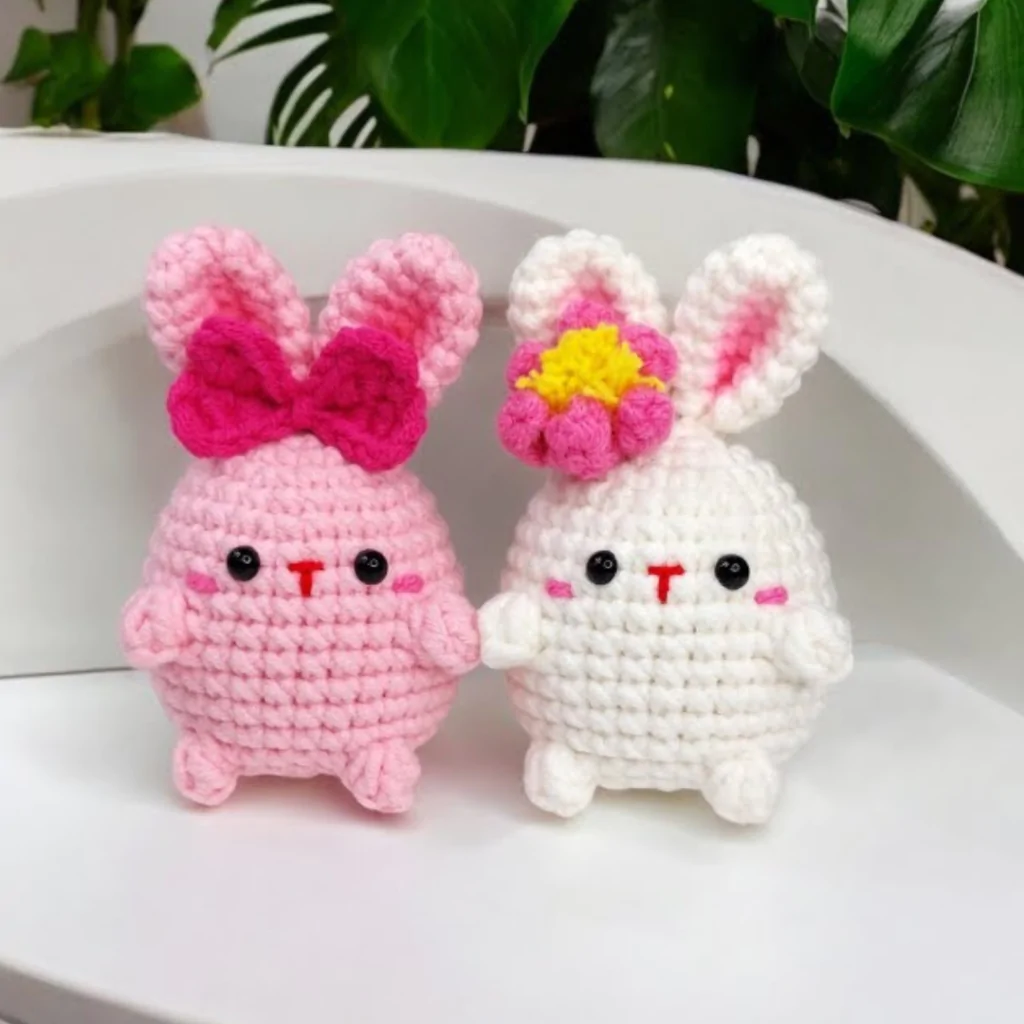
Create your own crochet cute bunny with this charming pattern! These adorable bunnies make the perfect handmade gifts or delightful decorations.
Creating a Crochet Cute Bunny is one of the most heartwarming projects I can think of as an experienced crocheter. No matter how many amigurumi animals I have made over the years, bunnies always remain among my favorites. They have such gentle features, soft shapes, and endless possibilities for personalization that every finished bunny seems to develop its own little personality. Whether you’re making one as an Easter decoration, a nursery gift, or simply because you enjoy adorable handmade creations, crocheting a bunny is always a rewarding experience from the very first stitch to the final finishing touches.
Whenever I begin a crochet bunny, I spend a little extra time selecting the perfect yarn. The yarn determines not only the texture of the finished piece but also the overall character of the bunny. I usually prefer a high-quality cotton yarn because it produces crisp stitches and allows every detail to stand out beautifully. If I want the bunny to have an especially cuddly appearance, I sometimes choose a soft cotton blend or a plush chenille yarn. Both options create completely different personalities. Cotton gives a neat and classic amigurumi finish, while plush yarn transforms the bunny into something irresistibly soft and huggable.
Choosing the colors is always one of the most enjoyable parts of the project. Traditional white, cream, beige, and light gray are timeless choices that create a realistic appearance, but I also enjoy experimenting with pastel shades like blush pink, lavender, baby blue, or mint green. These softer colors give the bunny a whimsical charm that makes it perfect for children’s rooms or seasonal decorations. Sometimes I even combine several colors for tiny accessories, creating contrast without overwhelming the simple elegance of the bunny itself.
How to Make a Crochet Cute Bunny
The hook I use is just as important as the yarn. With amigurumi, I almost always select a hook one or two sizes smaller than recommended. This creates dense, compact stitches that prevent the stuffing from showing through while giving the bunny a smooth, professional finish. After years of crocheting, I’ve learned that firm stitches are one of the secrets behind durable amigurumi. The tighter fabric also helps every part maintain its shape, allowing the finished bunny to look beautiful for many years.
I almost always begin with the head because it is the part where the bunny’s personality starts to emerge. Working in continuous rounds, I focus on creating a perfectly rounded shape with even increases and decreases. I never rush this process because a symmetrical head provides the perfect foundation for every facial detail that follows. As the rounds progress, I gradually add small portions of stuffing, gently shaping the piece with my hands. This prevents lumps and helps create that soft, smooth appearance that makes handmade toys so appealing.
Crafting a crochet cute bunny is easier than you think! With simple stitches and colorful yarn, you can bring these sweet bunnies to life in no time. This crochet cute bunny pattern is fun, beginner-friendly, and highly customizable. Make them in different colors or add accessories for a unique touch!
Crochet Cute Bunny Pattern
The ears are undoubtedly my favorite part of making a crochet bunny. Long, elegant ears immediately define the silhouette and give the bunny its unmistakable character. Some designs feature floppy ears, while others stand upright with a playful appearance. Both styles have their own charm. I enjoy crocheting the ears separately because it gives me complete control over their size and shape. Before attaching them permanently, I usually pin them in place and examine the bunny from several angles. Even a slight adjustment in placement can dramatically change the expression, making the bunny appear curious, shy, playful, or sleepy.
The face is where everything comes together. I usually use safety eyes because they provide a polished finish, although embroidered eyes can create a softer appearance, especially for baby-safe toys. Positioning the eyes requires patience. I often spend several minutes testing different placements before securing them because the smallest adjustment can completely transform the bunny’s personality. A tiny embroidered nose, often shaped like an upside-down triangle, completes the face beautifully. Sometimes I also add a delicate stitched smile, keeping it subtle so the overall expression remains gentle and timeless.
Once the head is complete, I move on to the body. I prefer a softly rounded body that complements the oversized head, creating the classic proportions that make amigurumi so charming. The body is relatively simple, but consistency remains important. I compare the proportions frequently to ensure everything feels balanced and harmonious. Small adjustments during this stage help create a bunny that looks natural and cohesive.
Crochet Cute Bunny . Materials:
- Yarn: DK or worsted weight yarn in white, pink, and accent colors for accessories
- Hook: 2.5 mm crochet hook
- Stuffing: Polyester fiberfill
- Safety eyes: 6 mm
- Yarn needle
- Embroidery thread: For facial features and blush
- Scissors
Abbreviations:
- MR: Magic ring
- sc: Single crochet
- inc: Increase (2 sc in the same stitch)
- dec: Decrease (sc2tog)
- sl st: Slip stitch
Instructions:
Body and Head (Main Color):
- Round 1: MR, 6 sc into the ring. (6)
- Round 2: Inc in each stitch around. (12)
- Round 3: [1 sc, inc] repeat around. (18)
- Round 4: [2 sc, inc] repeat around. (24)
- Rounds 5-12: Sc in each stitch around. (24)
- Round 13: [2 sc, dec] repeat around. (18)
- Round 14: [1 sc, dec] repeat around. (12)
- Begin stuffing the body firmly.
- Round 15: Dec around. (6)
- Fasten off and close the opening.
Ears (Make 2):
- Round 1: MR, 6 sc into the ring. (6)
- Rounds 2-4: Sc in each stitch around. (6)
- Fasten off, leaving a long tail for sewing.
- Sew the ears to the top of the head.
Arms (Make 2):
- Round 1: MR, 6 sc into the ring. (6)
- Rounds 2-3: Sc in each stitch around. (6)
- Fasten off and sew the arms to the sides of the body.
Legs (Make 2):
- Round 1: MR, 6 sc into the ring. (6)
- Round 2: Sc in each stitch around. (6)
- Fasten off and sew the legs to the bottom of the body.
Bow or Flower Accessory:
- Bow: Chain 10, sl st into the first chain to form a loop, chain 10 again, and sl st into the same chain. Wrap yarn around the middle of the loops to form a bow shape and sew onto one ear.
- Flower: Create a magic ring, [chain 2, 1 dc, sl st] repeat 5 times into the ring. Fasten off and sew onto the ear.
Face Details:
- Attach the safety eyes to the front of the head, evenly spaced.
- Use embroidery thread to stitch a small nose and mouth.
- Add pink blush with embroidery thread or a touch of fabric paint.
Assembly:
- Sew all parts securely to the body.
- Add any final adjustments to the accessories or facial details.
Even after years of crocheting, Crochet Cute Bunny projects continue to remind me why I fell in love with amigurumi in the first place. They allow me to slow down, enjoy the rhythm of each stitch, and watch a charming little character gradually come to life. There is something incredibly satisfying about seeing simple shapes transform into an expressive companion full of warmth and personality.