Creating a Crochet Amigurumi Snow White doll is a delightful project that combines classic fairy tale charm with the art of crochet. This project is perfect for intermediate crocheters who want to create a beloved character with intricate details, such as her iconic dress, apple, and the cute little bird on her head. The doll can be a beautiful addition to your amigurumi collection or a special gift for a loved one.
After more than 20 years as a passionate crocheter, I’ve created everything from cozy home goods to detailed garments—but if there’s one area of crochet that continues to surprise and delight me, it’s amigurumi. There’s something truly magical about turning a ball of yarn into a character—someone with personality, charm, and expression. And among all the dolls I’ve made, one of the most enchanting is my Crochet Amigurumi Snow White.
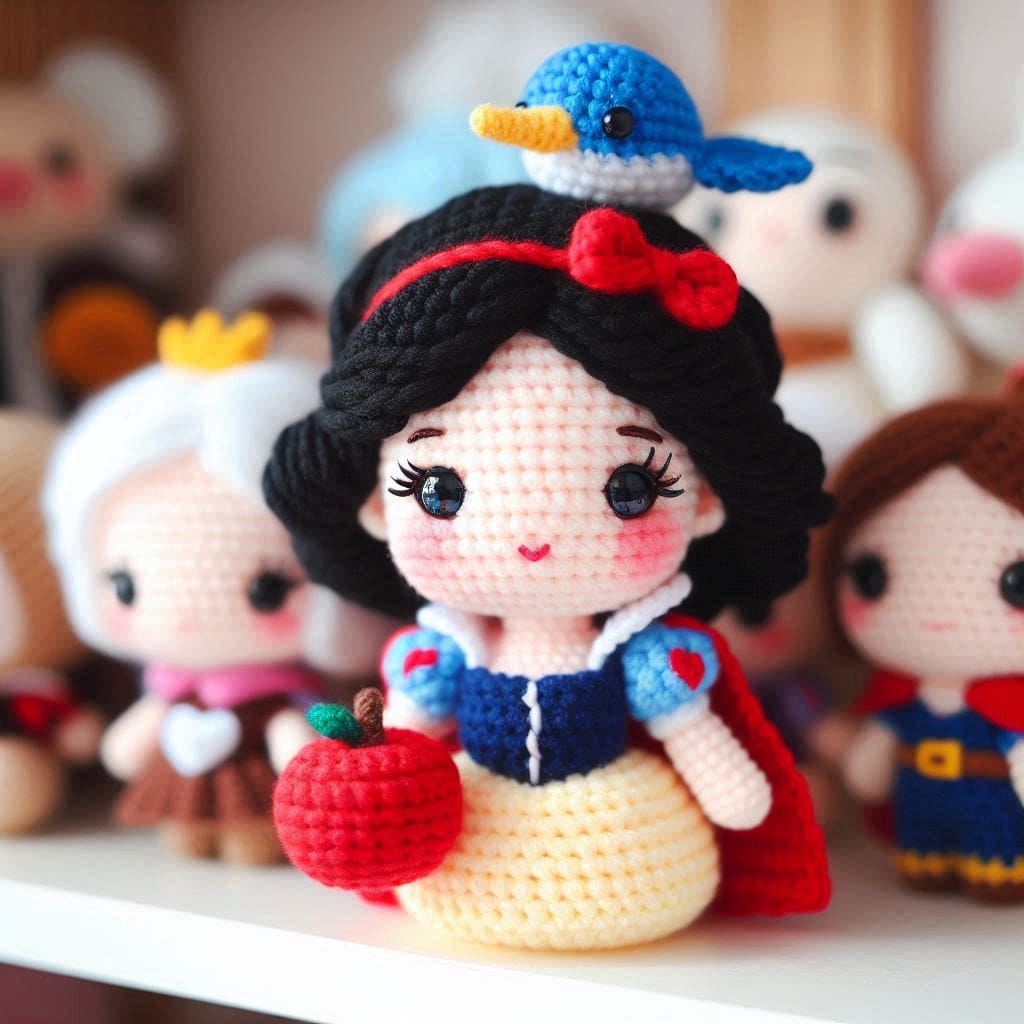
We all know the story—an innocent, kind-hearted princess with skin as white as snow, lips as red as blood, and hair as black as ebony. The first Disney princess, and for many, still the most iconic. So when I decided to bring her to life in yarn, I knew I had to get every detail just right—from her signature dress to her sweet expression.
Let me walk you through how I approached this amigurumi project as an experienced crocheter, and why she remains one of my favorite makes to this day.
How to Make Your Own Crochet Amigurumi Snow White
To start your Crochet Amigurumi Snow White project, you’ll need yarn in various colors, including black, red, blue, white, yellow, brown, green, and a small amount of pink for the blush. You’ll also need safety eyes, a crochet hook, stuffing, and a yarn needle. This project uses basic amigurumi techniques like single crochet, increases, decreases, and color changes. Follow the steps below to create your Snow White doll, and don’t forget to add the small details like the apple and the bird for an extra touch of charm.
Crochet Amigurumi Snow White Pattern
As a lifelong lover of fairytales, I’ve always had a soft spot for the classics. Snow White, with her purity of heart and graceful spirit, stood out to me even as a child. She represents kindness in its purest form, and her story continues to resonate with new generations.
I’ve made many princess-inspired dolls over the years, but this one felt special. Snow White’s aesthetic is instantly recognizable, and capturing her essence in crochet form was a rewarding challenge that brought me back to everything I love about storytelling through yarn.
To start, I chose high-quality, soft cotton yarn. Cotton is my go-to for amigurumi because it offers clean stitch definition, holds shape beautifully, and stands up well over time—especially if the doll is going to be handled or gifted.
Materials:
- Yarn: Black, Red, Blue, White, Yellow, Brown, Green, Pink
- Crochet hook (appropriate size for your yarn)
- Safety eyes (10mm)
- Stuffing
- Yarn needle
- Stitch marker
- Scissors
Abbreviations:
- sc: single crochet
- inc: increase (2 sc in the next stitch)
- dec: decrease (sc 2 together)
- sl st: slip stitch
- ch: chain
- st: stitch
- FO: finish off
Head and Body:
- Head:
With skin-colored yarn,
R1: 6 sc in a magic ring (6)
R2: inc around (12)
R3: (sc, inc) around (18)
R4: (2 sc, inc) around (24)
R5: (3 sc, inc) around (30)
R6-12: sc around (30)
R13: (3 sc, dec) around (24)
R14: (2 sc, dec) around (18)
Insert safety eyes between R9 and R10, about 6 stitches apart.
R15: (sc, dec) around (12)
R16: dec around (6)
FO and weave in the ends. - Body:
With yellow yarn,
R1: 6 sc in a magic ring (6)
R2: inc around (12)
R3: (sc, inc) around (18)
R4: (2 sc, inc) around (24)
R5-9: sc around (24)
Switch to blue yarn,
R10: sc around (24)
R11: (2 sc, dec) around (18)
R12: (sc, dec) around (12)
R13-14: sc around (12)
FO and leave a long tail for sewing.
Arms (make 2):
With skin-colored yarn,
R1: 6 sc in a magic ring (6)
R2-7: sc around (6)
Switch to blue yarn,
R8-10: sc around (6)
FO and leave a tail for sewing.
Hair: With black yarn,
Create a wig cap that fits snugly over the head using the same pattern as the head up to R12.
For the hair strands, cut long pieces of yarn and attach them to the wig cap. Braid or style as desired.
Dress Details: With white yarn,
Crochet a small collar around the neck by making a simple chain and attaching it with sl st.
Red Bow:
With red yarn,
Ch 8,
R1: sc in the second ch from the hook, sc across (7)
R2-4: ch 1, turn, sc across (7)
FO and tie in the middle to create a bow shape. Attach it to the wig cap.
Bird:
With blue yarn,
R1: 6 sc in a magic ring (6)
R2: inc around (12)
R3-5: sc around (12)
FO and stuff lightly. Attach a small beak made with yellow yarn and sew to the head.
Apple:
With red yarn,
R1: 6 sc in a magic ring (6)
R2: inc around (12)
R3: (sc, inc) around (18)
R4-6: sc around (18)
R7: (sc, dec) around (12)
R8: dec around (6)
FO and stuff firmly. Add a small stem and leaf with brown and green yarn.
Assembly:
- Sew the head to the body.
- Attach the arms to the sides of the body.
- Sew the wig cap with hair to the head.
- Attach the dress details, bow, bird, and apple.
Enjoy your adorable Crochet Amigurumi Snow White! For me, one of the most satisfying parts of any amigurumi project is adding expression and emotion. With this Snow White doll, I gave her large round eyes and slightly blushed cheeks to capture her gentle spirit. Her tiny hands rest politely in front of her, and her smile is just the slightest curve—a picture of grace.
If you want to add even more personality, you could crochet a small red apple accessory, a tiny woodland friend, or even one of the seven dwarfs in mini form. I’ve done the apple and a small bluebird, and it’s incredible how much storytelling that adds to the display.