Craft your very own adorable capybara in amigurumi! This simple yet charming project is perfect for animal lovers and crochet enthusiasts alike. Creating a capybara in amigurumi form is one of those projects that feels both charming and deeply satisfying, especially when you’ve spent years refining your crochet technique and learning how to bring personality into every stitch.
The capybara has such a calm, gentle presence, and translating that into yarn is a beautiful challenge. It’s not about complicated shaping, but about capturing that relaxed expression, the soft rounded body, and those small, thoughtful details that make the character instantly recognizable.
Working in continuous rounds, I start with a magic ring and build outward with gradual increases, always keeping my stitches tight and even. Using a smaller hook than recommended is something I rely on for all amigurumi, but especially for a piece like this where smoothness really matters. As the base grows, I focus on maintaining a gentle oval shape rather than a perfect sphere, which gives the capybara its distinctive silhouette.
How to Make a Capybara in Amigurumi
Creating a capybara in amigurumi is a delightful crochet project. With soft yarn and basic stitches, you can bring this lovable creature to life. It’s an excellent gift idea or a fun decoration for your home.
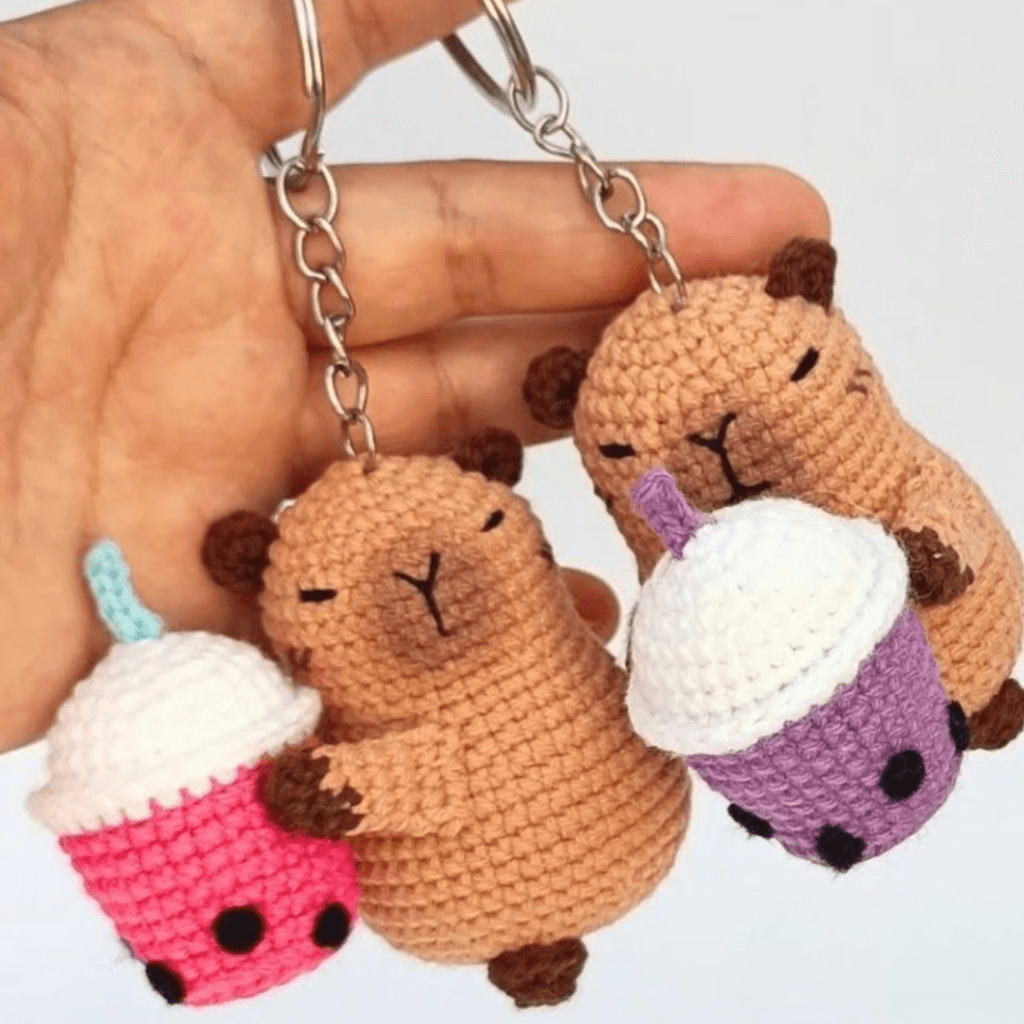
Your capybara in amigurumi is now complete! Customize it with different colors or accessories to give it a personal touch. Enjoy showcasing your handmade creation!
The yarn choice plays a big role in achieving that soft, natural look. I tend to reach for warm brown tones, sometimes blending slightly different shades to give a more organic feel. Cotton yarn works beautifully for this, offering clean stitch definition and structure, but a soft acrylic can also add a slightly plush texture that feels just as inviting. The key is to choose a color that feels earthy and calm, reflecting the natural tones of the animal.
Detailed Recipe: Capybara in Amigurumi
Stuffing is something I approach slowly and carefully. I add small amounts at a time, shaping the piece with my hands as I go. For a capybara, the body should feel firm enough to hold its shape but still soft and slightly squishy, reflecting that relaxed, laid-back nature. I smooth out any uneven areas, making sure the surface looks clean and rounded from every angle.
The ears are small but important details. I usually crochet them as tiny rounded pieces, keeping the stitches tight so they hold their shape. Placement is key here, because even a slight shift can change the expression. I pin them in place first, adjusting until they sit just right on top of the head, slightly spaced and balanced. Once I’m happy with the position, I sew them on securely.
The legs are another subtle feature. They’re often small and simple, sometimes just little rounded shapes attached to the underside of the body. They don’t need to be overly detailed, but they should be positioned carefully so the capybara sits naturally. I always take a moment to check the balance, making sure the piece can rest comfortably without tipping.
The face is where the capybara truly comes to life, and I always approach this step with patience. The eyes are small and placed slightly forward, giving that gentle, calm expression. I often use safety eyes or embroider them, depending on the look I want. The nose is another defining feature, usually stitched in a slightly darker shade to stand out subtly against the body. A simple embroidered mouth can add just enough detail without overwhelming the softness of the design.
Materials:
- Yarn: Brown and beige cotton yarn (medium weight).
- Hook: 3.0mm crochet hook.
- Stuffing: Polyester fiberfill.
- Safety eyes: 8mm.
- Yarn needle.
- Scissors.
Abbreviations (US terms):
- MR: Magic ring
- SC: Single crochet
- INC: Increase (2 SC in the same stitch)
- DEC: Decrease (single crochet two stitches together)
- CH: Chain
- FO: Fasten off
Instructions:
Body
- Round 1: MR, 6 SC. (6)
- Round 2: INC in each stitch. (12)
- Round 3: (SC, INC) around. (18)
- Round 4: (2 SC, INC) around. (24)
- Round 5-12: SC around. (24)
- Round 13: (2 SC, DEC) around. (18)
- Round 14: (SC, DEC) around. (12)
- Stuff the body firmly. FO.
Head
- Round 1: MR, 6 SC. (6)
- Round 2: INC in each stitch. (12)
- Round 3: (SC, INC) around. (18)
- Round 4-8: SC around. (18)
- Round 9: (SC, DEC) around. (12)
- Stuff the head. FO, leaving a long tail to sew.
Ears (Make 2)
- Round 1: MR, 6 SC. (6)
- FO, leaving a tail for sewing.
Legs (Make 4)
- Round 1: MR, 6 SC. (6)
- Round 2-4: SC around. (6)
- Stuff lightly. FO.
Tail
- Round 1: MR, 4 SC. (4)
- Round 2-3: SC around. FO, leaving a tail for sewing.
Assembly
- Sew the head onto the body.
- Attach the ears to the top of the head.
- Sew the legs to the underside of the body.
- Attach the small tail to the back.
- Insert safety eyes and embroider the nose and mouth.
What I love most about making a capybara amigurumi is how minimal the features are, yet how much personality they convey. It’s a reminder that you don’t need complex details to create something expressive. The shape, the proportions, and the careful placement of each element do most of the work.
Sometimes I like to add small touches to give the piece even more character. A tiny crocheted accessory, like a little fruit or a small hat, can make it feel playful without taking away from its natural charm. Still, I’m careful to keep these additions simple, because the beauty of the capybara lies in its calm and understated appearance.
Assembling the final piece is something I do slowly, making sure every part is secure and well-positioned. I take a step back occasionally, looking at the amigurumi from different angles to ensure everything feels balanced. These small adjustments are what give the finished piece a polished look.
Finishing is always done with care. I weave in all ends neatly, making sure nothing is visible. I gently shape the body one last time, smoothing the surface and adjusting the stuffing if needed. These final touches bring everything together and give the piece that refined, handmade quality.