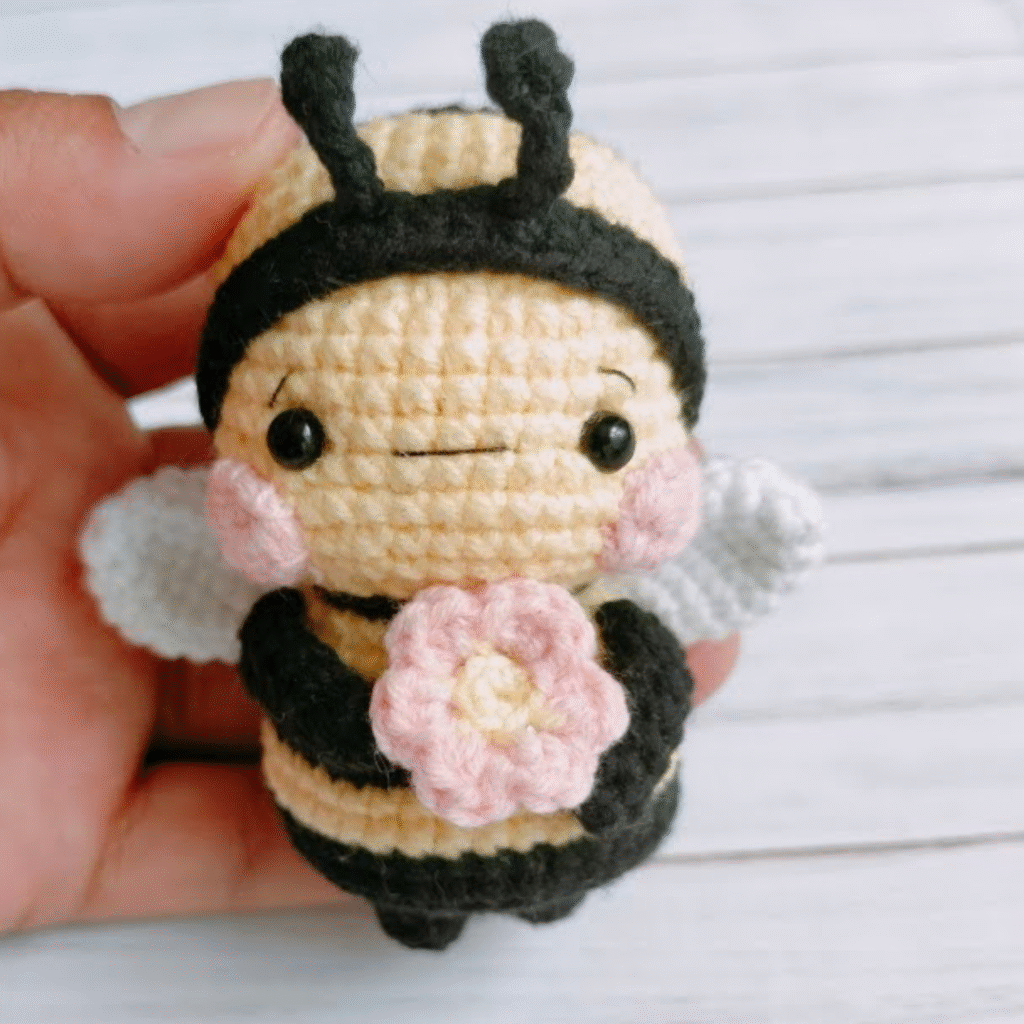
Bee Doll Amigurumi Crochet. Create your own adorable Bee Doll Amigurumi with this crochet pattern inspired by Victoria from Minoski Amigurumi! This sweet little bee with blushing cheeks, soft wings, and a tiny flower in hand is perfect for spring decorations, gifts, or simply to add to your amigurumi collection. Designed for all skill levels, this project is a charming and rewarding experience.
Creating a Bee Doll Amigurumi Crochet piece is one of those projects that feels instantly joyful from the very first stitch. As an experienced crocheter, I’ve always had a soft spot for designs that blend cuteness with character, and a bee doll does exactly that. It’s playful, delicate, and full of personality, yet still structured enough to challenge your technique in all the right ways. From the moment you begin shaping the body, you can already imagine those cheerful stripes and tiny wings coming together into something truly charming.
The first thing I always consider is yarn choice, because texture and color are essential for this kind of project. A smooth cotton yarn is usually my go-to, especially for amigurumi, because it gives excellent stitch definition and keeps the shape firm. For a bee doll, the classic yellow and black combination is what brings it to life, but I like to choose softer, slightly muted shades to give it a more handmade, cozy feel rather than something overly bold. The hook size matters just as much. I tend to go a bit smaller than recommended to keep the stitches tight, ensuring that the stuffing stays hidden and the fabric looks neat and compact.
How to Crochet a Bee Doll Amigurumi Crochet Pattern
The Bee Doll Amigurumi Crochet features simple stitches, rounded shapes, and minimal sewing. From her striped body to her cute antennas and soft wings, each part is crocheted and assembled with love.
With this Bee Doll Amigurumi, you can bring a touch of whimsy and joy to your crochet projects. Whether as a toy, keepsake, or gift, this little bee will surely brighten anyone’s day.
The construction typically begins with the head, worked in continuous rounds. This is where I settle into a steady rhythm, focusing on even tension and precise stitch counts. Over the years, you develop a feel for how the yarn should move and how the shape should form under your hands. The head needs to be nicely rounded, soft but structured, and I always add stuffing gradually to maintain control over the shape. This approach helps avoid lumps and keeps the surface smooth, which is especially important when working with lighter colors.
Bee Doll Amigurumi Crochet
The face is where the bee doll really starts to come alive. I usually keep the features simple and sweet—small eyes, either safety eyes or embroidered, and a tiny stitched smile. Placement is everything here. Even a slight adjustment can change the entire expression, so I take my time to position the eyes evenly and at the right height. A gentle, friendly expression is what I aim for, something that captures the playful nature of the design without overwhelming it with too many details.
As I move on to the body, I begin incorporating the iconic stripes. This is one of my favorite parts of the process because it adds instant character. Clean color changes are important, and I always make sure to transition neatly between the yellow and black yarns. Carrying the yarn carefully or fastening off between sections can help keep the inside tidy and the outside smooth. The body is usually slightly elongated, giving the doll a balanced proportion that works well when the head is attached.
The arms and legs are small but important details that complete the figure. I like to keep them simple, often using just a few rounds to create soft, rounded shapes. Attaching them securely and symmetrically is key, especially if you want the doll to sit or stand nicely. Even though they’re small, they add so much to the overall personality, giving the piece a sense of movement and life.
Materials:
- Yarn: Yellow, black, beige, white, pink, and light pink
- Hook: 2.5 mm
- Safety eyes (6 mm)
- Tapestry needle
- Fiberfill stuffing
- Stitch marker
- Scissors
Head and Body (worked in one piece)
With beige:
- MR, 6 sc (6)
- inc around (12)
- (1 sc, inc) x6 (18)
- (2 sc, inc) x6 (24)
5–10. sc around (24)
Insert eyes between rows 6–7, 6 sts apart
Embroider mouth and cheeks
Switch to yellow:
11. (3 sc, inc) x6 (30)
12. sc around (30)
13. switch to black, sc around
14. switch to yellow, sc around
15. switch to black, sc around
16. dec x6, sc around (24)
Start stuffing
17. (2 sc, dec) x6 (18)
18. (1 sc, dec) x6 (12)
19. dec around (6), FO and close
Antennas (make 2)
With black yarn:
- MR, 4 sc
2–4. sc around
FO and sew to top of head
Cheeks (make 2)
With pink yarn:
- MR, 6 sc, sl st to join
FO and sew under the eyes
Wings (make 2)
With white yarn:
- MR, 6 sc
- (1 sc, inc) x3 (9)
3–4. sc around
FO and sew to back
Arms (make 2)
With beige:
- MR, 6 sc
2–4. sc around
FO and sew to sides
Flower
With light pink:
- MR, ch 2, 2 dc, ch 2, sl st x5 to form petals
FO and sew to hands
What I love most about creating a Bee Doll Amigurumi Crochet piece is the sense of joy it brings. It’s a project that doesn’t feel rushed or overly complicated, yet it still allows for creativity and personal expression. Each doll has its own personality, shaped by tiny variations in stitching and detail. It’s a reminder that crochet is not just about following a pattern, but about bringing something to life through your own hands.
Even after years of crocheting, projects like this continue to inspire me. They combine technique, creativity, and a touch of whimsy in a way that feels both satisfying and meaningful. When you finish, you’re left with a small, charming piece that feels full of life—a little bee doll that carries the care and attention of every stitch you’ve made.
Note: Here is a pattern suggestion for you to create your own pattern. The end result may vary.