Angy Coffee Crochet. Brighten your day with this adorable Angy Coffee Crochet tutorial! Perfect for amigurumi enthusiasts and coffee lovers alike. Creating an “Angy Coffee” crochet piece is one of those playful, personality-filled projects that instantly makes me smile, even after years of crocheting. There’s something so charming about taking an everyday object like a coffee cup and turning it into a tiny amigurumi with attitude.
It’s not just about shaping a cup, it’s about capturing that slightly grumpy, expressive face that gives the whole piece its character. Projects like this remind me that crochet can be fun, lighthearted, and full of storytelling, even in the smallest designs.
I usually begin with the base of the cup, working in continuous rounds from the bottom up. Starting with a magic ring, I build a flat circle that will become the base, increasing evenly to keep it smooth and balanced. From there, I stop increasing and begin working straight rounds to form the sides. This is where consistency really matters. I keep my stitches tight by using a smaller hook than recommended, which helps the cup hold its shape and gives it that neat, structured look that amigurumi pieces need.
Step-by-Step Angy Coffee Crochet Pattern
Learn how to crochet a cute and expressive angry coffee crochet with this detailed guide, ideal for beginners and advanced crafters.
Choosing the yarn is an important part of bringing this piece to life. For the cup itself, I often go with neutral tones like cream, white, or soft beige, something that feels like a classic coffee cup. For the “coffee” top, I use warm browns, sometimes adding a slightly darker shade to create depth. Cotton yarn is usually my first choice because it provides crisp stitch definition, but a soft acrylic can also work if I want a slightly more relaxed texture.
As the cup begins to take shape, I start thinking about the proportions. The sides should be straight but not stiff, with just enough height to feel like a real cup. Before closing the top, I add the stuffing, doing so gradually to maintain a smooth and even surface. I always take a moment to shape the piece with my hands, making sure there are no lumps and that the base sits flat.
Angy Coffee Crochet Pattern
The top of the coffee is where you can have a bit of fun. Sometimes I crochet a separate piece to represent the surface of the coffee, stitching it onto the top for a clean finish. Other times, I incorporate the color change directly into the rounds. A slight curve or raised edge can give the illusion of liquid sitting inside the cup, and it adds a subtle but effective detail.
The handle is a small but essential part of the design. I usually crochet it separately as a short strip or a curved piece, then attach it securely to the side of the cup. It needs to be sturdy enough to hold its shape, so I keep the stitches tight and the structure firm. Placement is important here, so I pin it in place first, adjusting until it looks balanced before sewing it on.
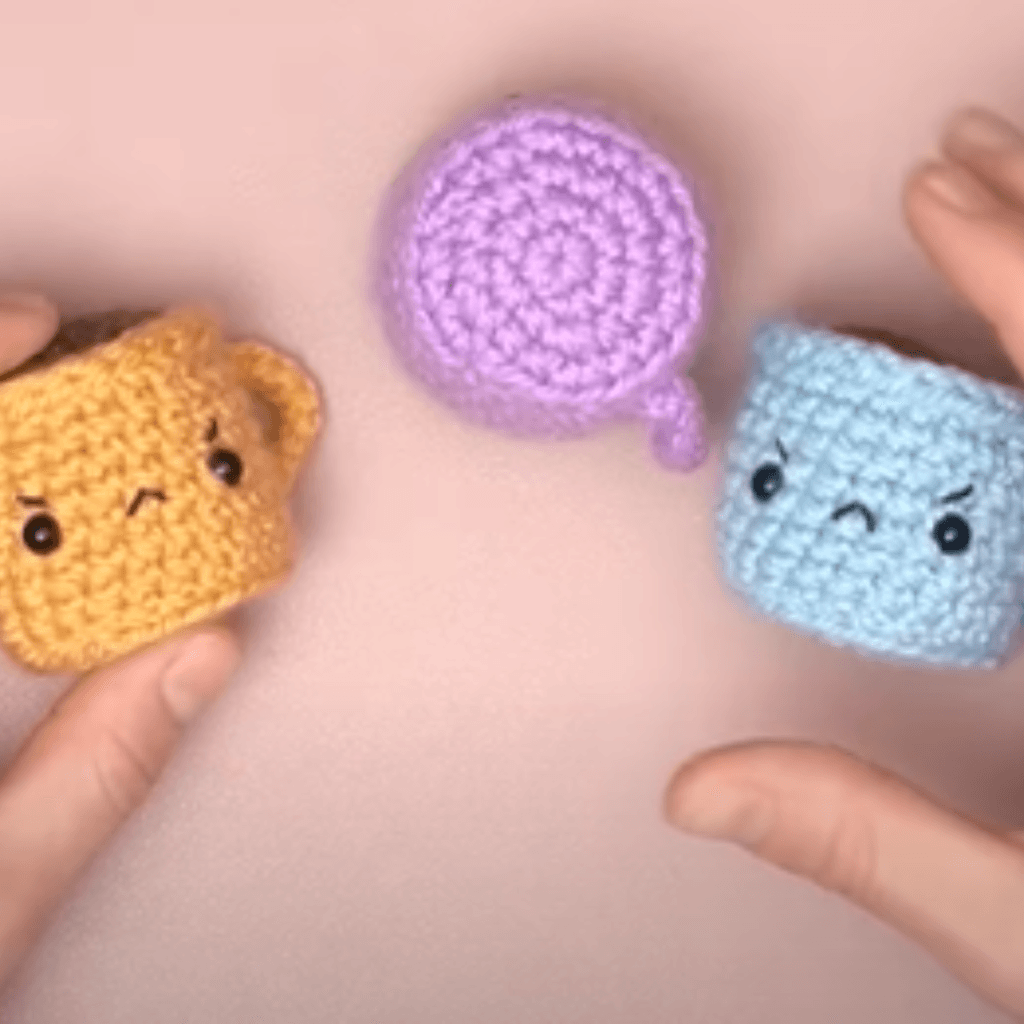
Now comes my favorite part, the face. This is where the “angy” personality truly comes to life. I usually embroider the features rather than using safety eyes, because it allows for more control over the expression. Slightly angled eyebrows, small eyes, and a tiny frown can completely transform the piece. It’s amazing how just a few stitches can give the coffee cup such a distinct attitude.
I take my time with the face, marking the placement lightly before stitching. Symmetry is important, but so is expression. Sometimes I adjust the angle of the eyebrows just a little to get that perfect grumpy look. It’s a delicate balance, and one of the most rewarding parts of the process.
If I want to add extra character, I might include small details like blush marks, a tiny spoon, or even a little whipped cream swirl on top. These additions are optional, but they can make the piece feel even more playful. Still, I always keep the design balanced, making sure the main focus remains on the expressive face.
Assembling everything is done with care. I check that the handle is secure, the top is neatly finished, and the face looks just right. I take a step back and look at the piece from different angles, making small adjustments if needed. These final refinements are what give the amigurumi its polished look.
Materials:
- Yarn: Worsted weight yarn in coffee brown (for the coffee), yellow, blue, or purple (for the cup), and black (for the facial features).
- Hook: 3.5mm crochet hook.
- Stuffing: Polyester fiberfill.
- Safety Eyes: 8mm size.
- Needle: Tapestry needle for sewing.
- Stitch Markers: Optional, for marking rounds.
Abbreviations (US Terms):
- MR: Magic Ring
- SC: Single Crochet
- INC: Increase (2 SC in the same stitch)
- DEC: Decrease (Single Crochet 2 together)
- SL ST: Slip Stitch
- FO: Fasten Off
Instructions:
Cup Base and Body:
- Start with the base of the cup in your chosen cup color:
- Round 1: MR, 6 SC into the ring. (6)
- Round 2: INC in each stitch around. (12)
- Round 3: (SC, INC) around. (18)
- Round 4: (2 SC, INC) around. (24)
- Round 5: (3 SC, INC) around. (30)
- Round 6: (4 SC, INC) around. (36)
- Round 7-11: SC around without increasing. (36)
- Change to brown yarn for the coffee top:
- Round 12: In the back loops only, SC around. (36)
- Round 13-14: SC around. (36)
- FO and leave a long tail for sewing if necessary. Stuff the cup.
Handle:
- Using the same color as the cup:
- Chain 12.
- Row 1: SC in each chain starting from the second chain from the hook. (11)
- FO and leave tails for sewing.
- Attach the handle to the sides of the cup securely.
Facial Features:
- Attach safety eyes between rounds 8 and 9, about 5 stitches apart.
- Use black yarn to embroider the “angry” eyebrows and mouth.
Assembly:
- Ensure the cup is stuffed firmly.
- Sew the coffee top securely onto the cup.
- Attach the handle to the side of the cup.
Angy Coffee Crochet. Final Thoughts
Now you have your very own Angy Coffee Crochet! This fun project is perfect as a gift or to add a touch of personality to your workspace. Happy crocheting!
In the end, holding that finished little coffee cup in your hands is always a satisfying moment. It’s small, expressive, and full of personality, a tiny piece that shows how much can be created with just a bit of yarn and imagination. And honestly, there’s something truly special about seeing that little “angy” face looking back at you, knowing it came together stitch by stitch into something so simple, yet so full of character.