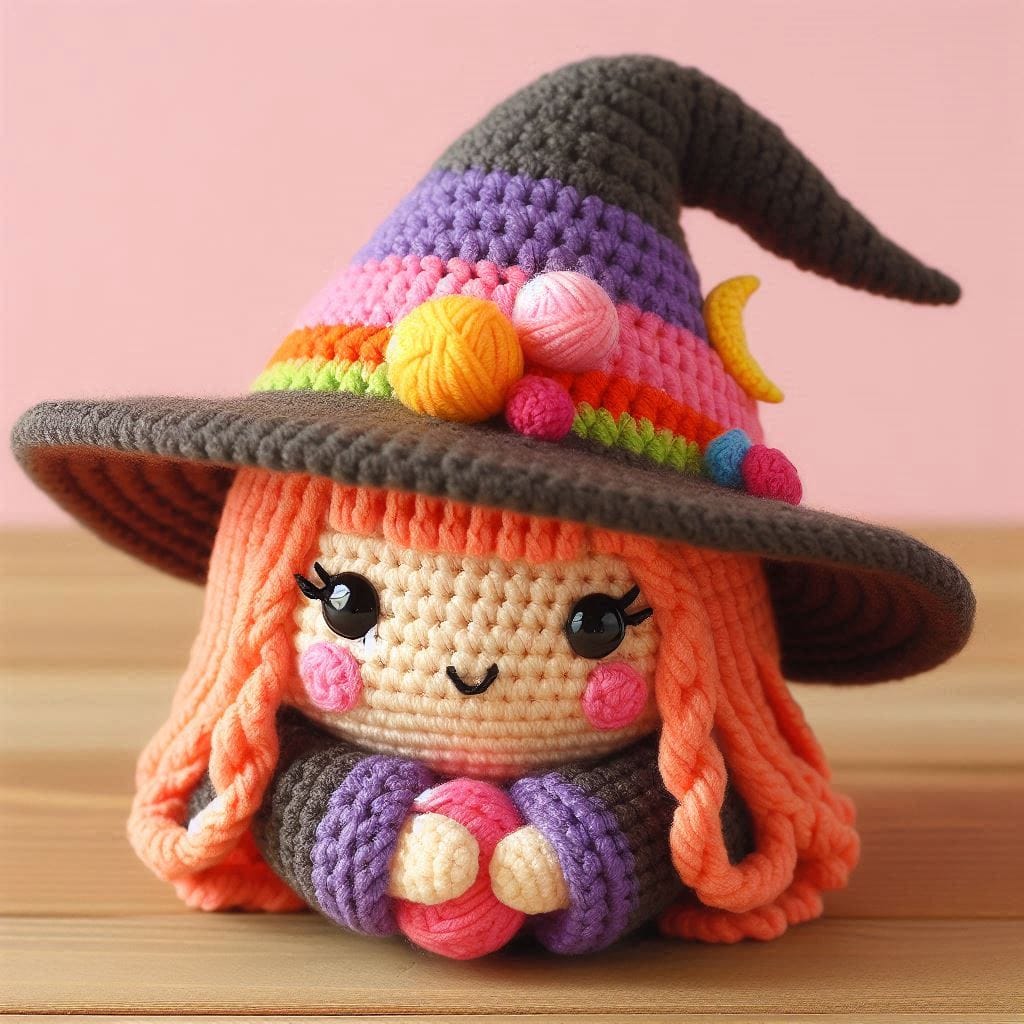
This adorable Amigurumi Witch Crochet witch is the perfect crochet project for Halloween or for anyone who loves whimsical characters. Her colorful hat, cute details, and warm smile make her a fun and cheerful addition to your collection of handmade dolls.
How to Crochet a Cute Amigurumi Witch Crochet
Creating this sweet witch requires some basic amigurumi techniques, but the fun details make it a truly unique project. Follow this step-by-step pattern to bring this lovely character to life!
Amigurumi Witch Crochet Pattern
Materials:
Yarn in peach, orange, brown, purple, pink, and rainbow colors (DK or sport weight)
10mm safety eyes
Fiberfill stuffing
2.5 mm crochet hook
Tapestry needle
Scissors
Abbreviations:
MR: magic ring
sc: single crochet
inc: increase (2 sc in the same stitch)
dec: decrease (single crochet two stitches together)
sl st: slip stitch
ch: chain
Head and Body
Using peach yarn:
Round 1: MR, 6 sc in the ring (6)
Round 2: Inc in each stitch (12)
Round 3: 1 sc, inc around (18)
Round 4: 2 sc, inc around (24)
Round 5: 3 sc, inc around (30)
Round 6-12: Sc around (30)
Attach the safety eyes between rounds 7 and 8, spaced evenly apart.
Round 13: 3 sc, dec around (24)
Round 14: 2 sc, dec around (18)
Round 15: 1 sc, dec around (12)
Round 16: Dec around (6)
Fasten off and stuff firmly.
Using brown yarn (for the body):
Round 1: MR, 6 sc in the ring (6)
Round 2: Inc in each stitch (12)
Round 3: 1 sc, inc around (18)
Round 4-9: Sc around (18)
Fasten off and sew the body to the head. Stuff the body as you go.
Arms (Make 2)
Using peach yarn (for hands):
Round 1: MR, 6 sc in the ring (6)
Round 2-4: Sc around (6)
Switch to purple yarn for the sleeves.
Round 5-8: Sc around (6)
Fasten off and sew the arms to the sides of the body.
Hair
Using orange yarn:
Cut several strands of yarn and attach them to the head, around the back and sides, to form the hair.
Braid small sections or leave them loose for a playful look.
Witch Hat
Using brown yarn:
Round 1: MR, 6 sc in the ring (6)
Round 2: Inc in each stitch (12)
Round 3: 1 sc, inc around (18)
Round 4: 2 sc, inc around (24)
Continue increasing evenly until the hat’s base fits the head (about 60 stitches).
For the striped part of the hat:
Change colors to purple, pink, and rainbow yarn to create stripes.
Work in rounds until the hat reaches the desired height.
Brim of the hat (using brown yarn):
Round 1: 3 sc, inc around (75)
Round 2: Sc around (75)
Fasten off.
Decorative balls (for the hat):
Using various colors of yarn, create small yarn balls to sew onto the hat. Attach them securely to give the hat a playful, magical look.
Assembly
Place the witch hat on the head, and secure it with stitches.
Add any extra details such as a crescent moon or extra decorations on the hat using felt or yarn.
Embroider a small smile on the face using black yarn.
Your adorable amigurumi witch is now complete and ready to spread some magic!
Note: Here is a pattern suggestion for you to create your own pattern. The end result may vary.