Creating an amigurumi lilac witch keychain is a fun and magical project that combines the charm of crochet with the whimsical nature of a little witch. This lilac-themed keychain is perfect for adding a playful touch to your keys or as a gift for someone who loves unique and handmade items.
I wanted to do something a little different than the usual black-and-orange Halloween vibes. Don’t get me wrong, I love a classic spooky look, but this time I was in the mood for something softer — something dreamy and light, with a witchy twist. That’s when lilac popped into my head!
There’s something so magical about lilac, isn’t there? It’s soft and feminine, but still mystical. Pair it with white or silver, and it has this ethereal energy that just feels like fairy dust. So I dug into my yarn stash (which, let’s be honest, is dangerously overflowing) and found the perfect soft purple shade. And from that moment, I knew this little witch was going to be something special.
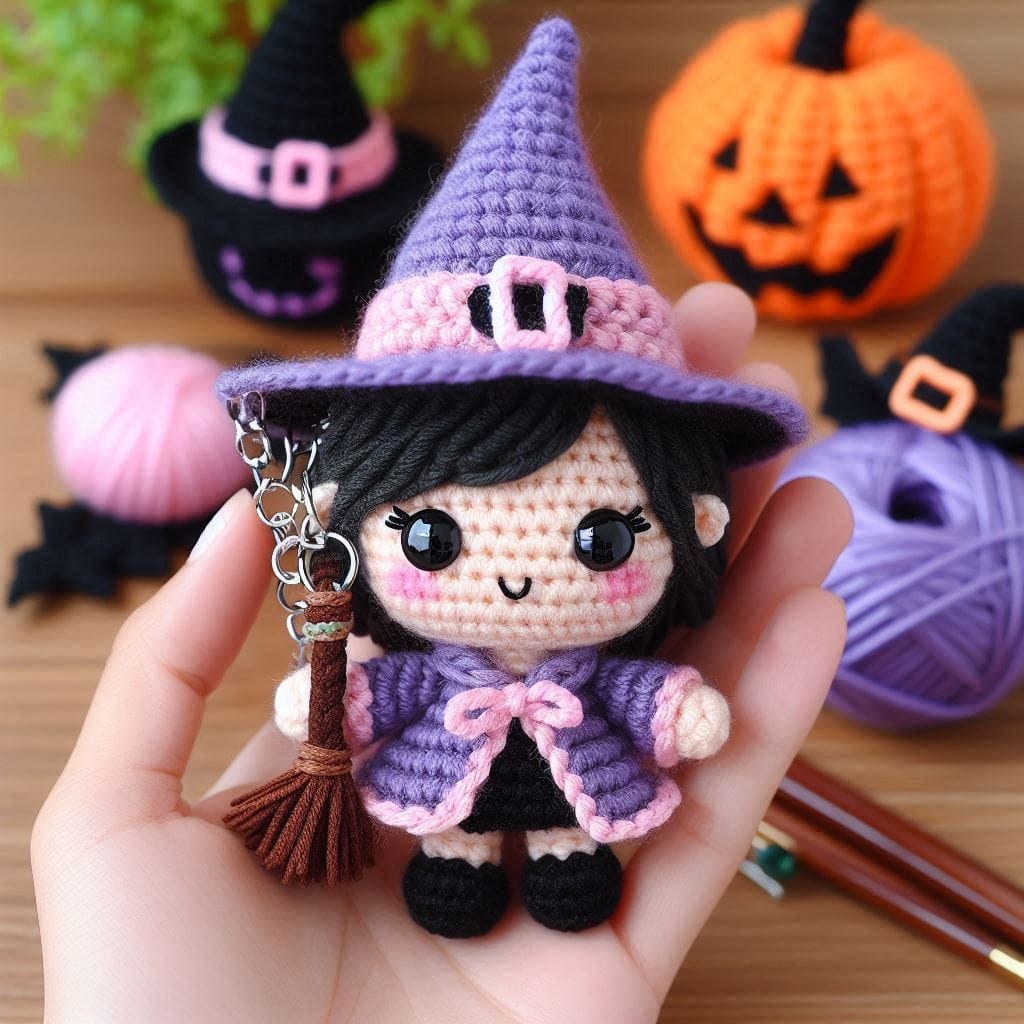
Hey, crochet friends! Today I’m here to share one of the sweetest little projects I’ve ever made — my Lilac Witch Amigurumi Keychain. Oh my stars… I’m absolutely smitten with this tiny enchantress! From her pastel purple dress to her floppy hat and charming mini size, she’s the kind of creation that makes your heart smile every time you look at her.
I’ve made a lot of amigurumi in my time, but there’s something truly whimsical and joyful about this little witch. She’s small enough to take just a few hours to make, but packed with enough personality and charm to become a treasured keepsake — or the perfect handmade gift.
Let me tell you all about it!
How to Make an Amigurumi Lilac Witch Keychain
Making an amigurumi lilac witch keychain is not only enjoyable but also a great way to showcase your crochet skills. With her lilac dress and matching hat, this tiny witch is both adorable and easy to create.
This amigurumi is perfect for scrap yarn and doesn’t require a lot of materials. I used:
- Worsted weight yarn in lilac for the dress and hat, white for the stockings and accents, and a soft skin-tone yarn for the face and hands.
- A 2.5 mm crochet hook — great for tight stitches and clean shaping.
- Stuffing — just a small handful of polyfill does the job!
- 6mm safety eyes (but you can embroider them if you prefer a softer look).
- Embroidery thread for the smile and blush.
- A keychain ring, jump ring, and optional clasp.
- And, of course, your trusty tapestry needle, scissors, and stitch markers.
Optional: I added a tiny felt moon on her hat and a silver bead as a “charm” hanging from her belt — details like these really bring her to life!
Instructions for an Amigurumi Lilac Witch Keychain
Like most amigurumi, this witch is built in parts: head and body, arms, legs, hat, and accessories. I worked her in a spiral, starting from the top of the head down to the bottom of the body.
The body is simple — rounds of increases and decreases that shape into a gentle cone. I made her dress part of the body to keep it seamless and quick.
The arms and legs are tiny tubes — so satisfying to whip up! I made the arms in solid lilac and the legs in white, then added a stripe at the bottom to look like tiny shoes.
The hat was a total joy to design. I started from the tip and worked my way down to the brim, increasing slowly. I left the brim a little soft and bendy for that whimsical “storybook witch” look. You can stiffen yours with a little fabric glue or felt inside if you want it more structured.
And the hair — okay, this might have been my favorite part! I went with a light silver yarn and crocheted a base cap, then added loops for curls. You could easily do straight hair, pigtails, or braids. So many options for customization here!
- Materials Needed:
- Yarn in lilac, black, skin tone, and accent colors (like yellow or white)
- Crochet hook suitable for your yarn
- Fiberfill stuffing
- Tapestry needle
- Safety eyes or black embroidery thread for eyes
- Keychain ring
- Scissors
- Step-by-Step Instructions:
- Head:
- Start with a magic ring using skin-tone yarn.
- Round 1: 6 single crochets (sc) into the magic ring.
- Round 2: 2 sc in each stitch around (12 stitches).
- Round 3: 1 sc in next stitch, 2 sc in next stitch around (18 stitches).
- Rounds 4-7: Sc in each stitch around (18 stitches).
- Round 8: 1 sc in next stitch, decrease around (12 stitches).
- Insert safety eyes between Rounds 5 and 6, then stuff the head.
- Round 9: Decrease around, close the opening, and fasten off.
- Body:
- Attach lilac yarn for the body.
- Rounds 1-2: Sc in each stitch around (12 stitches).
- Round 3: 1 sc in next stitch, 2 sc in next stitch around (18 stitches).
- Rounds 4-6: Sc in each stitch around (18 stitches).
- Lightly stuff the body, then decrease around to close the opening. Fasten off.
- Hat:
- Begin with a magic ring using black yarn.
- Round 1: 6 sc into the magic ring.
- Round 2: 2 sc in each stitch around (12 stitches).
- Round 3: 1 sc in next stitch, 2 sc in next stitch around (18 stitches).
- Round 4: Work in back loops only, sc in each stitch around.
- Rounds 5-6: Sc in each stitch around.
- Round 7: 1 sc in next stitch, decrease around.
- Fasten off and sew the hat onto the head.
- Accessories:
- Use lilac or yellow yarn to create a small cape or scarf.
- Add tiny stars or a small bow to the hat for extra flair.
- Attach the keychain ring to the top of the witch’s hat.
- Assembly:
- Weave in all loose ends and secure.
- Add any additional details like hair or a small wand to personalize your witch.
- Head:
- Final Touches:
- Complete your lilac witch keychain by adding any final decorations, making her uniquely yours!
Once all the pieces were made and sewn together (which honestly didn’t take long), I started on the details that bring her to life.
- I added tiny rosy cheeks with blush yarn stitched lightly onto her face.
- Her smile is just a simple embroidered line — but somehow she looks like she knows something we don’t!
- I sewed on her hat at a bit of a tilt — because let’s face it, witches always wear their hats with a little flair!
- And to top it all off, I gave her a felt crescent moon charm and a silver belt bead that makes her sparkle just a little.
Attaching the keychain ring was simple — I crocheted a little loop at the top of the hat and secured the ring with a jump ring. You could also sew it into her head if you prefer a more hidden attachment.
Amigurumi Lilac Witch Keychain. Conclusion
Sometimes, I just need a small, joyful project to lift my spirits — and this one was exactly that. It’s quick enough to finish in a day, cute enough to give as a gift, and special enough to become a keepsake. Plus, the color palette makes it feel less “Halloween” and more “everyday magic,” which I just adore.
If you’re looking for a cozy weekend project Amigurumi Lilac Witch Keychain, a thoughtful handmade gift, or just want to make something that brings you joy every time you look at it — I can’t recommend this lilac witch keychain enough.
Amigurumi Lilac Witch Keychain may be tiny, but she’s full of charm.
Crafting a chaveiro bruxinha lilac de amigurumi is a delightful way to bring a little magic into your life. This lilac-themed witch keychain is not only cute but also a wonderful expression of your creativity. Whether you’re keeping her for yourself or gifting her to someone special, this amigurumi project is sure to charm anyone who sees it!