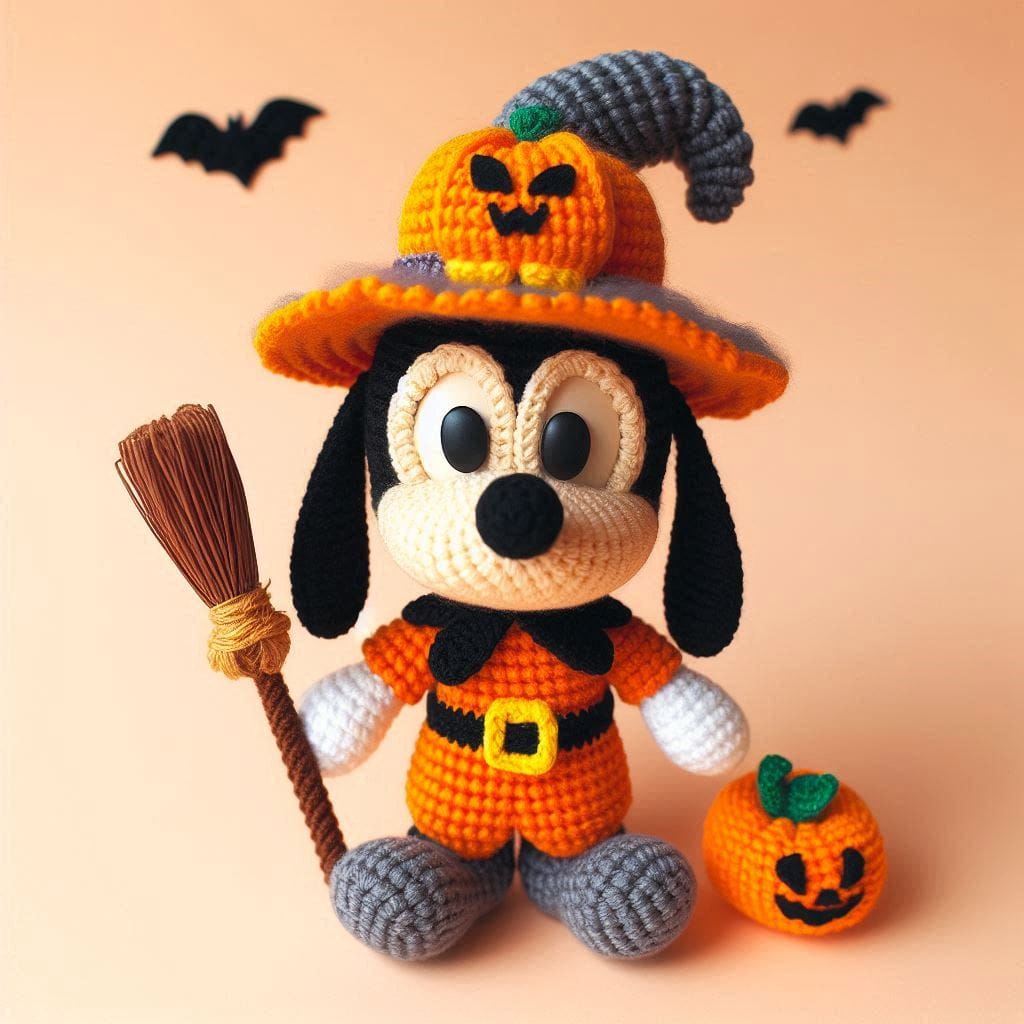
How to Make a Witch Goofy. Halloween is one of the most fun times to create themed crochet pieces, and a Witch Goofy Amigurumi is a charming choice. This crochet doll, with its pumpkin hat and broom, is perfect for decorating your home or giving as a gift to someone special.
Creating How to Make a Witch Goofy is one of those projects that instantly brings a smile to my face, even before I’ve finished the first round. After years of working with amigurumi, I’ve come to really appreciate pieces that combine character, movement, and just a touch of humor, and this one has all of that in the best possible way.
How to Make a Witch Goofy: Goofy, by nature, already has such a playful and exaggerated personality, so transforming him into a whimsical Halloween witch feels like a natural and delightful twist. From the very beginning, you can tell this is not going to be just another doll—it’s going to be full of charm, expression, and those little details that make handmade pieces so special.
Step-by-Step Guide to Making the How to Make a Witch Goofy
When I start a project like this, I always think about proportions first. Goofy has very distinctive features—his long face, extended limbs, and relaxed posture—so capturing that silhouette is key to making the character recognizable. I usually begin with the head, working in continuous rounds and paying close attention to where increases and decreases fall.
How to Make a Witch Goofy. The shaping here is essential because it sets the tone for the entire piece. A slightly elongated muzzle and a well-defined snout make all the difference, and I take my time adjusting the stuffing to make sure everything sits just right. This is one of those moments where experience really comes into play, because subtle shaping decisions can completely change the final expression.
Choosing the right yarn is another important step. For character amigurumi like this, I prefer yarns with good stitch definition, usually cotton or a high-quality acrylic blend. This allows the stitches to stay crisp and makes the details stand out more clearly. The color palette is also something I think about carefully. For Witch Goofy, I like to stay true to his classic tones—black ears, a warm neutral for the face, and those familiar outfit colors—but then introduce deeper, more Halloween-inspired shades for the costume. A rich purple or dark green works beautifully for the witch outfit, while black adds contrast and a slightly mysterious feel.
To create your Witch Goofy Amigurumi, you will need the following materials: black, white, orange, gray, and green crochet threads, a crochet hook, stuffing fiber, safety eyes, and a tapestry needle to sew the parts together.
By following the steps below, How to Make a Witch Goofy:
As I move on to the body, I keep the structure simple but intentional. Goofy’s body doesn’t need to be overly complex, but it should support the character’s proportions and allow the costume to shine. I usually make the arms and legs slightly longer and thinner than standard amigurumi proportions, which helps maintain that signature lanky look. Attaching the limbs requires a bit of patience, especially if you want them to sit naturally. I always pin everything in place before sewing, adjusting angles until the posture feels relaxed and true to the character.
The costume is where this project really comes to life. Creating the witch outfit is such a fun process because it allows for creativity while still working within a recognizable theme. I often crochet the outfit separately so I can control the fit and layering.
A slightly flared robe or tunic gives movement, and adding small details like a textured hem or subtle stitch variation can make the piece feel more dynamic. The hat, of course, is the highlight. A classic pointed witch hat with a gentle curve at the tip adds personality and balance to the overall design. I like to keep the stitches tight here so the hat holds its shape, sometimes even reinforcing it slightly if needed.
- How to Make a Witch Goofy. Head and Body:
- Start with the head using black thread for the top and white thread for the face. For the body, use orange thread.
- Work in increases and decreases until you get the desired rounded shapes.
- How to Make a Witch Goofy. Ears and Snout:
- Make two elongated ears using black thread and a rounded snout with white thread.
- How to Make a Witch Goofy. Arms and Legs:
- Using gray thread, make the legs, and for the arms, alternate between white and orange threads, simulating Goofy’s clothing.
- Witch Hat and Broom:
- Using orange and gray threads, create a cone-shaped hat, adding a decorative pumpkin.
- For the broom, make a small bundle of brown threads tied to the end of a wooden stick.
- Final Details:
- Attach all parts of Goofy, insert the safety eyes, and if desired, add small details like the hat’s buckle or the broom’s strap.
How to Make a Witch Goofy. Facial details are always my favorite part, and with Goofy, they are especially important. His expression is what gives him life. I usually embroider the eyes and mouth carefully, taking my time to get the placement just right. A slightly tilted smile or a relaxed gaze can instantly capture his playful nature. This is not something I rush, because even the smallest adjustment can change the entire feel of the piece. The nose, too, needs to be proportionate and well-shaped, sitting comfortably within the contours of the face.
Once all the pieces are assembled, I like to take a step back and really look at the amigurumi as a whole. This is where I make any final adjustments, whether it’s reshaping the stuffing, tightening a stitch, or repositioning a detail. I also make sure all ends are securely woven in, especially since pieces like this are often handled, displayed, or even gifted. Sometimes I’ll lightly steam the piece from a distance to help the fibers relax and give everything a smoother finish, particularly if I’ve used cotton yarn.
Finalizing Your Halloween Amigurumi
After following all the steps, your Witch Goofy Amigurumi will be ready to bring a special touch to Halloween. With attention to detail and practice, you can create a piece that will charm everyone.
What I love most about making a Witch Goofy amigurumi is how much personality it carries. It’s playful without being overcomplicated, detailed without feeling overwhelming. It’s the kind of project that reminds me why I enjoy crochet so much—not just for the technique, but for the joy of bringing something to life with my own hands. Every stitch contributes to the final character, and when it’s done, it feels like more than just a finished piece. It feels like a small creation with its own story.
Projects like this are also incredibly rewarding to share. Whether displayed as part of a Halloween collection or given as a handmade gift, they tend to spark smiles and conversations. And for me, that’s one of the most meaningful parts of crochet. It’s not just about making something beautiful—it’s about creating something that connects with people, something that carries a bit of your time, care, and creativity in every stitch.